
Fluidmaster
Complete Toilet Repair Kit Installation Guide
How to fix common toilet problems
(water leaks, running, refilling, & faulty flushing) with a Fluidmaster Complete
Repair Kit.

By Paul B. Michaels Author & Photographer Auto Mechanic Since 1989 |
||
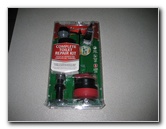 Complete Toilet Repair Kit |
 $19.98 @ Home Depot |
 Valves, Flapper, Lever, Etc |
| Just about
every common toilet problem can be resolved by installing a
Fluidmaster Complete Repair Kit that costs around $20 at Home Depot
or Lowes hardware stores. Some of these toilet issues include the following: 1. water leaking from the tank into the bowl due to a faulty flapper valve, 2. a water leak from the rubber gasket between the tank & bowl, 3. water leaking out of the bottom of the tank due to corroded tank bolts, 4. the fill valve refills the tank every few minutes, 5. the toilet lever won't flush properly, 6. a constantly running toilet, 7. a water leak from a worn out flush valve gasket, 8. or a water leak from the tank's supply line gasket. This toilet also had a slow leak from the toilet water supply valve, so I bought a new one for about $5. The tools needed to install this Fluidmaster kit include a pipe wrench, pliers, scissors, a bucket, a sponge, and a hand saw. |
||
|
|
||
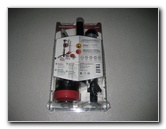
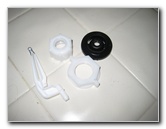
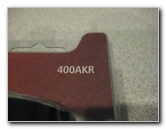 Fluidmaster # 400AKR |
 Contents of Kit |
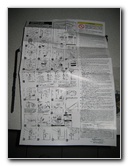 Large Instruction Sheet |
| The first few steps are to familiarize yourself with the contents of the Fluidmaster Complete Toilet Repair Kit, look over the instructions sheet, and assemble the necessary hand tools. The kit includes a new fill valve assembly, a flush valve assembly with adjustable flapper valve, a flush lever, a rubber fill tube, new gaskets, new tank bolts with nuts, rubber washers and metal washers. | ||
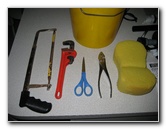 Required Tools |
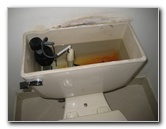
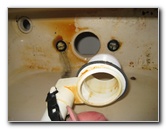
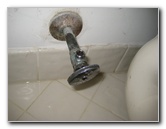
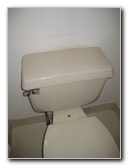 Old Toilet Tank |
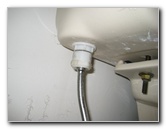
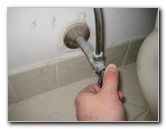 Turn Off Toilet Water Supply |
| Next turn off the toilet's water supply valve located below the tank by turning it clockwise until it stops. If the toilet's water supply valve has also developed a water leak, buy a new 1/2" inch BrassCraft Multi-Turn Valve assembly for about $5.00 and turn off the home's main water supply valve. | ||
 Remove Tank Lid |
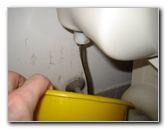
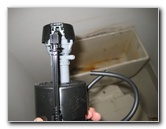
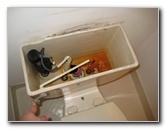 Flush Toilet - Drain Water |
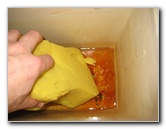 Soak Up Remaining Water |
| Then remove the tank lid, flush the toilet to drain most of the water out, and remove the rest of the water in the tank using a sponge and bucket. | ||
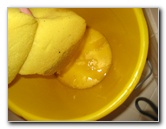 Wring Sponge In Bucket |
 Remove Fill Tube |
 Remove Flush Handle Chain |
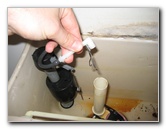
| Pull off the old rubber fill tube from the fill valve (left) and the flush valve (right). Detach the flush chain from the flapper valve and the tank lever. | ||
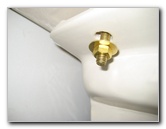
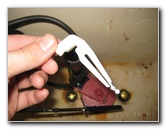
 Unscrew Flush Lever |
 Tank Lever Arm Removed |
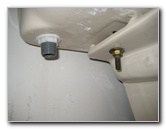
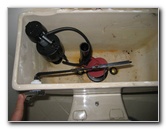
 Toilet Water Supply Line |
| Unscrew the white plastic nut that secures the chrome colored flush handle and lever to the top left of the toilet tank. | ||
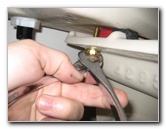
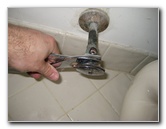
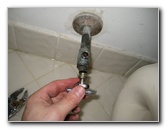
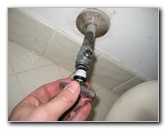
 Loosen Coupling Nut |
 Catch Water In Bucket |
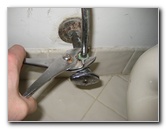 Unscrewing Supply Line |
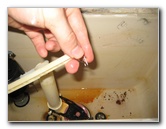
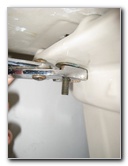
| Next move to the lower left bottom of the tank and loosen the plastic coupling nut that secures the top of the water supply line to the threaded shank on the fill valve. Since this toilet has a metal flanged water supply tube, I also had to unscrew it from the top of the water supply valve in order to move it out of the way. | ||
 Metal Supply Line Removed |
 Lock Nut On Fill Valve |
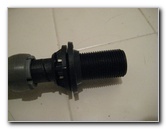
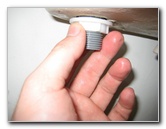 Remove Fill Valve Lock Nut |
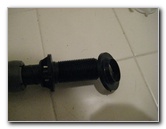
| Then unscrew the plastic lock nut on the bottom of the fill valve by turning it counter clockwise. | ||
 Lock Nut Removed |
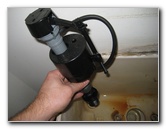
 Remove Old Fill Valve |
 Loosen Tank-To-Bowl Nut |
| Once the lock nut is removed from the bottom of the fill valve, you can pull it out from the inside of the tank. | ||
 2nd Tank-To-Bowl Bolt |
 Old Nuts & Washers Removed |
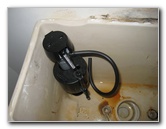
 Lift Off Toilet Tank |
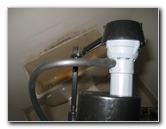
| The next step is to loosen the nuts on the two (or three) bolts located on the underside of the bowl that hold the tank to the bowl using the pliers or a crescent wrench. Carefully lift the tank off the toilet and rest it on top of the toilet lid. | ||
 Old Bolts & Rubber Gasket |
 Remove Old Rubber Gasket |
 Flush Valve Collar Lock Nut |
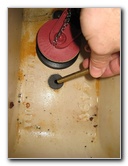
| Pull off the old rubber gasket from the bottom of the flush valve, push the old tank bolts out, and unscrew the white plastic flush valve collar nut by turning it counter clockwise. Lift the old flush valve out from the tank. | ||
 Remove Flush Valve Nut |
 Remove Old Flush Valve |
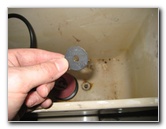
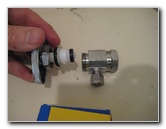
 Fill Hose Clip, Washers, Nuts |
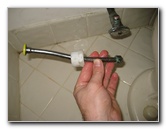
| Locate the white coupling nut, white lock nut, and black shank/cone washer that come grouped together on the white fill hose angle adapter. Separate the pieces from each other and lay them aside. | ||
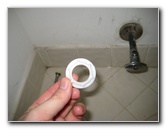
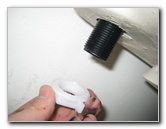
 Shank & Cone Washer |
 Shank Washer - Cone Washer |
 Shank Washer On Fill Valve |
| The shank and cone washers are attached to each other by three little pieces of rubber. Pull them apart by hand or carefully use a utility knife or X-Acto knife. The shank washer is the larger piece and the cone washer is the smaller piece. | ||
|
|
||
 Tapered Side Down |
 New Fill Valve |
 New Refill Tube Attached |
| Push the larger shank washer onto the threaded bottom of the new fill valve with the tapered side facing down. Then push one end of the new rubber fill tube onto the plastic nipple located near the top of the fill valve. | ||
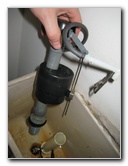
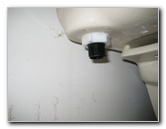
 Insert Fill Valve In Tank |
 New Fill Valve In Place |
 New Fill Valve Lock Nut |
| Place the new fill valve with the shank washer and rubber fill hose attached into the rear left corner of the toilet tank. Move to below the tank and secure the new fill valve in place with the white plastic lock nut. Tighten it just past hand tight and do not use the pliers to tighten the nut. | ||
 Hand Tighten Lock Nut |
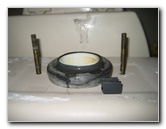
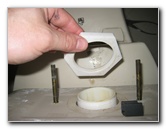
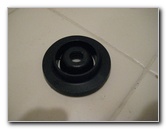
 New Flush Valve |
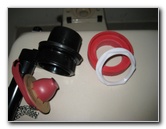 New Gasket & Collar Nut |
| Locate the new flush valve assembly. Then remove the new red rubber gasket, the white plastic collar nut and the cardboard shipping ring on the red rubber flapper. | ||
 New Flush Valve In Place |
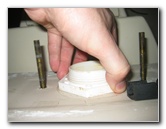
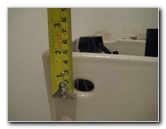 Overflow Pipe - 1" Below Lever |
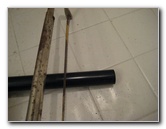 Cutting Overflow Pipe |
| The top opening on the black plastic overflow pipe on the new flush valve must be at least 1" (one inch) below the flush handle/lever hole in the front of the tank. Use a ruler or measuring tape to determine how much of the new overflow pipe needs to be cut. Carefully cut off the excess pipe with a hand saw or Dremel tool. | ||
 Overflow Pipe Cut |
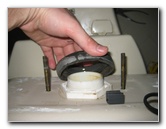
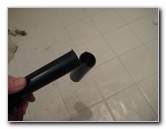
 Insert New Flush Valve |
 Hand Tighten Collar Nut |
| Once the overflow pipe is cut to the correct length, insert the new flush valve into the center of the tank and secure it in place with the white plastic collar nut. Tighten the collar nut by hand only. Using a pipe wrench or pliers to tighten the nut could cause it to crack. | ||
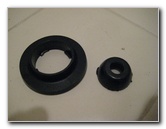
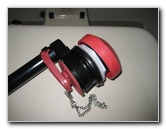
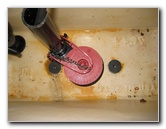
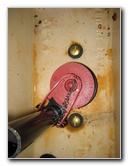
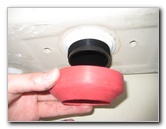 Attach Rubber Gasket |
 Tapered Side Down |
 Rubber Washer |
| Slide the new red rubber gasket over the part of the flush valve that protrudes out from the bottom of the tank with the tapered side facing towards you. Lift the tank up and carefully place it back on top of the toilet so that the bolt holes in the tank line up with the bolt holes on the rear edge of the toilet bowl. | ||
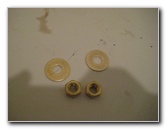
 Rubber Washers In Tank |
 Insert New Tank Bolts |
 New Tank Bolts Inserted |
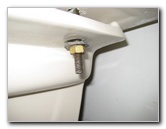
| Place two (or three depending on your tank) rubber washers inside the tank over the bolt holes. Carefully insert two (or three) new tank bolts through the rubber washers and out the other side of the tank. | ||
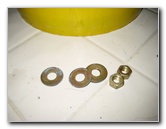
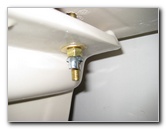
 New Metal Washers & Nuts |
 Thread On Washer & Nut |
 Carefully Tighten Nuts |
| Move to below the toilet bowl and locate the ends of the new tank bolts. Attach a metal washer and metal nut to each new tank bolt. Carefully and evenly tighten them to just barely past hand tight. Do not over tighten the nuts on the tank bolts since the porcelain bowl and/or tank could crack as a result. | ||
 Tighten Wing Nuts |
 Do Not Overtighten! |
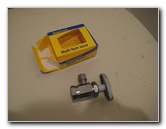 New Water Supply Valve |
| This Fluidmaster Complete Repair Kit (model # 400AKR) came with wing or "thumb" nuts to help keep the standard nuts on the tank bolts from loosening. The original toilet tank bolts did not have these, but I figured they couldn't hurt and threaded the wing nuts on to the bolts below the other nuts. | ||
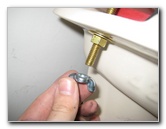
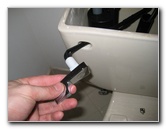
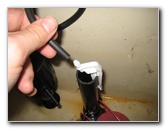
 Twist Off Old Valve |
 Old Valve & Leaky Gasket |
 New Rubber Gaskets |
| If your toilet
water supply valve isn't leaking, you can skip this next paragraph.
I twisted off the old water supply valve with the pliers and pulled it out from the supply pipe. The gasket and rubber o-ring on the old valve had deteriorated and was falling apart, which led to the slow water leak. Rather than having to remove the old welded on valve body, I just inserted the new valve innards and handle into the old valve body. I tightened the valve to just past hand tight. To help prevent leaks, you can wrap a small amount of Teflon tape or "plumber's" tape around the threads. |
||
 Insert New Valve |
 Tighten New Supply Valve |
 Re-Attach Water Supply Pipe |
| Re-attach the
bottom of the water supply pipe to the toilet water supply valve and tighten
it just past hand tight. Since this toilet has a metal flanged water supply
tube, the directions had me use the existing washer and coupling nut to
attach the top of the pipe to the bottom of the toilet fill valve.
Again, only tighten the water supply pipe's coupling nut to just past hand tight to secure it to the bottom of the fill valve. If the connection has a slow leak after you turn the water back on, you can carefully tighten it further with the pliers or pipe wrench. |
||
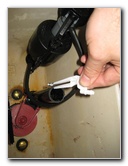
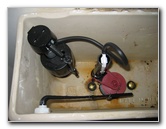
 Insert Tank Flush Lever |
 Flapper Chain On Lever |
 Fill Tube "Angle Adapter" |
| Almost done!
Attach the flapper chain or "linkage" to the hole on the tank lever that provides the best lifting action of the flapper valve and still has a bit of slack. You may need to adjust the chain after turning on the water for the best flushing performance. The excess on the chain may also need to be cut off to prevent it from getting stuck between the flapper and the flush valve body. Clip on the white plastic fill tube "angle adapter" to the black overflow pipe on the flush valve. Push the other end of the black rubber fill tube on to the white plastic nipple on top of the angle adapter. |
||
 Clip On Fill Tube Adapter |
 Attach Fill Tube To Adapter |
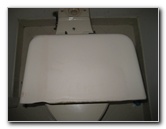
 Installation Complete |
| Double check that
everything is in its proper place and that the various bolts and nuts are
tight before turning on the toilet water supply valve. If you replaced the
toilet supply valve, you will also need to turn on the home's main water
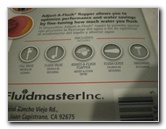
supply valve. Allow the toilet tank to fill with water and then flush it to see how the new system performs. If you're lucky, nothing will need to be adjusted. Check for any water leaks or accumulated water under the toilet for at least the next few days. The flush volume can be adjusted by rotating the red flapper valve to anywhere between "9" (Max) and "1" (Min). The water level setting can also be adjusted by rotating the small plastic "water level adjustment rod" attached to the side of the fill valve. I'd recommend placing some newspaper under the toilet tank and toilet water supply valve and leaving it there for the next few days. The newspaper will help you spot any slow water leaks that will leave water damage marks and ink runs on the newspaper but may dry up before you can notice the actual leak. For more of my home repair and maintenance
guides, click on the following links:
Toilet Water Supply Valve Leak Repair Guide,
Goodman
HVAC Condenser Coils Cleaning Guide,
Goodman Condenser Capacitor Replacement Guide,
Rheem A/C Capacitor Replacement Guide,
Rheem HVAC Condenser Coils Cleaning Guide,
Refrigerator Freezer Icemaker Replacement Guide,
Bathtub Shower Diverter Valve Replacement Guide,
Home Water Heater Sediment Flushing Guide,
Rheem HVAC Air Handle Coils Cleaning Guide,
A/C Condensate Water Drain Pipe Flushing Guide,
Home Clothes Dryer Lint Vent Cleaning Guide,
Laptop HDMI To HDTV Over CAT6 Connection Guide,
Culligan US-600A Under Sink Water Filter Installation Guide,
Culligan IC-EZ-1 Drinking Water Filter Installation Guide,
Culligan IC-100 Icemaker Water Filter Installation Guide,
Kitchen Sink Drain Leak Repair Guide,
Hunter Just Right Digital Thermostat Installation Guide,
Sticky Door Lock Lubrication Guide,
Honda EU3000is Generator Maintenance Guide,
Kenmore Oven/Range 220V Power Restoration Guide,
Refrigerator Water Leak Repair Guide,
GE HVAC Condenser Dual Run Capacitor Replacement Guide,
Delta 75520 Massaging Shower Head Installation Guide, and the
Carpenter Bee Insect Pest Control Guide. |
||
| If you found this guide to be helpful,
please consider making a small donation by clicking on the PayPal.com
"Donate" button located to the right of this paragraph. Thank you!
(Note: I am not a registered charity. Donations are not tax deductible.) |