
How To Fix A
Leaking Kitchen Sink Drain
A pictures illustrated guide to repairing
a kitchen sink drain leak with step by step instructions and parts list.

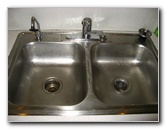 Dual Basin Kitchen Sink |
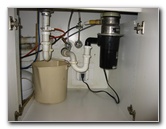 Sink Drain & Disposal |
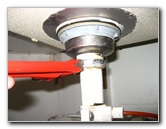
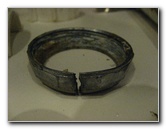
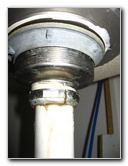 Cracked 1.5" Metal Nut |
| I recently
noticed a small puddle of water under the kitchen sink after taking
out the trash can. Using a small flashlight, I examined the various
drain pipes, the garbage disposal and the vinyl plastic fresh water
lines. The source of the leak ended up being a cracked metal collar nut that attached the white PVC drain pipe to the metal sink basin. To be sure that I bought the correct replacement part at Home Depot, I wanted to bring the old piece with me. I had to take apart the entire drain pipe assembly to be able to remove the old broken collar nut. I used a pipe wrench, locking pliers, and a Phillips head screw driver to take apart the drain assembly. At Home Depot, I learned from the plumbing expert that this 1 1/2" metal collar nut is a common failure point on sink drains. |
||
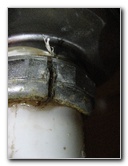 Split Metal Nut |
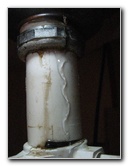 Water Leaking |
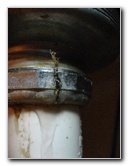 |
| The 1.5 inch collar nut is usually the first part to fail on a sink drain because the repeated changes in temperature over many years causes the metal to contract and expand until it develops fatigue and cracks. | ||
 |
 |
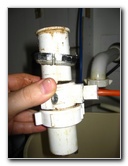
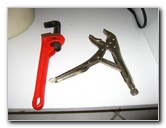 Pipe Wrench & Pliers |
 Loosening Old Nut |
 Broken Nut Removed |
 Drain Assembly Detached |
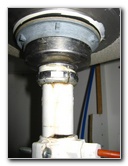
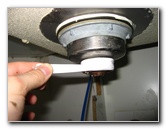
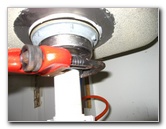
| To remove the old
collar nut, I used the orange handled adjustable
pipe wrench and turned the
nut counter clockwise.
Then I had to loosen several plastic collar nuts and unscrew the tap collar for the water filtration system. |
||
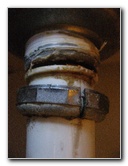
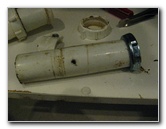
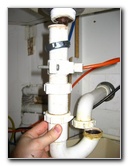
 Taking Apart Drain Pipe |
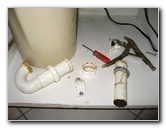 Drain Pipe Disassembled |
 Broken 1 1/2" Drain Collar |
 New Drain Collar Nut $2.53 |
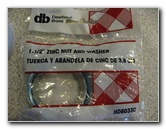 Dearborn Brass # HD8033C |
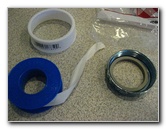 Teflon Tape $0.98 |
| At Home Depot I
bought a Dearborn Brass # HD8033C 1 1/2" Zinc Nut for $2.53 and some
Teflon tape
or "plumber's" tape for $0.98.
So the total cost of parts for this repair was about $3.50. |
||
 New Nut On Drain Pipe |
 Re-Assembling Drain Pipe |
 Wrapping Teflon Tape |
| Once back home, I
slid the new 1.5" collar nut onto the PVC drain pipe and put the assembly
back together.
It's always a good idea to wrap a few turns of Teflon tape on any plumbing connection to prevent leaks or seepage. The Teflon tape helps seal up any miniscule irregularities between the surfaces and create a watertight joint. |
||
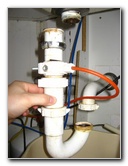
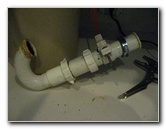
 Re-Installing Drain Pipe |
 Lower Connector Secured |
 Tightening Drain Pipe Collar |
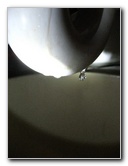
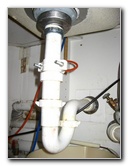
| I first attached
the lower "U" bend part of the drain pipe with the PVC collar nut and
tightened it snugly by hand.
Then I threaded the new 1.5" collar nut on to the bottom of the sink and tightened it with the pipe wrench. During the first test, water sprayed from around the new collar nut. I tightened the zinc collar nut a few more turns and the leak stopped. To test the drain pipe again, I put some paper towels under the sink and ran the water for a few minutes. So far, the pipe is water tight. |
||
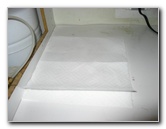 Paper Towel Drip Test |
 Running Water |
 Full Sink - Pressure Test |
| For more of my
related home maintenance instructions, click on the following links:
Carpenter Bee Insect Control Guide,
Kenmore Electric Range 220V Power Loss Repair Guide,
Air Conditioner Capacitor Replacement Guide,
Sticky Door Lock Repair Guide,
Refrigerator Leak Repair Guide,
Toilet Water Supply Valve Repair Guide,
Culligan IC-100 Icemaker Water Filter Installation Guide and the
Hunter "Just Right" Digital Thermostat Installation Guide. |
||
| If you found this guide to be helpful,
please consider making a small donation by clicking on the PayPal.com
"Donate" button located to the right of this paragraph. Thank you!
(Note: I am not a registered charity. Donations are not tax deductible.) |