
Culligan
IC-EZ-1 Drinking Water Filter Installation Guide
Pictures illustrated instructions for
installing a Culligan IC-EZ-1 Refrigerator Icemaker/Dispenser drinking water
filter.

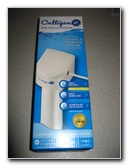 Culligan IC-EZ-1 |
 12 Month, 3000 Gallons |
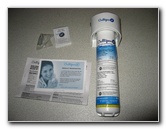 Filter, Papers, Screws |
| The tap water
in our city, while being perfectly safe to drink, doesn't always taste
that great.
Our house was originally equipped with an elaborate under sink system that filters the water for both the refrigerator icemaker and the kitchen sink's drinking water dispenser. For better tasting water from the kitchen sink's drinking water fountain, I decided to install this Culligan IC-EZ-1 Refrigerator Icemaker/Dispenser water filter. The total cost was about $18. Since I was eliminating the old dual purpose system, I also installed a Culligan IC-100 Refrigerator Icemaker Water Filter on the back of our GE refrigerator. The only tools needed to complete this job are scissors, a screwdriver (optional) and some basic knowledge of plumbing. |
||
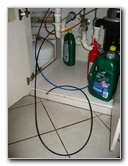
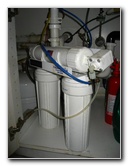 Old Dual Purpose Filter |
 Old Plastic Tubes |
 Old Connecting Pieces |
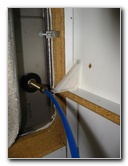
| My first task was to figure out how to eliminate the old dual purpose water filter system that used to provide clean water to the refrigerator icemaker and the kitchen sink's water fountain. There were a variety of colorful vinyl tubes snaking their way around the area under the sink. I eventually isolated the clear tube (icemaker water supply), the blue tube (sink fountain water supply) and the black tube (fresh water supply line). | ||
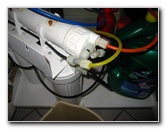
 Old System Cut Out |
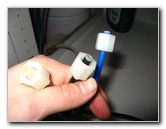 Supply Line & Fountain Tube |
 "T" Supply Line Splitter |
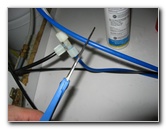
| Once the old system had been removed, I moved on to splitting the common water supply line (black tube) to provide water for both the refrigerator icemaker (clear tube) and the kitchen sink's drinking fountain (blue tube). I recycled a few of the old plastic compression nuts and a "T" splitter to get the job done. | ||
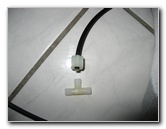
 Water Supply Line Split |
 Icemaker & Fountain Connected |
 Sink Dispenser Connected |
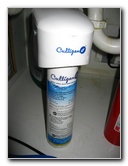 Culligan IC-EZ-1 |
 Water Supply Valve |
 Blue Tube To Fountain |
| I verified that both the fountain and icemaker were being supplied fresh water and then turned off the main water supply valve. | ||
 Cutting Blue Pipe To Fountain |
 Blue Supply Tube Cut |
 Marking In/Out Connections |
| When I was finally ready to actually install the Culligan IC-EZ-1 water filter under the sink, I cut the blue plastic tube that went from the water supply splitter to the bottom of the kitchen sink's water dispensing fountain. | ||
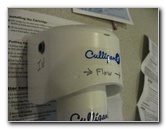
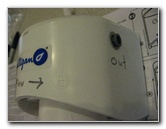 Water Flow Indicator Marks |
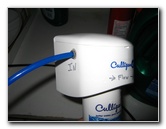 Water Supply Side Inserted |
 To Fountain Tube Inserted |
| I had previously
marked which side of the Culligan IC-EZ-1 was the "In" connection and the
"Out" connection where the filtered water would flow out to the dispenser.
The filter is equipped with pressure connections, so connecting the lines is extremely easy. Be sure to double check that you are inserting the the "supply" and "filtered water" tubes in the correct locations. The pressure fittings hold on to the tubes very securely and it may be impossible to remove them once inserted without damaging the water filter. |
||
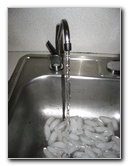
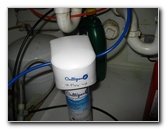
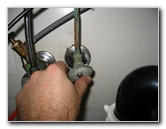 Opening Water Supply Valve |
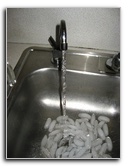 Great Tasting Water |
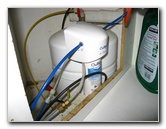 Water Filter Stowed Away |
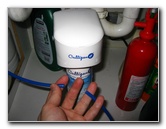
| I placed the water
filter down where the old filter system used to reside out of the way of the
trash can and turned on the water supply valve.
The instructions recommend allowing a few gallons of water to flow through the filter to flush out any loose particles of carbon that may be inside the filter. After a few minutes of letting the water run, I sampled the filtered water and was pleasantly surprised by how fresh it tasted. For more of my related photo galleries, click
on the following links:
Culligan IC-100 Icemaker Water Filter Installation Guide,
Leaking Kitchen Sink Drain Repair Guide,
Sticky Door Lock Repair Guide,
Hunter Just Right Digital Thermostat Installation Guide,
A/C Capacitor Replacement Guide,
Leaking Refrigerator Repair Guide,
Toilet Water Supply Valve Leak Repair Guide,
Kenmore Range 220V Power Repair Guide, & the
Carpenter Bee Pest Control Guide. |
||
| If you found this guide to be helpful,
please consider making a small donation by clicking on the PayPal.com
"Donate" button located to the right of this paragraph. Thank you!
(Note: I am not a registered charity. Donations are not tax deductible.) |