
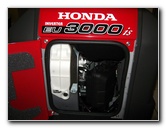
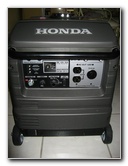
Honda EU3000is Generator
Maintenance Guide
Instructions for changing the oil,
cleaning the air filter and charging the battery on a Honda EU3000is Generator.

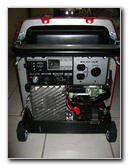
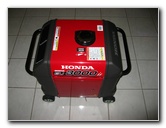 Honda EU3000is Generator |
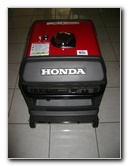 Front Control Panel |
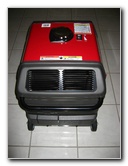 Rear Panel Exhaust |
| The next
hurricane season in South Florida is rapidly approaching, so I decided
it was time to perform some basic maintenance on our
Honda EU3000is gasoline generator.
We've had our generator for about two
years and have never really needed it. That's not such a bad thing.
I've only run it at least once a month for an hour to make sure the carburetor is clean and to keep the internal battery maintained. I also keep the battery hooked up to a Battery Tender Jr. trickle charger and put Sta-Bil fuel stabilizer in the gasoline tank to make it last longer. Honda included a user manual with the EU3000is that provides details about the recommended maintenance schedule. I scanned over the list and planned to just change the generator's oil, clean the air filter and trickle charge the battery. Since I've operated it just one hour a month, the generator has been used a total of 24 hours in 2 years. The list of EU3000is maintenance procedures with their suggested intervals are below. |
||
|
|
||
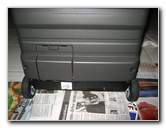 Rear Panel & Oil Cover |
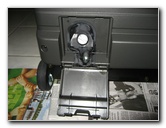 Oil Maintenance Cover |
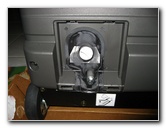 Oil Cover Removed |
| The complete list
of procedures on the maintenance schedule includes
engine oil changes (every
6 months or 100 hours), air filter cleaning (3 months or 50 hours),
air
filter replacement (every year or 300 hours), sediment cup cleaning (6
months or 100 hours), spark plug (check/adjust every 6 months or 100
hours), spark plug replacement (every year or 300 hours), spark arrester
cleaning (6 mo./100 hrs.), valve clearance (check/adjust every year or 300
hours), combustion chamber cleaning (every 500 hours), fuel tank & filter
cleaning (every year or 300 hours), and fuel line (check/replace every 2
years). I'd recommend buying the Genuine Honda EU3000 Tune Up Kit since it includes a new engine air filter, spark plug and a quart of 10W-30 oil for a great price. |
||
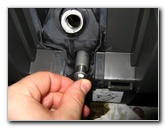
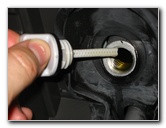
 Removing Oil Dipstick |
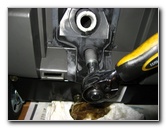
 Draining Old Oil |
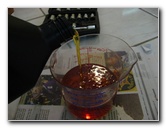
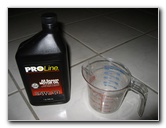 5W-30 Oil & Measuring Cup |
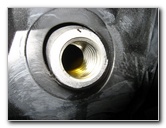
| Before going ahead with the oil change, I ran the generator for an hour as per my usual routine. Honda recommends warming up the engine before changing the oil. This causes more of the old oil to flow out and in a more timely manner. Then I removed the oil dipstick from the oil filler hole and loosened the 10mm oil drain bolt. I drained the old oil out into a 1/2 gallon milk jug. | ||
 Re-Inserting Oil Drain Plug |
 Tightening 10mm Oil Bolt |
 Half A Quart of New Oil |
| After a few minutes, the flow of old oil slowed to a drip. I re-inserted the oil drain bolt and tightened it with a 10mm socket and ratcheting wrench. The Honda EU3000is owner's manual calls for .58 US quarts of new oil to be poured into the oil filler. That's equal to about 18.56 ounces, 2.32 cups or 549 mL. The manual recommends 10W-30 for moderate climates, 30 weight for tropical climates and 5W-30 for colder climates. I didn't want to use my expensive synthetic Mobil 1 10W-30 so this time I just used the cheapest stuff I had on hand which was some ProLine 5W-30. | ||
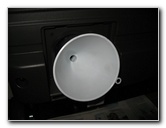 Small Funnel Inserted |
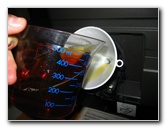 Pouring In New Oil |
 Oil Filler Port, Level Full |
| I poured about 1/2 of a quart of new oil into a measuring cup and then poured it into the generator's oil filler hole. The manual indicates that the oil level should reach to the top of the threads that the oil filler cap screws onto. It took just a little more than the .5 quart to reach that level. I guess some of the old oil must have still been in the generator. Next time, I'll try tipping the generator to get more of the old oil to flow out. | ||
 Checking Oil Level |
 Tightening Oil Filler Cap |
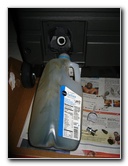
 Honda EU3000is Side Cover |
| I checked the oil level with the dipstick and visually by looking into the oil filler hole. Then I re-inserted the dipstick and screwed it in. | ||
|
|
||
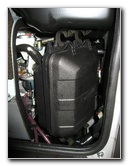
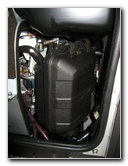
 Left Side Cover Open |
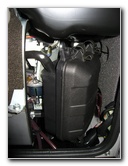 Air Cleaner Container |
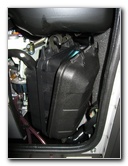 Air Cleaner Cover Unsnapped |
| My next step was to move to the left side cover and open it with a flat head screwdriver. There is a single latch that is operated by turning a silver bolt head on the outside of the left side cover. With the left side cover open, you can see the black air cleaner box that has four black clips holding it together. I unsnapped the clips, opened the cover and removed the blue paper air filter. | ||
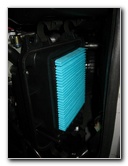 Paper Air Filter |
 Rear of Air Filter |
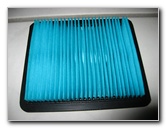 Front of Air Filter |
| The paper air
filter looked practically brand new with just a tiny amount of sediment
visible on the air intake side. I tapped the filter to dislodge the sediment
and re-installed it back into the air cleaner box. The new OEM air filter with its part number is as follows: Honda 17211-ZS9-A02. |
||
 Air Filter Re-Inserted |
 Air Filter Cover Closed |
 Filter Cover Latches Secured |
| If your Honda EU3000is generator is equipped with a foam filter, you can clean it with warm soapy water and let it dry. Then soak the filter in new engine oil, squeeze out the excess oil and re-install it. | ||
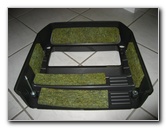
 Left Side Cover Closed |
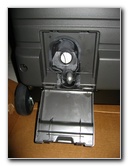 Oil Maintenance Access |
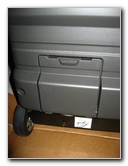 Oil Maintenance Cover Closed |
| I finished the air filter cleaning and oil change by closing the left side cover and closing the oil maintenance cover. | ||
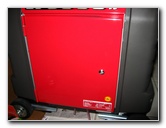
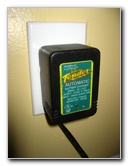 Battery Tender Jr. |
 Front Control Panel |
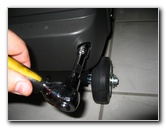 Removing 10mm Cover Bolts |
| The generator always seemed to have no problem starting when I ran it once a month but I figured it wouldn't be a bad idea to put the internal battery on a Battery Tender trickle charger. To access the battery, I unscrewed the four 10 mm bolts on the front panel and removed it. | ||
 Front Panel |
 Front Panel Removed |
 Yuasa 12V Battery |
| The Battery Tender Jr. comes with a set of alligator clips and a connector that can be screwed onto the battery terminals. I'll probably attach the more secure connector in the future, but this time I just used the alligator clips. It only took about 30 minutes for the Battery Tender Jr. trickle charger status light to change from red (charging) to green (maintaining). The hour of operating the generator must have already charged the battery to near full capacity. The last step of the day was to refill the gas tank with a few gallons of fresh gasoline and treat it with STA-BIL fuel stabilizer. The Honda EU3000is gas tank holds 3.43 gallons and STA-BIL recommends 1 ounce for every 2.5 gallons. I added about 1.5 ounces which is close enough to the 1.37 ounces required. | ||
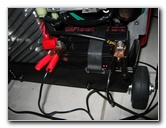 Battery Charger Clips On |
 Green Light, Fully Charged |
 STA-BIL Gasoline Additive |
| Update - It has
been about five years since we purchased this generator and the only major
maintenance expense has been purchasing a new
12V battery after a friend borrowed
the generator and left the ignition switch on over night.
For more of my
maintenance and repair guides, please visit the
Miscellaneous section of
Paul's Travel Pictures. |
||
| If you found this guide to be helpful,
please consider making a small donation by clicking on the PayPal.com
"Donate" button located to the right of this paragraph. Thank you!
(Note: I am not a registered charity. Donations are not tax deductible.) |