
Rheem HVAC
Condenser Coils Cleaning Guide
How to safely clean and maintain the
condenser coils on a Rheem Classic outside A/C unit for max cooling efficiency.

By Paul B. Michaels Author & Photographer Auto Mechanic Since 1989 |
||
|
|
||
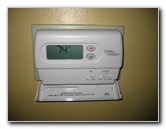 Turn Off Thermostat |
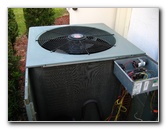
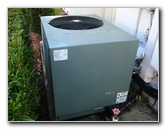
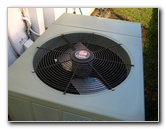 Rheem Classic Condenser |
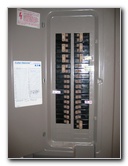
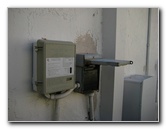 Power Supply - Fuse Block |
| This home
maintenance "how-to" guide was specifically written to assist owners
of the Rheem Classic HVAC condenser unit in cleaning the coils for
maximum cooling and energy efficiency. Owners of other A/C systems with similar outside condenser units such as Trane, GE (General Electric), LG, Lennox, Amana, American Standard, Arco, Carrier, Goodman, Bryant, Luxaire, York, Kenmore, Frigidaire, Goldstar, Maytag, and Whirlpool may also find this guide to be useful. Since "winter" in South Florida is coming to an end, I decided it was time to clean out the coils in the outdoor condenser unit of our Rheem air conditioning system before summer arrives. The items needed to complete this procedure include a screw driver, a cleaning brush, a wet/dry shop vacuum, a garden hose, HVAC coil cleaner or dishwashing detergent, and a sprayer bottle. |
||
|
|
||
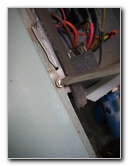
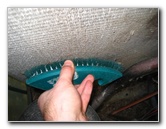
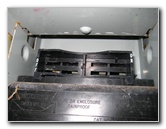
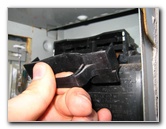
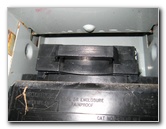
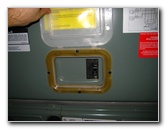
 Block Shutoff Switch |
 Power Block Removed |
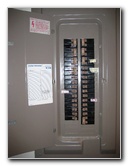 Inside Breakers Turned Off |
| The first steps are
to turn off the air conditioning system at the thermostat, turn off the
circuit breaker(s) for the A/C system inside the house, and pull out the
large block or "handle" shutoff switch located inside the power supply box
near the condenser.
Your system may instead be equipped with a common circuit breaker switch outside to locally disconnect power to the condenser. (Just in case, I also flipped the inside air handler's circuit breaker to "off".) |
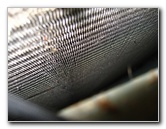
||
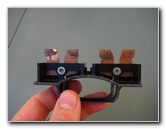
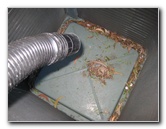
 Smaller Condenser Cover |
 Capacitor & Compressor |
 Coils Clogged With Debris |
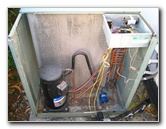
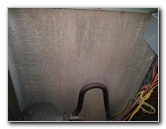
| Next, I removed the
screws holding the smaller metal cover that protects the capacitor, the
compressor, and one side of the square shaped condenser.
Since there isn't much air flow in this area due to the sealed cover, it was the dirtiest section of our condenser. The coils were clogged with a grey carpet of dust, dirt, pet hair, lint and other debris. |
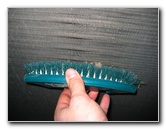
||
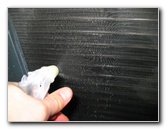
 Lint, Dust, Dirt & Pet Hair |
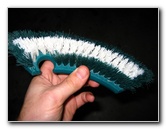 Soft Bristle Cleaning Brush |
 Gently Brush Out Debris |
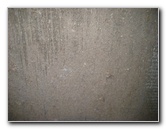
| Before you get
anything wet, it's best to carefully vacuum out the coils with a wet/dry
shop vacuum or brush them out with a soft bristle brush.
Try to avoid flattening or crushing any of the aluminum fins as this will reduce their efficiency. |
||
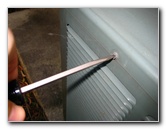 Remove Fan Case Screws |
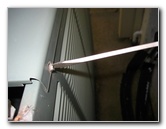 Flathead Screwdriver |
 Final Screw Near Capacitor |
| Once I had that
side of the condenser's coils cleaned, I removed the screws holding the fan
motor and top cover in place.
(Make a mental note of which screws came from where. You don't want to insert a long screw in somewhere that originally had a short screw and risk puncturing the coils.) Lift up the top cover of the condenser and carefully rest it somewhere safe or have someone hold it. Be sure to not stress the wires leading to the fan motor or any other connections. |
||
 Lift Fan Up & Vacuum |
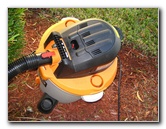 Rigid Wet/Dry Shop Vac |
 Leaves & Debris Removed |
| I used a Rigid 5HP wet/dry shop vacuum to get all of the leaves, twigs, mummified lizards, grass clippings, and dirt out of the inside of the condenser unit. | ||
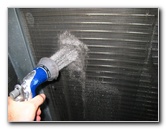
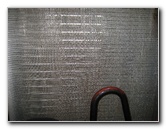
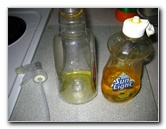 Mix Detergent & Water |
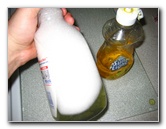 Soap & Water Spray Bottle |
 Gently Brush Out Fins |
| The fins inside the
condenser looked relatively clean, so I just gently ran the brush over them
a few times to dislodge any stubborn particles.
Then I prepared a solution of dishwashing soap and water in an old sprayer bottle. |
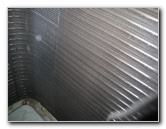
||
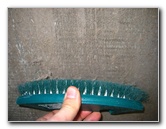
 Outer Fins Already Clean |
 Saturate Fins With Solution |
 Finish Brushing Out Coils |
| I saturated the
coils inside the condenser with the soapy solution and sprayed some of it
all around the rest of the outside of the unit including the exposed side
near the compressor.
In the future, I plan on buying some HVAC coil cleaner spray which might do a better job of dissolving the stubborn grease, oil and debris. The outer side of the coils on the condenser looked very clean, so I didn't bother removing the rest of the metal case protecting them. |
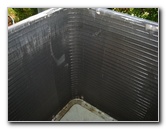
||
 Garden Sprayer On Shower |
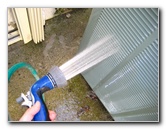 Rinse Off Outside Cover |
 Inner Coils Cleaned |
| After letting the
soapy solution sit for a few minutes, I rinsed off the coils with the garden
hose sprayer set to the low pressure "shower" setting.
Using higher pressure settings on your sprayer head or a pressure washer may flatten the coils and reduce the condenser's efficiency. Thoroughly soak every area of the coils with water and repeat the process several times to ensure that most of the debris or dust is flushed out. |
||
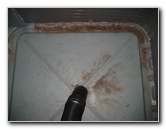
 Dirt & Dust Removed |
 Coils Rinsed Off |
 Lower Fan & Top Cover |
| As I mentioned, the
outside of the coils looked clean, so I didn't bother taking off the rest of
the condenser's metal case to access them.
But I did pull the metal cover back and spray the outside coils as best I could. The area I spent the most time cleaning was the coils on the capacitor/compressor side of the condenser that were completely caked with debris. You can see the dramatic difference between before and after cleaning in Picture # 9 and Picture # 28. |
||
 Small Cover Replaced |
 60 Amp Circuit |
 Replace Handle/Block |
| To complete the
job, I carefully lowered the top cover and fan back over the condenser's
case and re-inserted the screws.
The top of the case was secured with relatively short screws that can't puncture or damage the condenser coils. Don't forget the one screw that holds the top of the case to the small metal box that houses the capacitor. Then replace the smaller panel of the case that protects the compressor, capacitor, and one side of the coils. This panel was held in place by two slightly longer flat head screws. |
||
 Local Connection Restored |
 Turn On Circuit Breakers |
 Air Handler Circuit Breaker |
| Then I re-inserted
the block switch or "handle" piece back into the outside power circuit box,
flipped on the A/C breakers inside the house, and turned on the air handler
unit's breaker.
Finally, I switched the digital thermostat to "cool" and 70 degrees Fahrenheit to test they HVAC system. I heard the fan and compressor outside turn on before cool air starting blowing out of the vents or "registers" inside the house. If your system doesn't turn on, double check all the fuses, circuit blocks, breakers and the thermostat.
If you'd also like to clean the coils on your
inside A/C unit, click here -
HVAC Air Handler Coils Cleaning Guide. |
||
| For more of my
related how-to guides, click on the following links:
Rheem AC Condenser Run
Capacitor Replacement Guide,
Freezer Icemaker Replacement Guide,
Bathtub/Shower Water Diverter Valve,
HVAC Air Handler Coils Cleaning Guide,
Home Water Heater Sediment Flushing Guide,
Culligan US-600A Under Sink Water Filter Installation Guide,
Laptop to HDTV Via CAT6 HDMI Extender,
Home Clothing Dryer Exhaust Vent Lint Cleaning Guide,
Kitchen Sink Drain Water Leak Repair Guide,
Culligan Icemaker Water Filter Installation Guide,
Culligan IC-EZ-1 Drinking Water Filter Installation Guide,
Honda EU3000is Generator Maintenanc Guide,
How To Fix A Sticky Door Lock,
Hunter Just Right Digital Thermostat Installation,
GE A/C Condenser Run/Start Capacitor Replacement Guide,
Refrigerator Water Leak & Clogged Defrost Drain Repair Guide,
Toilet Water Supply Valve Leak Repair Guide,
Kenmore Oven/Range 220V Power Supply Restoration Guide,
Carpenter Bee Insect Pest Control Guide, and
TiVo Hard Drive Upgrade Guide. |
||
| If you found this guide to be helpful,
please consider making a small donation by clicking on the PayPal.com
"Donate" button located to the right of this paragraph. Thank you!
(Note: I am not a registered charity. Donations are not tax deductible.) |