
Clothes Dryer
Exhaust Vent Cleaning Guide
Pictures illustrated instructions for how
to remove lint from a home clothing dryer's hot air exhaust hose and vent.

By Paul B. Michaels Author & Photographer Auto Mechanic Since 1989 |
||
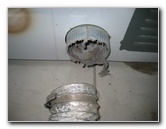
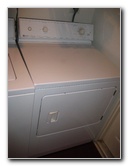 Maytag Clothes Dryer |
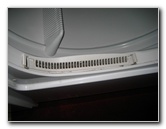 Lint Trap Screen |
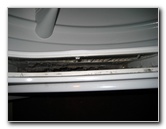 Lint Trap Removed |
| A recent
article I read about home fire safety inspired me to thoroughly
clean the lint trap and hot air exhaust vent of our clothes dryer. We're pretty good about cleaning out the lint trap screen after every (or every other) load of clothing, but I've never checked the flexible hose that leads from the back of the dyer to the outside vent. My first step was to remove the lint trap screen and use a Swiffer duster to remove some of the lint in the recesses of the trap. A better cleaning tool would be a long flexible dryer lint brush. Then I unplugged the dryer and pulled it away from the wall to reveal a mess of pet hair and debris from years of neglect by us and the previous owners. |
||
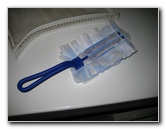 Swiffer Duster |
 Cleaning Lint Trap Recess |
 Lint Removed |
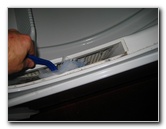
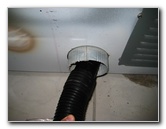
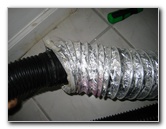
| To clean the
flexible exhaust pipe, I pulled it off the wall vent and unscrewed it from
the rear of the dryer.
Detaching it from the dryer required a flathead screwdriver to loosen the metal hose clamp. It was attached to the wall vent loosely with just a plastic zip tie. |
||
 Pet Hair & Debris |
 Remove Hose From Wall |
 Unscrew Hose From Dryer |
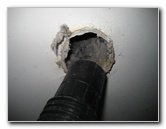
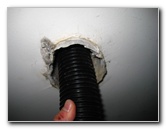
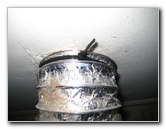
| Then I used a Rigid
5 HP Wet/Dry shop vacuum to remove all the pet hair, debris, and lint from
around the rear of the dryer.
I also used the vacuum to remove lint from inside the flex hose, the wall vent, and the hot air exhaust on the back of the dryer. |
||
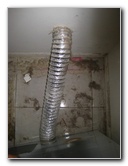
 Flex Hose Detached |
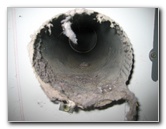 Dryer Exhaust Vent |
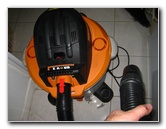 Wet/Dry Shop Vacuum |
 Vacuuming Dryer Vent |
 Vacuuming Exhaust Tube |
 Vacuuming Wall Vent |
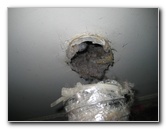
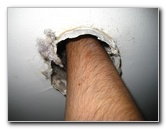
| After thoroughly vacuuming everything, I used my hand to pull out any stubborn pieces of lint sticking inside the vents and the flexible exhaust tube. | ||
 |
 Removing Lint By Hand |
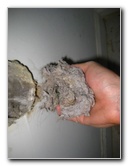 Big Clump Of Lint |
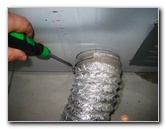
| Once I was
satisfied that the vast majority of the lint had been removed, I reattached
the pipe to the back of the dryer and tightened the metal hose clamp with
the flat head screwdriver.
Then I used a new plastic zip or "cable" tie to secure the hose to the outside air vent. There were some small holes in the hose, so I used metal foil duct tape to create a better seal around the hose. The article on fire safety recommended cleaning out the dryer exhaust vents and pipe at least once a year. It also encouraged everyone to treat a running dryer like a small child - never leave it unattended. So that if a lint fire starts, you'll be there to put it out with a fire extinguisher and call the fire department. |
||
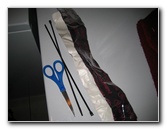 Scissors, Zip Ties, Metal Tape |
 Secure With Zip Ties |
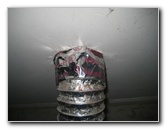 Wrap With Foil Duct Tape |
| For more of my
related pages, click on the following links:
Culligan US-600A Undersink Water Filter,
Culligan IC-100 Refrigerator Icemaker Water Filter,
Kitchen Sink Drain Pipe Leak Repair Guide,
Culligan IC-EZ-1 Water Filter Guide,
Honda Generator Maintenance Guide,
How To Fix A Sticky Door Lock,
Hunter Just Right Digital Thermostat Installation Guide,
Costco Wholesale Club Price Comparison,
Debbie Meyer Green Bags Review,
N:Vision CFL Bulbs,
Fagor Pressure Cooker Review,
Kenmore Refrigerator Leak Repair,
Toilet Water Supply Valve Leak Repair,
Kenmore Oven 220V Repair Guide,
Carpenter Bee Insect Pest Control Guide, and
How To Deep Fry A Turkey. |
||
| If you found this guide to be helpful,
please consider making a small donation by clicking on the PayPal.com
"Donate" button located to the right of this paragraph. Thank you!
(Note: I am not a registered charity. Donations are not tax deductible.) |