
Honda Civic
Tail Light Bulbs Replacement Guide
How to replace the brake, turn signal,
reverse & sidemarker bulbs in the tail light of a 2006 to 2011 Honda Civic.

By Paul B. Michaels Author & Photographer Auto Mechanic Since 1989 |
||
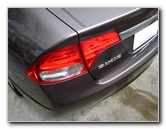 Honda Civic Tail Light |
 Plastic Screw Fasteners |
 Flathead Screwdriver |
| This
automotive "how-to" guide was specifically written to assist owners
of the 8th generation (2006, 2007, 2008, 2009, 2010, & 2011) Honda
Civic in replacing the brake light, turn signal / parking light,
reverse and rear side marker bulbs in the tail light assembly. Owners of other Honda or Acura vehicles such as the Accord, Crosstour, CR-V, CR-Z, Element, Fit, Insight, Odyssey, Pilot, Ridgeline, RL, TL. TSX, ZDX, MDX, and RDX may also find these instructions to be helpful. Replacement light bulbs from Sylvania and other manufacturers have the following part numbers: Brake Light # 7443, Rear Turn Signal # 7440A (992), Reverse Light # 7440, and Rear Side Marker Light # 168. The only tool needed to replace any of the tail light bulbs is a flathead screwdriver. |
||
|
|
||
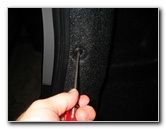
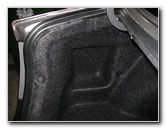
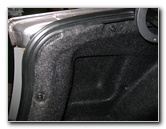
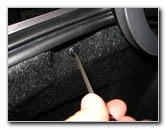 Remove 2nd Screw |
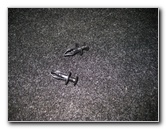 Two Plastic Screw Rivets |
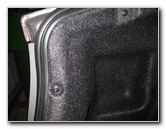
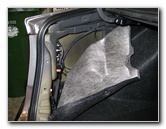 Pull Back Trunk Carpet |
| The first step is
to open the trunk and locate the two plastic flathead screws that hold the
trunk's carpet liner in place.
Unscrew the two screws, pull out the plastic rivets, and peel back the trunk's carpet. |
||
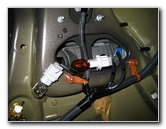
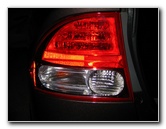 Tail Light Assembly |
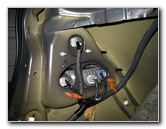 Light Bulb Sockets |
 Brake (Stop) Light Bulb |
| Behind the trunk's
carpet liner, you'll be able to see the four light bulb sockets for the tail
light assembly.
The top one is the brake (stop) light. The brake light is part number 7443. The socket closest to the center line of the vehicle is the reverse or "back up" bulb. The replacement part is 7440. In the center of the lower row is the turn signal light bulb, which is an amber colored # 7440A bulb. Closest to the outer edge of the vehicle is the rear side marker bulb. |
||
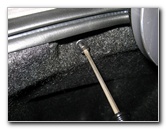
 Pull Bulb Straight Out |
 1/4 Turn Counter Clockwise |
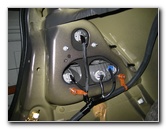 Re-Insert 1/4 Turn Clockwise |
| To remove any of
the light bulb sockets, grasp it by the base and rotate it 1/4 turn counter
clockwise before pulling it straight out of the assembly.
To remove the light bulb from the socket, pull it straight out. If it won't come out easily, try wiggling the bulb while pulling it out. |
||
|
|
||
 Replace Trunk Carpet |
 Re-Insert Plastic Rivets |
 Tighten Plastic Screws |
| Test the new tail
light bulb(s) by having someone step on the brakes, put on the hazard
signals or put the transmission in reverse.
Then replace the trunk carpet liner, re-insert the plastic screw rivets and tighten the screws with the screwdriver. You can usually just easily push the plastic screws into place with your finger. |
||
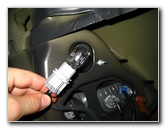
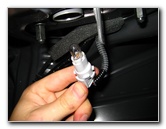
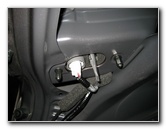
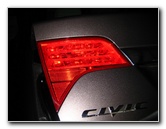 Trunk Lid Parking Light |
 Tail Light Bulb Socket |
 1/4 Turn Counter Clockwise |
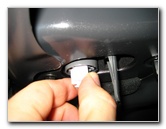
| The parking or
"tail" light bulb is located in a separate housing inside the trunk lid. To
remove the light bulb socket, rotate it 1/4 turn counter clockwise and pull
it straight out. Pull the bulb straight out of the socket and push in a new 168 bulb. Then insert the socket back into the trunk lid and rotate it 1/4 turn clockwise to secure it. |
||
 # 168 Tail/Parking Bulb |
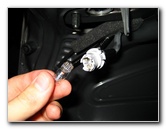 Pull Out Old Light Bulb |
 Insert Socket - Turn Clockwise |
| For more of my
related automotive maintenance or repair instructions, click on the
following links:
Honda Civic Engine Oil Change Guide,
Honda Civic Front Door Speaker Replacement Guide,
Honda Civic Cabin Air Filter Replacement Guide,
Honda Civic Front
Brake Pads Replacement Guide,
Honda Civic Overhead Map Light Bulb Replacement Guide,
Honda Civic Front Door Panel
Removal Guide,
Honda Civic Headlight Bulbs Replacement Guide,
Honda Civic Third Brake Light Bulb Replacement Guide,
Honda Civic Key Fob Battery
Replacement Guide, and Honda Civic Dome Light Bulb Replacement Guide. For more, check out all of my Honda Civic DIY Repair & Maintenance Guides. |
||
| If you found this guide to be helpful,
please consider making a small donation by clicking on the PayPal.com
"Donate" button located to the right of this paragraph. Thank you!
(Note: I am not a registered charity. Donations are not tax deductible.) |