
Honda Civic
Front Brake Pads Replacement Guide
How to replace the front brake pads on an
8th generation (2006 to 2011) Honda Civic with pictures and instructions.

By Paul B. Michaels Author & Photographer Auto Mechanic Since 1989 |
||
| Please note, I am not a professional mechanic. This guide is for illustrative purposes only. If you have any doubts, do not proceed and consult with your dealership. I assume no responsibility for damage to your vehicle, persons, property or pets. | ||
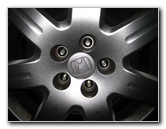
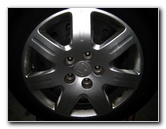
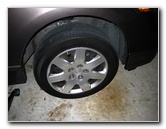 Honda Civic Front Wheel |
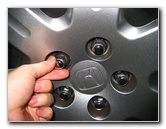
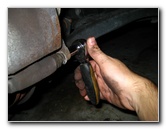
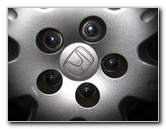
 Loosen Five Lug Nuts |
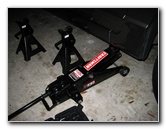
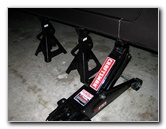 Jack Up Vehicle |
| This
automotive "how-to" guide was specifically written to assist owners
of the 8th generation (2006, 2007, 2008, 2009, 2010, & 2011) Honda
Civic in replacing the front brake pads. Owners of other Honda or Acura vehicles such as the Accord, Crosstour, CR-V, CR-Z, Element, Fit, Insight, Odyssey, Pilot, Ridgeline, RL, TL. TSX, ZDX, MDX, and RDX may also find these instructions to be helpful. A few compatible replacement brake pads with their part numbers are as follows: Bosch BC465A, KFE KFE465-104, Honda 45022-SNE-A00, ACDelco 14D465C, Monroe DX465, ACDelco 17D465AC, Wagner ZD465A, Raybestos PGD465AC and Dura International BP764 C. The tools needed to complete this brake job include a lug nut wrench, a floor jack, jack stands, a 12mm socket or wrench, brake parts cleaner spray, a "C" or "F" clamp, some brake parts lubricant grease for the caliper pins, and CRC Disc Brake Quiet gel (optional). |
||
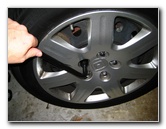
 Spin Off Lug Nuts |
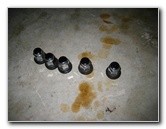 5 Lug Nuts Removed |
 Pull Off Front Wheel |
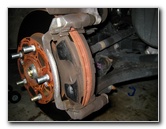
| The first step is
to loosen the five lug nuts on the front wheel with the lug nut
wrench or "tire iron" located on top of the spare tire inside the car's
trunk.
Then raise up the side of the car with the floor jack and secure it with two jack stands. Next remove the five lug nuts and pull off the front wheel to reveal the brake caliper and the brake rotor. |
||
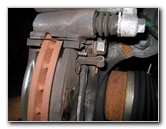
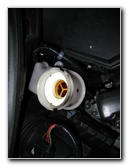
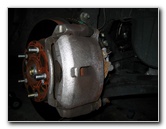
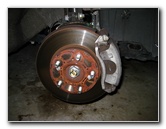 Front Rotor & Caliper |
 Front Brake Caliper |
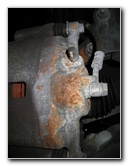 Brake Fluid Bleeding Valve |
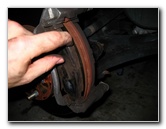
| To access the brake
pads in the front caliper, you'll need to remove the lower caliper bolt with
a 12mm socket and ratcheting wrench.
The bolt head faces inwards to the wheel well of the car on the rear of the caliper. |
||
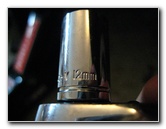 12mm Socket & Wrench |
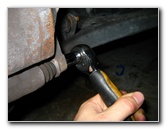 Remove Lower Caliper Bolt |
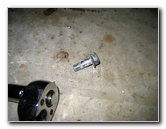 12mm Bolt Removed |
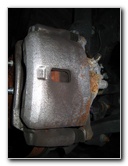
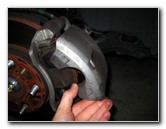
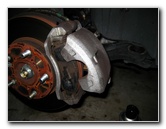
| After removing the
lower 12mm caliper bolt, rotate the caliper upwards off the pads and away
from the rotor.
Even if the caliper stays up by itself, secure it with some twine tied to the suspension spring to prevent the caliper from crashing down on your fingers. |
||
 Rotate Caliper Upwards |
 Secure Caliper To Shock |
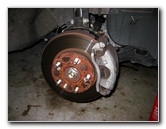
 Front Brake Pads |
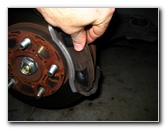
| With the caliper up
and out of the way, you can wiggle off the old brake pads with your fingers.
I recommend buying the Bosch BC465A QuietCast brake pads since they have excellent reviews on Amazon. Usually the new pads will come equipped with new metal backing plates. If your new pads didn't come with backing plates, save the old ones and install them on to the new pads. You'll also need to remove the wear indicator or "squeal" bar from the top of the inner brake pad and install it in the same location on the new interior pad. |
||
 Wiggle Out Old Pads |
 Inner Pad Wear/Squeal Bar |
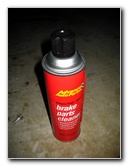 Brake Parts Cleaner |
| Once the old pads
are removed, spray down the rotor and caliper with the
brake parts cleaner spray. If your car is prone to brake squeaking or squealing, apply a product such as the CRC Disc Brake Quiet gel to the back of the new pads where they come in contact with the caliper. If your vehicle exhibits shuddering, pulsating, or vibrations while braking, you may need to have your rotors "turned" or just replace them with new rotors.. |
||
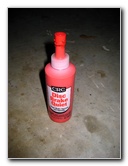 CRC Disc Brake Quiet |
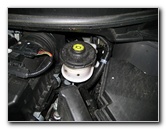 Brake Fluid Reservoir |
 Remove Cap |
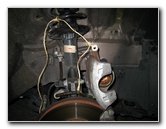
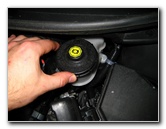
| In preparation for compressing the brake caliper piston, remove the cap from the brake fluid reservoir in the engine bay to allow the fluid to flow freely. | ||
|
|
||
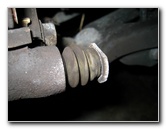
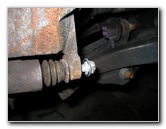
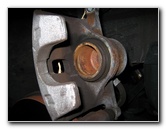 Brake Caliper Piston |
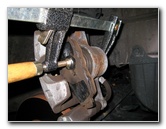 Compress Caliper Piston |
 Brake Caliper Pin |
| The brake caliper
piston will have to be compressed back in order for it to fit over the new
pads which are thicker than the old worn down ones.
Use a "C" clamp and one of the old brake pads to evenly compress the brake caliper piston. Compress the piston very slowly and check the brake fluid level in the reservoir frequently to avoid having it overflow. Try to only compress the piston as far back as necessary and don't compress it past the point where it is flush with the rubber gasket. Check that the brake fluid in the reservoir is at the "Max" level. If it is above it, remove a bit with a spray bottle head, a turkey baster, or soak some up with a paper towel. If the level is too low, add a bit of fresh DOT 3 brake fluid until it reaches the cold "Max" line. |
||
 Check & Lubricate Pin |
 Re-Insert Caliper Pin |
 Install New Pads |
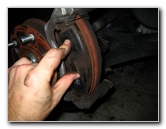
| Before installing
the new pads, check the the lower brake caliper pin to see if it slides
freely.
If it does not, lubricate it with some moly grease or brake caliper grease. Then remove the top 12mm caliper bolt and lubricate the upper caliper pin as well. |
||
 Push Against Rotor |
 Lower Caliper Over Pads |
 Line Up Caliper Bolt Hole |
| Insert the new
brake pads against the rotor in between the upper and lower anti-rattle
clips.
Push against the new pads until they are flush with the brake rotor. Make sure that the wear indicator or "squeal" bar is situated at the top of the inner brake pad. Then cut or untie the twine supporting the brake caliper and carefully lower it over the new brake pads. If the caliper won't fit over the new pads, compress the piston back a bit more. |
||
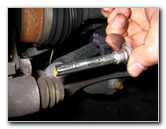
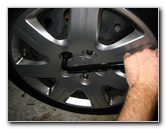
 Insert Lower Caliper Bolt |
 Torque Down Caliper Bolt |
 Bleed Brake Lines? |
|
Make sure that the lower caliper bolt hole lines up properly with the rubber dust boot and the lower caliper pin. Then insert the 12mm bolt and tighten it with the socket and ratcheting wrench. Torque the caliper bolt to the manufacturer's specifications. If your vehicle's brakes are prone to "fading" (loss of performance after repeated moderate to hard stops) you may need to bleed the brake lines to replace the contaminated fluid with new brake fluid. Check my Brake Line Fluid Bleeding Guide for more information on that topic. |
||
 Replace Wheel |
 Spin On Lug Nuts |
 Lower Car Down |
| Double check to
make sure the caliper bolts and bleeder valve are tight before replacing the
wheel.
Spin on the five lug nuts and tighten them by hand with the lug nut wrench. Then lower the car to the ground and torque the lug nuts to the manufacturer's specifications which is 80 ft-lbs. It would be best to use a torque wrench or an impact wrench with a torque stick. Move to the engine bay and check the level in the brake fluid reservoir once more and then replace the cap. |
||
 Torque Lug Nuts |
 Check Brake Fluid Level |
 Replace Reservoir Cap |
| To break in the new brake pads, just drive
normally for a few hundred miles to allow the brake pad material to evenly
transfer onto the rotors.
This is called "mating" and helps the brake pad and rotor to stop the car smoothly and quietly. Try to avoid hard braking or "panic stops" during this break-in period to prevent "brake pad glazing" which can result in noisy brakes that don't perform well.
Be sure to record the brake pad change in your
vehicle's service records. |
||
| For more of my
related automotive maintenance or repair instructions, click on the
following links: Honda Civic Engine Oil Change Guide,
Honda Civic Cabin Air Filter Replacement Guide,
Honda Civic Headlight Bulbs Replacement Guide,
Honda Civic Tail Light Bulbs Replacement Guide,
Honda Civic Front Door Panel
Removal Guide,
Honda Civic Front Door Speaker Replacement Guide,
Honda Civic Third Brake Light Bulb Replacement Guide,
Honda Civic Key Fob Battery
Replacement Guide,
Honda Civic Overhead Map Light Bulb Replacement Guide,
and Honda Civic Dome Light Bulb Replacement Guide. |
||
| If you found this guide to be helpful,
please consider making a small donation by clicking on the PayPal.com
"Donate" button located to the right of this paragraph. Thank you!
(Note: I am not a registered charity. Donations are not tax deductible.) |