
Honda Civic Map Light Bulbs
Replacement Guide
How to replace the overhead map light
bulbs in an 8th generation 2006-2011 Honda Civic with pictures & instructions.

By Paul B. Michaels Author & Photographer Auto Mechanic Since 1989 |
||
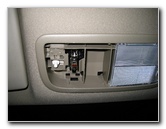
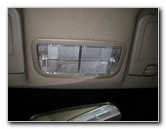 Honda Civic Map Lights |
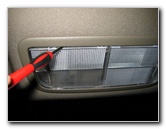 Pry Off Lens Cover |
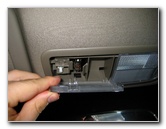 Remove Lens Cover |
| This
automotive "how-to" guide was specifically written to assist owners
of the 8th generation (2006, 2007, 2008, 2009, 2010, & 2011) Honda
Civic in replacing the overhead map light bulbs. Owners of other Honda or Acura vehicles such as the Accord, Crosstour, CR-V, CR-Z, Element, Fit, Insight, Odyssey, Pilot, Ridgeline, RL, TL. TSX, ZDX, MDX, and RDX may also find these instructions to be helpful. A replacement light bulb for the Honda Civic's overhead map light bulbs is part # DE3175 which is available from a variety of manufacturers including Sylvania, Bosch, Philips and GE. If you would like to have brighter map lights, install some compatible DE3175 LED bulbs. The only tool needed to replace either map light bulb is a small flathead screwdriver or a plastic pry bar tool. A butter knife, thin car key, or coin may also be used if you don't have a screwdriver. |
||
|
|
||
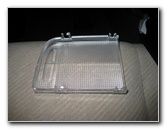 Map Light Lens Cover |
 Light Bulb Exposed |
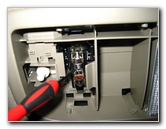 Pry Out Map Light Bulb |
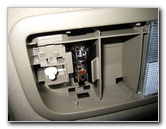
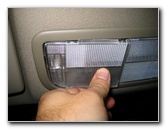
| The first step is
to gently pry off the map light bulb's translucent plastic lens cover with a
small flathead screwdriver.
It doesn't take much force to remove the cover, so don't pry too hard or you may crack the plastic. With the cover removed, you can pop out the old light bulb with the small flathead screwdriver. |
||
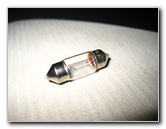 DE3175 Light Bulb |
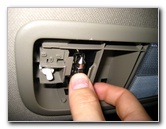 Push In New Bulb |
 New Bulb Inserted |
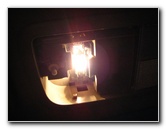
| Push in a new #
DE3175 light bulb and test it by pushing on the white switch located just
next to the bulb's socket.
If you are installing a DE3175 LED bulb and it doesn't work at first, try flipping it around in the socket. Some LED bulbs are "polarized" and will only work when the "+" positive and "-" negative electrical contacts are in the correct orientation. If it works properly, gently pop the lens cover back in place. Double check to make sure the switch works by pushing upwards on the plastic lens cover. |
||
 Test New Bulb |
 Snap Cover Back In Place |
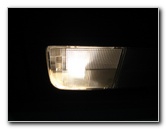 New Map Light Bulb |
| For more of my
related automotive maintenance or repair instructions, click on the
following links:
Honda Civic Engine Oil Change Guide,
Honda Civic Front Door Speaker Replacement Guide,
Honda Civic Cabin Air Filter Replacement Guide,
Honda Civic Front
Brake Pads Replacement Guide,
Honda Civic Tail Light Bulbs Replacement Guide,
Honda Civic Front Door Panel
Removal Guide,
Honda Civic Headlight Bulbs Replacement Guide,
Honda Civic Third Brake Light Bulb Replacement Guide,
Honda Civic Key Fob Battery
Replacement Guide, and Honda Civic Dome Light Bulb Replacement Guide. For more, check out all of my 2006-2011 Honda Civic DIY Repair & Maintenance Guides. If you have a newer Civic, please take a look at the links below: |
||
| If you found this guide to be helpful,
please consider making a small donation by clicking on the PayPal.com
"Donate" button located to the right of this paragraph. Thank you!
(Note: I am not a registered charity. Donations are not tax deductible.) |