
Honda Civic
Front Door Panel Removal Guide
How to remove the front door panel to
access the speaker or power window motor/regulator on a Honda Civic.

By Paul B. Michaels Author & Photographer Auto Mechanic Since 1989 |
||
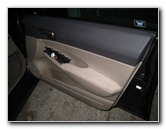
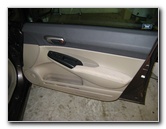 Honda Civic Door Panel |
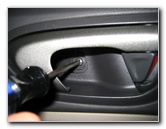
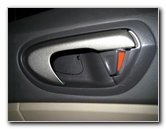 Door Handle |
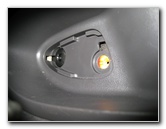
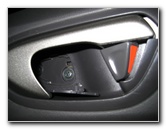 Remove Screw Cover |
| This
automotive "how-to" guide was specifically written to assist owners
of the 8th generation (2006, 2007, 2008, 2009, 2010, & 2011) Honda
Civic in removing the front door panel to access the speaker or
power window motor & regulator. Owners of other Honda or Acura vehicles such as the Accord, Crosstour, CR-V, CR-Z, Element, Fit, Insight, Odyssey, Pilot, Ridgeline, RL, TL. TSX, ZDX, MDX, and RDX may also find these instructions to be helpful. A few of the reasons that you may need to remove a door panel on your Honda Civic is to add sound insulation such as Dynamat, replace the door speaker with an upgraded unit and replace a faulty power window motor/regulator assembly. The only tools needed to remove the door panel include a Phillips head screwdriver and a flathead screwdriver or an automotive panel removal tool. |
||
|
|
||
 Screw Cover Removed |
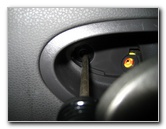
 Remove Phillips Screw |
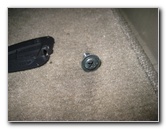 Screw Removed |
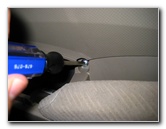
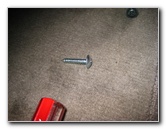
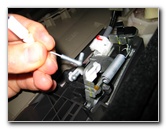
| The first step is
to locate the small plastic cover behind the door handle and pry it out with
a flathead screwdriver.
Then unscrew the one Phillips head screw and set it aside. Just to the left of that screw is a black plastic pop rivet. Push in the center of the pop rivet with the screwdriver so that it is loose for later when you pull off the panel. |
||
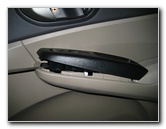
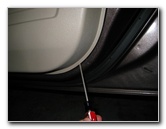 Pry Up Lower Panel |
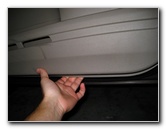 Pop Out Plastic Rivets |
 Door Handle Pop Rivet |
| Next pry up the
lower part of the door panel and pull out the plastic pop rivets all around
the door panel.
If you have trouble pulling out the bottom of the door panel, use an automotive panel removal tool. Don't pull too hard at this point though, there is still one screw under the arm rest to remove. |
||
 Push In On Black Rivet |
 Pry Up Arm Rest |
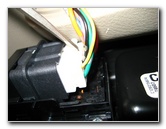
 Power Window/Lock Wires |
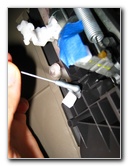
| Pry up the arm rest
with the flathead screwdriver and turn it upside down.
Then press on the tab on the power window & power door lock connector to remove it. Put the arm rest aside and get the Phillips head screwdriver. |
||
 Push Connector Tab |
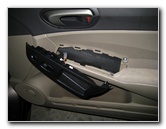
 Remove Arm Rest Panel |
 Final Door Panel Screw |
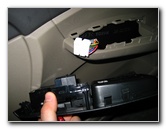
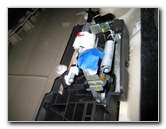
| Behind the arm rest
controls panel you'll find the last Phillips head screw.
It is the last thing holding the door panel in place. Remove it and put it aside. |
||
|
|
||
 Remove Phillips Screw |
 Last Phillips Screw Removed |
 Pull Out & Up On Panel |
| Pull on the lower
edge and sides of the panel to remove the plastic pop rivets.
Then lift upwards and outwards on the panel until it can be moved away from the rest of the door. |
||
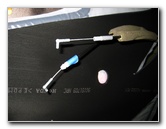
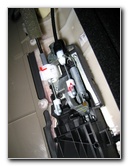 Two Door Handle Cables |
 Turn Up & Pop Out |
 Remove First Cable |
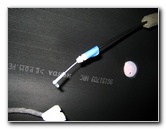
| The door panel will
still be held in place by the door cables that connect to the door handle
pull.
If you just want to replace the door speaker, you may not need to entirely remove the door panel. If you need to replace the power window motor and regulator assembly, it's best to entirely remove it. |
||
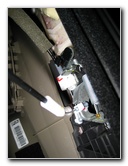
 Mark With Tape |
 Tape On Cable Receptacle |
 Remove 2nd Cable |
| Each cable is held
in place a few inches away from the end and also at the very end.
Pry the first cable out and mark it with some tape so that you don't mix it up with the other one later. Once both cables are free, you can move the panel to somewhere safe. |
||
 Pop Out 2nd Cable |
 Door Handle Cables Removed |
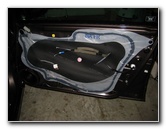 Door Panel Removed |
| For more of my
related automotive maintenance or repair instructions, click on the
following links: Honda Civic Engine Oil Change Guide,
Honda Civic Front
Brake Pads Replacement Guide,
Honda Civic Headlight Bulbs Replacement Guide,
Honda Civic Tail Light Bulbs Replacement Guide,
Honda Civic Front Door Speaker Replacement Guide,
Honda Civic Third Brake Light Bulb Replacement Guide,
Honda Civic Key Fob Battery
Replacement Guide,
Honda Civic Overhead Map Light Bulb Replacement Guide,
Honda Civic Cabin Air Filter Replacement Guide,
and Honda Civic Dome Light Bulb Replacement Guide.
For more, check out all of my
Honda Civic DIY Repair & Maintenance Guides. |
||
| If you found this guide to be helpful,
please consider making a small donation by clicking on the PayPal.com
"Donate" button located to the right of this paragraph. Thank you!
(Note: I am not a registered charity. Donations are not tax deductible.) |