
GM Power
Window Tracks & Regulator Lubrication Guide
Pictures illustrated instructions for how
to lubricate the power window tracks & regulators in a GM Pontiac Grand Prix.

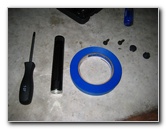
 2001 Pontiac Grand Prix |
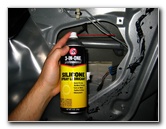
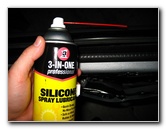
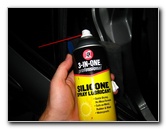
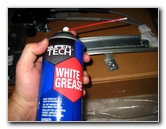
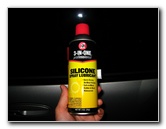 Silicone 3-In-One Spray |
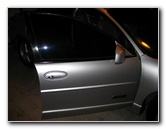
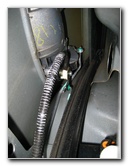
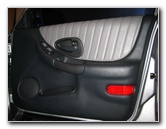
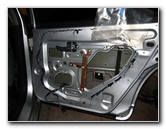
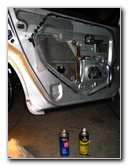
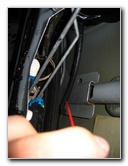
 Door Panel Removed |
| This
automotive how-to guide was specifically written to assist owners of
the 6th generation (1997, 1998, 1999, 2000, 2001, 2002 and 2003) GM Pontiac Grand Prix in lubricating the fabric &
rubber power window tracks and the metal regulator assemblies. Owners of other General Motors vehicles such as the Pontiac Bonneville, Grand Am, Sunfire, Vibe, Chevrolet Malibu, Chevy Monte Carlo, Lumina, Buick Regal, Oldsmobile Intrigue, and Olds Cutlass Supreme may also find this guide to be useful. After replacing several of the power window motor & regulator assemblies in my 2001 Pontiac Grand Prix, I realized that friction was the culprit for causing them to fail prematurely. I purchased some silicone spray lubricant for the window tracks made of fabric and rubber since petroleum based lubricating sprays could break down the rubber over time. |
||
|
|
||
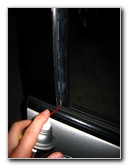
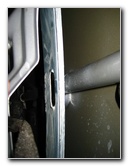
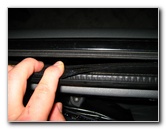
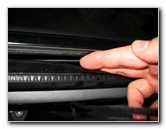
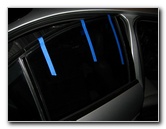
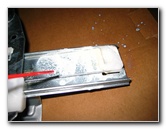
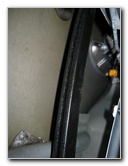
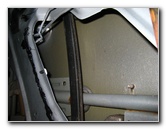
 Rubber/Fabric Track |
 |
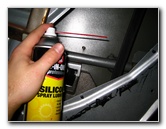
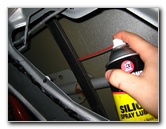
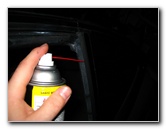
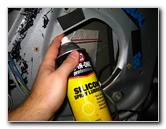
 Spraying Silicone Lubricant |
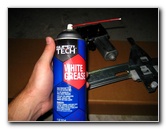
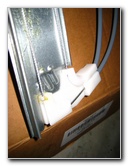
| For the metal
regulator assemblies with steel wires, you'll need a light petroleum based
lubricant such as white lithium grease.
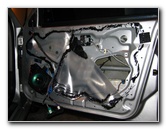
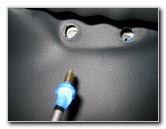
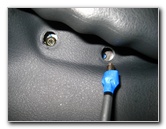
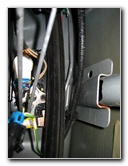
If you need instructions for removing the door panels, check my GM Power Window Motor & Regulator Replacement Guide. Removing the panels requires a Torx T-27 screwdriver and a flat head screwdriver or door panel removal tool. |
||
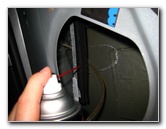
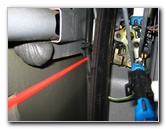 Spray Into Track Crease |
 Track Generously Lubed |
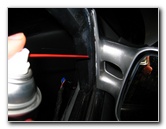 Lubricate Top Front Corner |
| If your power
windows aren't going up or down as fast as they used to but you don't need
to replace a motor/regulator assembly, you can try lubricating the tracks
without removing the door panels.
Insert the straw of the silicone spray into each side of the upper window track and spray a generous amount into them. Then raise and lower the window several times to spread the lubricant on the tracks and edges of the glass. |
||
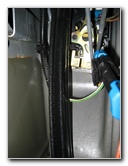
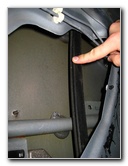
 Lubricate Upper Rear Track |
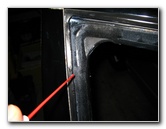 Lubricate Outer Border |
 Spread Silicone With Finger |
| On the other hand, if you have the time and want to avoid having to buy new window motors and regulators, I'd recommend removing all four door panels to lubricate all of the tracks and the regulators. | ||
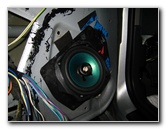
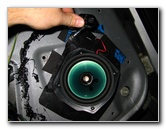
 7mm Socket & Wrench |
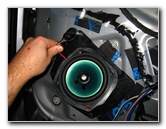 Remove Speaker & Mount |
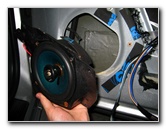 Front Speaker Removed |
| To access the front
window track in each of the front doors, you'll need a 7mm socket and wrench
to remove the front speaker and mount.
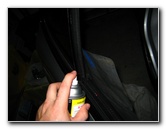
Through the front speaker mount's hole, you can insert the tube of the silicone spray can and lubricate the front track. |
||
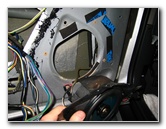
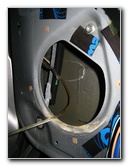 Access Hole To Front Track |
 |
 Lubricate Lower Front Track |
| Depending on how
much silicone lubricant you spray onto the window tracks, some of it may
leak out from the bottom of the door panel.
So I'd recommend keeping the doors open for a few hours to allow the silicone to leak onto some newspaper rather than stain your garage floor or driveway. |
||
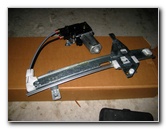
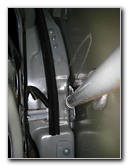
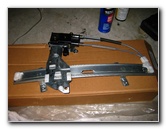
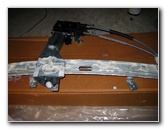
 Regulator Assembly |
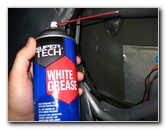 White Lithium Grease |
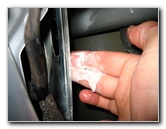 Spread On Front & Rear |
| While you have the
door panels off, it would be a good idea to add some extra lubrication to
the metal surfaces of the regulator assembly and the regulator's steel
wires.
Use white lithium grease or some other light petroleum based lubricant. |
||
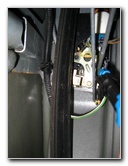
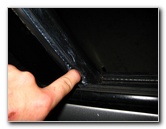
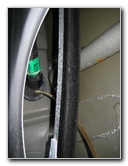
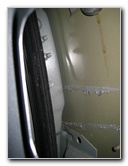
 Top Rubber Lip |
 |
 Lightly Lubricate Top Lip |
| To help the windows
slide even more easily, I also applied a light coating of silicone spray to
the top rubber lip of the door panel and also around the inner borders.
If any of it gets on to your windows, just use some Windex to clean them off. |
||
 Re-Attach Door Panel |
 Torx T-27 Screwdriver |
 Torx Screw Attached With Tape |
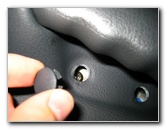
| Once I was done thoroughly lubricating all of the contact points of each window, I re-attached the door panels by pushing in the plastic rivets and screwing in the two screws with a Torx T-27 screwdriver. | ||
 |
 Replace Plastic Caps |
 Rear Passenger Window |
| The rest of the pictures on this page cover the same lubrication process for my other power window motor tracks and regulators. | ||
|
|
||
 Replacing Motor/Regulator |
 New Motor/Regulator $40 |
 White Lithium Grease |
| After lubricating
your power window tracks and the regulator, the window should glide up and
down relatively easily.
You can maintain the lubrication by spraying a small amount of silicone lubricant down each side of the upper window track every few months. This should help you avoid having to purchase and install new power window motor and regulator assemblies. |
||
 Lubricate Steel Wires |
 Regulator Lubricated |
 Rubber Window Track |
 |
 Inside Rear Door Panel |
 Silicone Spray Window Tracks |
 |
 |
 Spray Upper Window Track |
 Rear Driver Door |
 |
 |
 |
 New Front Driver Regulator |
 Weak Point Of Regulator |
 |
 Regulator Lubricated |
 Front Driver Window Track |
 Four 7mm Speaker Screws |
 Remove Front Speaker |
 Front Speaker Removed |
 Front Driver Window Track |
 Lubricate Front Track |
 |
| For more of my
related automotive how-to guides, click on the following links:
GM Power Window Motor & Regulator Replacement Guide,
GM Pontiac Grand Prix Headlight Bulbs Replacement Guides,
GM Pontiac Grand Prix Tail Light Bulbs Replacement Guide,
Zaino Bros Show Car Polish Review,
WeatherTech FloorLiner Car Mats Review,
GM 3800 II Power Steering Whine Repair Guide,
GM Pontiac Grand Prix Front Brake Pads Replacement Guide,
GM Brake Line Bleeding Guide,
GM Pontiac Grand Prix Rear Brake Pads Replacement Guide,
Headlight & Tail Light Condensation Solution Guide,
GM Pontiac Grand Prix GTP Supercharger Belt Replacement Guide,
GM Pontiac Grand Prix Serpentine Belt Replacement Guide,
GM 3800 II Idler & Tensioner Pulleys Replacement Guide,
Corroded Car Battery Terminal Replacement Guide,
GM 3800 II Alternator Replacement Guide, GM
Pontiac Grand Prix PCV Valve Replacement Guide,
GM ABS/TCS/SES Warning Lights Solution Guide,
GM Wheel Bearing Hub Replacement Guide,
GM 3800 Series II Engine Oil Change Guide,
Buffing Old Faded Headlights Guide,
K&N Air Filter Cleaning Guide,
GM 3800 Series II Eaton M90 Supercharger Oil Change Guide,
GM Pontiac Grand Prix 3rd Brake Light Bulb Replacement Guide, and
Meguiar's Headlight Restoration Kit Review.
For more, check out all of my
Pontiac Grand Prix DIY Repair & Maintenance Guides. |
||
| If you found this guide to be helpful,
please consider making a small donation by clicking on the PayPal.com
"Donate" button located to the right of this paragraph. Thank you!
(Note: I am not a registered charity. Donations are not tax deductible.) |