
GM Pontiac Grand Prix
Supercharger Belt Replacement Guide
A pictures illustrated guide for
replacing the Eaton M90 supercharger belt on a GM 3800 Series II 3.8L V6 Engine.

| This
"how to" guide was specifically written to assist owners of the
6th generation (1997, 1998, 1999, 2000, 2001, 2002 & 2003)
General Motors Pontiac Grand Prix GTP, equipped with an Eaton M90, in
replacing the supercharger belt on the 3800 Series II SC 3.8 Liter V6
pushrod engine.
Owners of other GM cars with a similar forced induction motor may also find the guide to be useful. These other vehicles include the following: Buick Park Avenue Ultra, Olds Eighty-Eight LS, Oldsmobile Eighty Eight LSS, Olds Ninety-Eight, Pontiac Bonneville (SLE, SSE, SSEi), Buick Riviera, Buick Regal (GS, GSX, SLP), Chevy Impala SS, and the Chevrolet Monte Carlo SS. I am not a professional mechanic. I assume no responsibility
for damage to your vehicle, persons, property or pets. If you have any
doubts, please consult an ASE certified mechanic. Please proceed with
caution at your own risk.
|
||
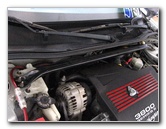
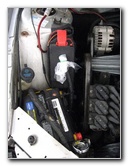
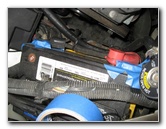
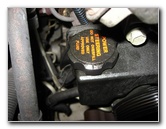
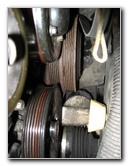
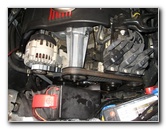
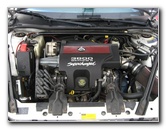 GM 3800 Series II Engine |
 Serpentine Belt Routing |
 Supercharger & Belt |
| A few days
ago, I heard a loud rattling sound from under the hood after redlining
the engine. I checked under the hood and discovered that pieces of the "Serpentine" (Accessory) belt were scattered around the engine compartment. Luckily, half of the belt was still intact on the pulleys. Since the supercharger belt must be removed first to access the accessory belt, I decided to change it as well. Both the belts were last changed at the 60,000 mile mark. The car now has just over 90,000 miles. The tools and parts needed to replace the supercharger belt include the following: Dayco 5060665 Polyrib Belt, 13mm socket, 10mm socket, 8mm socket, 15mm socket, a 3/8" drive ratchet, and a long handled breaker bar or ratchet. |
||
|
|
||
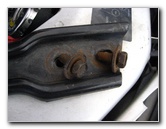
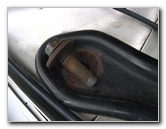
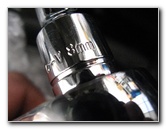
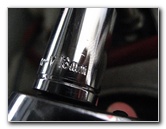 13mm Socket & Wrench |
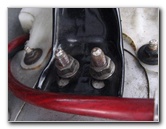 Buick STB Bolts |
 Buick Strut Tower Brace |
| I added
Buick STBs (strut tower braces) to the engine bay and trunk of my '01
Pontiac Grand Prix GTP.
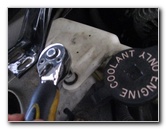
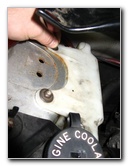
My first step was to remove the two 13mm bolts on the passenger side of the STB. Then I was able to remove the coolant overflow bottle with a 10mm socket. |
||
 Removing 2 STB Bolts |
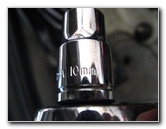 10mm Socket |
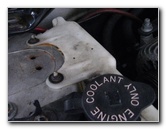 Coolant Overflow Bottle |
| To make this procedure easier, I completely removed the coolant overflow bottle by detaching the black rubber hose that is attached to its side. | ||
 Removing Coolant Bottle |
 Detaching Overflow Hose |
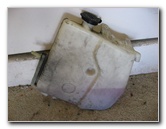 Coolant Bottle Removed |
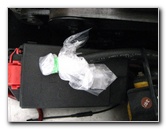
| Be careful when you remove the coolant overflow bottle, because the fluid can splash out of the top cap and the small tube protruding from the side. | ||
 Coolant Hose Sealed |
 Engine Bay Brace |
 13mm Socket |
| To prevent coolant from leaking out of the coolant overflow tube, cover it with a plastic bag secured by a rubber band or tape. | ||
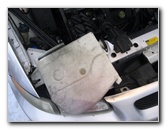
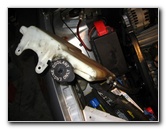
 Removing Engine Brace |
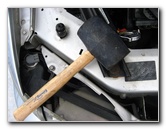 Rubber Mallet |
 Two Small Lower Bolts |
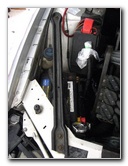
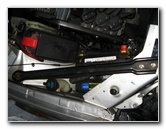
| I
removed the left engine bay brace for easier access to the belts and also
because I planned on removing the battery.
I skipped removing the battery and then realized that the brace may also be left in place. Having the battery out may make the job slightly easier if you have large hands. |
||
 One Large Upper Bolt |
 Pliers Releasing Cable |
 Brace Removed |
| If you do remove the engine bay brace and the battery, you'll need to release the cable loom attached to the brace with a pair of needle nose pliers. | ||
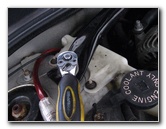
 8mm Socket |
 Negative Battery Cable |
 Removing Battery Cables |
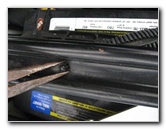
| If you
haven't already removed the battery, disconnect the battery cables with an
8mm socket.
I then put painters tape over the battery terminals for extra safety. |
||
 Battery Terminals Covered |
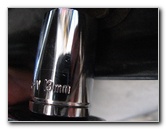
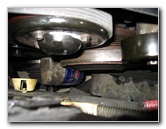
 15mm Socket |
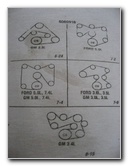
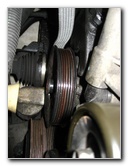
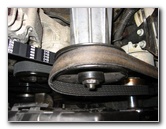
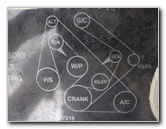 Belt Routing Diagram |
 Wrench On Tensioner |
 Pull Towards Front |
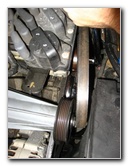
 Slip Belt Off Supercharger |
|
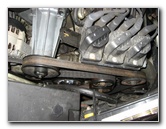
To remove the supercharger belt, put the 15mm socket and long handled wrench on the SC belt tensioner. The tensioner is located below the supercharger's pulley and towards the front of the vehicle. The supercharger belt tensioner is a smooth pulley that is directly next to a grooved idler pulley located closest to the front of the car. (See routing diagram.) |
||
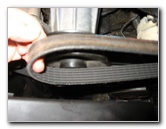
 Old Belt Off Supercharger |
 Removing Old SC Belt |
 SC Belt Off Crankshaft |
| Once
the old belt is off the supercharger pulley, you can pull it away from the
tensioner, the two idler pulleys and the crank shaft.
Try to pay attention to how the old belt is routed around the pulleys to make installing the new one easier. |
||
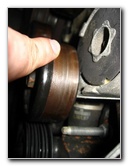
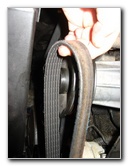
 Old Supercharger Belt |
 Cracks, Pits & Wear |
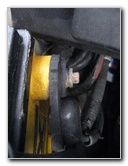
 Power Steering Fluid Reservoir |
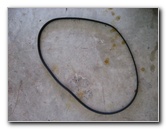
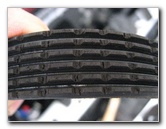
| I
checked the back of the old belt and saw that it had small cracks and other
signs of wear.
Since I had both the supercharger and serpentine belts removed, I took the time to check the level in the Power Steering fluid reservoir. The PS reservoir is located below the alternator. |
||
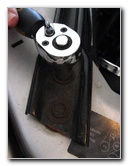
 Checking Pulley Bearings |
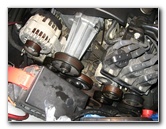 Both Belts Removed |
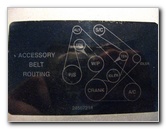 Belt Routing Diagram |
|
All of the pulleys, idlers, tensioners, etc should be relatively easy to spin with just your finger (except for the crank shaft). It's best to check them now and replace anything that doesn't spin freely rather than wait for them to seize later on. I had to replace both the Serpentine Belt Tensioner Pulley (Dayco 89007 - 3" Smooth) and the Supercharger Belt Idler Pulley (Dayco 89006 3.5" Smooth). If you also have a stubborn pulley that won't spin, check out my Grand Pix Pulley Replacement Guide. |
||
 Crank Pulley - Largest |
 Water Pump - Above Crank |
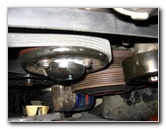 SC Belt On Crank |
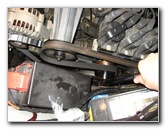
| To get
the new Dayco 5060665 supercharger belt in place, first place it over the outer set of
ribs on the crank shaft pulley.
The crank shaft is the lowest and largest pulley on the engine. The serpentine belt will already be in place on the inner set of ribs on the crank shaft. |
||
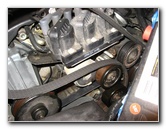 Two Idlers & Tensioner |
 Serpentine Belt Already Installed |
 Barely Reaching Supercharger |
|
The easiest way to get the belt properly routed is to remember that the smooth pulleys get the smooth side of the belt and the ribbed pulleys get wrapped by the ribbed side of the belt. |
||
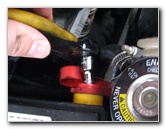
 Stretching Over SC Pulley |
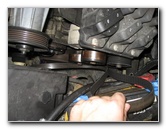
 Tensioner, 15mm, To Front |
 SC Belt On SC Pulley |
| After
wrapping the new SC belt over the outer set of ribs on the large crank shaft
pulley, I placed it around the smooth 3.5" idler pulley, the small ribbed
idler pulley and over the smooth 3" tensioner.
Hold the new belt with your finger near the supercharger pulley. Then place the 15mm socket on the tensioner with your other hand and pull the long handled wrench towards the front of the car to release the tension. The extra slack should be just enough to slip the new SC belt over the supercharger's ribbed pulley. |
||
 Supercharger Belt Installed |
 Re-Attach Coolant Hose |
 Reattach Battery Terminals |
|
Once the supercharger belt is installed, check the routing diagram again to make sure it is on correctly. Then you can re-install the coolant overflow bottle, re-attach the battery terminals, re-install the engine bay brace and re-attach the Buick STB. Hopefully if you did everything right, your engine will look and sound like this: GM 3800 II Engine Running Video. |
||
 Re-Attach Coolant Overflow |
 Reinstall Buick STB |
 Reinstall Engine Bay Brace |
|
For more automotive "how-to" guides, click on the following links: Pontiac Grand Prix Serpentine Belt Replacement Guide, GM 3800 Series II Tensioner & Idler Pulleys Replacement Guide, Pontiac Grand Prix Front Brake Pads Replacement Guide, Grand Prix Rear Brake Pads Replacement Guide, Pontiac Grand Prix Brake Lines Bleeding Guide, GM 3800 Series II Power Steering Fluid Maintenance Guide, Pontiac Grand Prix Alternator Replacement Guide, Pontiac Grand Prix PCV Valve Replacement Guide, Grand Prix TCS/ABS/SES Troubleshooting Guide, GM Pontiac Grand Prix Power Window Motor & Regulator Replacement Guide, GM Wheel Bearing Hub Replacement Guide, GM Pontiac Grand Prix Engine Oil Change Guide, Eaton M90 Supercharger Oil Change Guide, GM A/C Condensate Drain Pipe Unclogging Guide, and the Tail Light or Headlight Condensation Removal Guide.
For more, check out all of my
Pontiac Grand Prix DIY Repair & Maintenance Guides. |
||
| If you found this guide to be helpful,
please consider making a small donation by clicking on the PayPal.com
"Donate" button located to the right of this paragraph. Thank you!
(Note: I am not a registered charity. Donations are not tax deductible.) |