
Pontiac Grand
Prix Rear Brake Pads Replacement Guide
A pictures illustrated "how-to"
instruction guide for replacing the rear brake pads on a 2001 GM Pontiac Grand
Prix.

| This guide was
specifically written to assist owners of the 6th generation (1997, 1998,
1999, 2000, 2001, 2002 & 2003) Pontiac Grand Prix
SE/GT/GTP sedan or coupe in changing worn out rear brake pads.
The procedure is similar for many other General Motors vehicles including the Grand Am, Montana, Trans-Am, Firebird, Chevy Camaro, Corvette, Oldsmobile Aurora, Buick LeSabre, Regal, GTO, G6, G5, G8, Bonneville, Torrent, Aztek, Sunfire, Vibe, Grand National, Lucerne, Century, Park Avenue, Cadillac, Catera, DeVille, Eldorado, Seville, Escalade, STS, DTS, CTS, Cobalt, Malibu, Impala, Saturn Sky, Ion, Astra, Aura and Vue. Please note, I am not an ASE certified mechanic. Proceed at your own risk. I am not responsible for damage to your vehicle, persons, pets or property. |
||
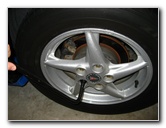
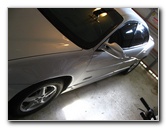 '01 Pontiac Grand Prix GTP |
 Garbage Bags & Painter's Tape |
 Pristine Paint Protected |
| The odometer
on my 2001 Pontiac Grand Prix GTP is just about to reach 91,000 miles.
I had the front brake pads changed during the 60,000 mile service but
the rears are the original equipment. I had been noticing a slight grinding noise coming from the brakes and they were also exhibiting some fade (mushy pedal) during spirited driving. I figured it was finally time to change the pads and bleed the brake lines. This guide is specifically for changing the rear brake pads. To view the Grand Prix Front Brake Pads Replacement Guide, click on the preceding link. If you only need to flush your fluid, view my Pontiac Grand Prix Brake Lines Bleeding Guide. Since I've been lovingly washing and waxing my car for 8 long years, I decided the first step was to protect the paint with some large plastic bags attached with painter's tape. |
||
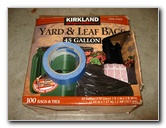
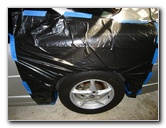
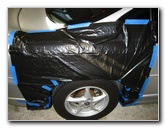 Bodywork Covered |
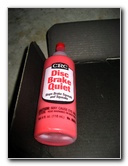
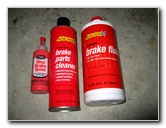 Brake Quiet, Cleaner, Fluid |
 $5.49, $4.29, $3.29 |
| To
prepare for this procedure, I purchased "Satisfied" brand ceramic vehicle
specific rear brake pads for about $30.
A few compatible sets of rear brake pads with their part numbers are as follows: ACDelco 14D698CH, Wagner PD698, Bendix D698CT, Dura International BP698, Wagner ZD698, Raybestos PGD698C and Monroe CX698. I also picked up some CRC Disc Brake Quiet, Advance Auto Parts Brake Cleaner ($3.29) and a big 32 oz bottle of Advance Auto Parts DOT 3 Hi-Temp synthetic brake fluid ($4.29). I've read that using the glycol based DOT "3" or "4" brake fluid is fine, but to avoid using DOT 5 which is silicone based and not compatible with the Grand Prix's braking system. |
||
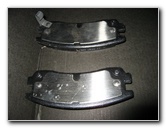
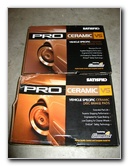 Satisfied Ceramic Brake Pads |
 Set of Rear Brake Pads |
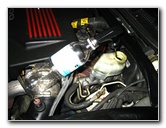
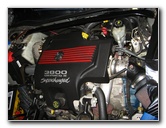 GM 3800 Series II Engine |
| The tools needed to complete this brake pad replacement are a 19mm lug nut wrench, a 19mm socket (for quickly spinning off the caps or lug nuts), a 14 mm wrench or metric socket for the rear caliper bolts, a rubber mallet, jack stands, a floor jack and either a spray pump or a turkey baster. | ||
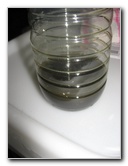
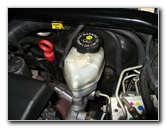 Brake Master Cylinder |
 Old Black Brake Fluid |
 Spray Pump & Bottle |
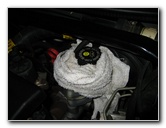
| It's a
good idea to remove as much old dirty brake fluid from the master cylinder
as possible before you begin, especially if you plan on bleeding the brake
lines.
New brake fluid is completely clear unlike the black sludge in my master cylinder. |
||
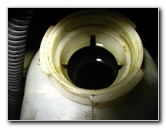
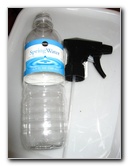
 Spraying Out Old Fluid |
 Black Fluid From Cylinder |
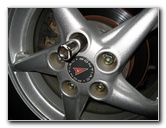
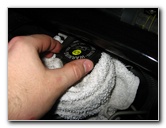
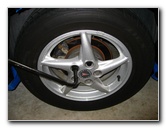 Remove Lug Nut Caps |
| After
spraying out most of the old fluid from my master cylinder into a plastic
water bottle, I moved to the rear wheels.
I gently loosened the plastic lug nut caps with the lug nut wrench and removed them by hand. Then I cracked the seal on the lug nuts with the vehicle still on the ground. |
||
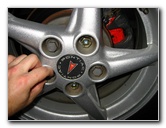
 Plastic Lug Covers Removed |
 Loosen Lug Nuts (19MM) |
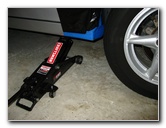
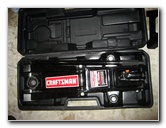 Craftsman Floor Jack |
| Once
the lug nuts were loosened, I placed my Craftsman 2.5 ton floor jack under
the car just in front of the rear wheel.
I lifted it up until the tire spun freely, placed a jack stand under the car and lowered the floor jack. |
||
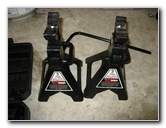 Craftsman Jack Stands |
 Jacking Up Side of Car |
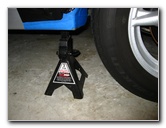 Jack Stand In Place |
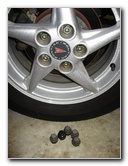
 Spinning Off Lug Nuts (19mm) |
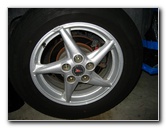
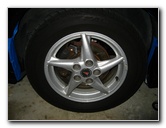
 Wheel Lug Nuts Removed |
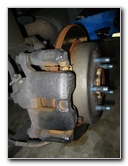
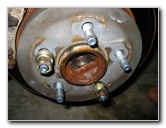
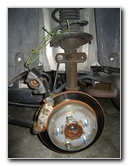
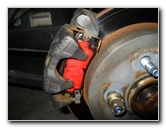
 Wheel Hub, Rotor, Caliper |
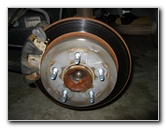
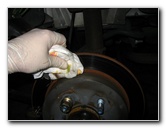
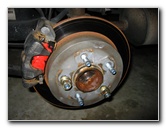
| I
quickly spun off the loose lug nuts with a 19mm socket and removed the wheel
to reveal the wheel hub, brake rotor and brake caliper.
I put two of the lug nuts back on the hub to hold the rotor firmly in place. |
||
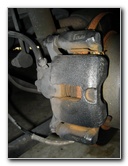
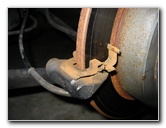
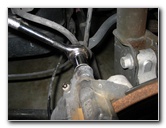
 Brake Caliper |
 Brake Fluid Line & Bleeder |
 Rubber Cap On Bleeder |
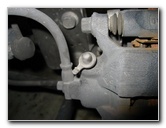
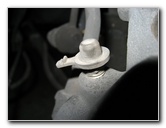
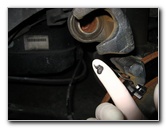
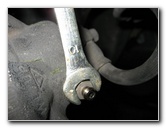
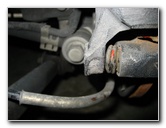
| In the
three pictures above, you'll see the location of the brake fluid bleeder
nipple with a rubber cap on top.
The brake lines should be bled anywhere from once a year to once every few years depending on how much you drive. If you'd like to go ahead and do this, please visit my Pontiac Grand Prix Brake Line Bleeding Guide. |
||
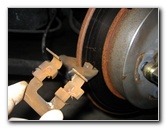
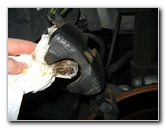
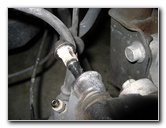
 Brake Fluid Bleeder Valve |
 2 Lug Nuts To Hold Rotor |
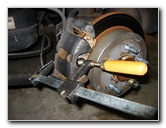 Separate Pads From Caliper |
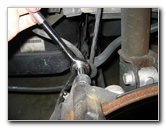
| Since
these old brake pads have been pressed against the caliper for over 90,000
miles, I had to use a carpenter's C clamp to pop the old pads away from the
caliper.
Make sure that the far side of the C clamp isn't pressing against anything sensitive like a brake line fitting. |
||
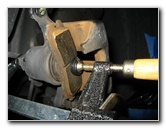
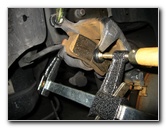
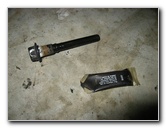
 Use Clamp On Old Pads |
 Old Pad Free From Caliper |
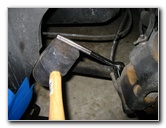 Rubber Mallet Loosening Bolt |
| To
access the brake pads, I loosened the top caliper bolt with a 14 mm socket
and completely removed the lower bolt.
I initially had some trouble getting the bolts to budge. With the help of a rubber mallet and heat from a butane lighter, I was eventually able to get them spinning. It also helps to just tap the caliper and the caliper bolt with the rubber mallet to loosen any sediment or Loctite threadlocker that may be preventing the bolt from rotating.
|
||
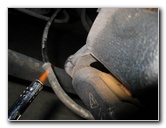 Heating Caliper Knuckle |
 Bottom Caliper Bolt Removed |
 Loosen Top Caliper Bolt |
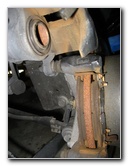
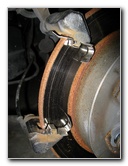
| With
the upper bolt loosened and the lower bolt removed, I swung the brake
caliper upwards and secured it to the suspension spring with some twine.
The caliper is heavy and the first piece of old twine snapped, so I used a second piece as a back up. Make sure that the rubber brake line does not become twisted, pinched or stressed in any way. |
||
 Swing Caliper Up & Secure |
 Two Old Calipers On Rotor |
 Brake Caliper Piston |
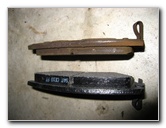
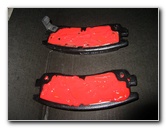
| Now
that the old brake pads are exposed, I wiggled them off the rotor.
Don't throw them away just yet, they'll be needed for the next step. In the comparison picture below, you'll see that the old pads probably still have a few thousands miles of life left in them. I recommend buying the Wagner ThermoQuiet PD698 rear brake pads since they have excellent reviews on Amazon. I also like how they don't require any backing plates, shims or disc brake quiet gel due to the built in insulators. |
||
|
|
||
 Remove Old Brake Pads |
 New Pad Compared To Old |
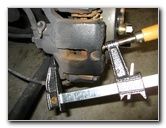
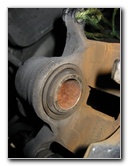
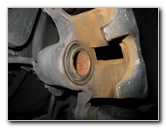
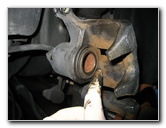
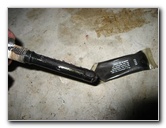
 Compress Piston With Clamp |
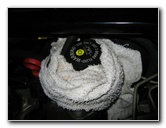
| The
next step is to compress the brake caliper piston until it is flush with the
rubber boot.
First open the cap on the master brake cylinder reservoir and place a towel around it. When the caliper piston is compressed, brake fluid will be pushed into the brake lines and back into the master cylinder. If you haven't already, remove some old fluid from the master cylinder to prevent it from overflowing. |
||
 Slowly & Gently Compress |
 Open Cylinder, Wrap In Towel |
 Still Compressing Piston |
| I very
slowly compressed the brake caliper piston to avoid building up excessive
pressure or damaging the brake lines.
While I waited for the piston to gradually sink back into the caliper, I turned my attention to the old metal pad abutment clips. |
||
 Piston Flush With Rubber |
 CRC Disc Brake Quiet |
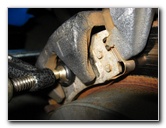
 Old Metal Pad Abutment Clip |
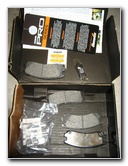
| The Satisfied Ceramic brake pads came with new "anti-rattle" or "pad abutment clips". I removed the old clips and installed the new ones in their place. | ||
 Remove Pad Abutment Clip |
 New Pad "Anti-Rattle" Clip |
 |
| The CRC
Brake Quiet gel requires about 10 minutes to dry until it is tacky.
I put on latex gloves to apply it since the label warns that it is a known carcinogen (cancer causing agent). I spread a generous layer of the CRC Disc Brake Quiet across the metal piece on the back of the new brake pad.
|
||
 New Rear Brake Pads |
 CRC Brake Quiet Applied |
 Brake Cleaner Spray |
| While I
waited for the CRC Brake Quiet to dry, I sprayed some brake parts cleaner on
the brake rotors and wiped them down with a paper towel.
I also sprayed some cleaner on the brake caliper and the piston. |
||
 Cleaning Front of Rotor |
 Cleaning Rear of Rotor |
 Cleaning Brake Caliper |
 High Pressure Moly Grease |
 Grease On Latex Glove |
 Lubricating Piston & Caliper |
| The new
Satisfied Ceramic Brake Pads came with a small tube of high pressure
synthetic brake caliper
grease.
I used this grease to lubricate the inside surfaces of the brake caliper, and the piston. |
||
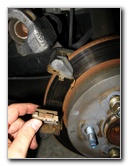
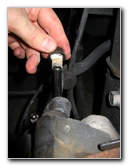
 Checking Bleeder Nipple |
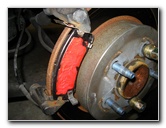 New Brake Pads On Rotor |
 Two New Pads On Rotor |
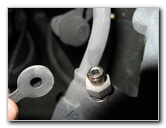
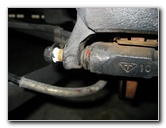
| I
planned on later bleeding the brake lines, so I checked the bleeder nipple
to see if it could be easily opened with a 10mm wrench.
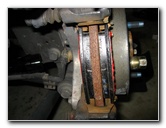
The CRC Brake Quiet was finally tacky after about 15 minutes. I had trouble getting the new brake pads on the rotor with the new "anti-rattle" pad abutment clips. Instead of fighting them, I re-installed the old clips which seemed to be in good shape. I wore another pair of latex gloves to place the pads on the rotor to prevent getting any of the carcinogenic brake quiet on my hands. Then I cut the twine holding up the caliper and lowered it down over the new brake pads on the rotor. If the caliper won't easily go down on the new brake pads, the caliper piston may need to be compressed some more. Make sure that the wear or "squeal" bar is located on the outside of the rotor and at the bottom. |
||
 Greasing Caliper Bolt |
 Lowering Caliper On Pads |
 Lining Up Rubber Dust Boot |
| The
lower caliper bolt still had some grease left on it from the factory, but
it's a good idea to coat it with some new grease.
I used the high pressure moly grease that came with the Satisfied brake pads to coat the caliper bolt with some fresh lubrication. Well lubricated caliper bolts (a.k.a. "pins") will slide easily which keeps the brakes from dragging or getting stuck. |
||
 Inserting Lower Caliper Bolt |
 Tightening Lower Caliper Bolt |
 Loosening Upper Caliper Bolt |
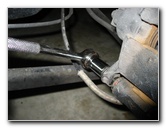
| I
re-inserted the greased up lower caliper bolt and tightened it with a 14 mm
socket and ratcheting wrench.
Then I removed the upper caliper bolt, applied some moly grease to it, and re-inserted it. Torque the caliper bolts down to 63 ft/lbs. |
||
 Removing Upper Bolt |
 Greasing Upper Caliper Bolt |
 Inserting Upper Caliper Bolt |
| If you
don't plan on bleeding the brake lines, double check the 10mm bleeder nipple
and the two caliper bolts to make sure they are tight.
This side is done. Repeat the above steps to replace the rear brake pads on the other side of the car. |
||
 Tightening Upper Caliper Bolt |
 Pad Installation Complete |
 3.8 Liter Supercharged V6 |
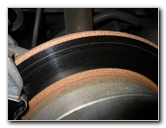
| My car
has been driven mostly on the highway, so I didn't bother to have my rotors
turned or replaced.
If you do a lot of stop and go driving, you may want to take off your rotors and have them "turned" or "cut" at an automotive service shop. Another sign indicating that you may need to have your rotors replaced or turned is if the car shakes or vibrates when the brakes are applied. |
||
 Brake Fluid Reservoir |
 Adding Brake Fluid |
 Closing Master Cylinder Cap |
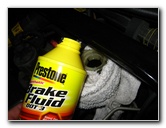
| If you
don't plan on bleeding the brake lines, you can just top off the master
brake cylinder with some fresh fluid to near the "Max" line and twist on the
cylinder's cap.
To flush the fluid, visit my Pontiac Grand Prix Brake Line Bleeding Guide. The procedure for the front wheels is very similar, but I created another specific page with those instructions. Click on the following link for my Pontiac Grand Prix Front Brake Pads Replacement Guide. To finish this job just replace the wheel, tighten the 5 lug nuts to 100 ft/lbs, and replace the plastic lug nut caps. It would be best to use a torque wrench. I then moved on to the front pads. If you're only replacing the rear pads, take the car for a test drive. Start by pumping the brakes to seat the pads against the rotors. To "break in" or "bed-in" the new pads, you'll need to make a series of near-stops from about 30-40 MPH down to about 5-10 MPH. Allow about 30 seconds in between near-stops to allow the rotors and pads to cool down. Satisfied recommends repeating this procedure about 10 to 20 times to properly mate the new pads to the rotor surface. The manufacturer also advises that you not tow or haul heavy loads and to avoid panic stops if possible in the first 300 KM (about 200 miles). |
||
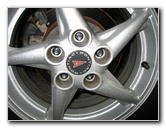
 Replace Wheel & Lug Nuts |
 Replace Plastic Lug Nut Caps |
 Ready To Roll & Stop! |
|
For more, visit the following links: Grand Prix Front Brake Pads Replacement Guide, Grand Prix Brake Line Bleeding Guide, Pontiac Grand Prix Engine Oil Change, Grand Prix Power Steering Fluid Maintenance Guide, GM Power Window Motor & Regulator Replacement Guide, Grand Prix "TCS OFF" SES & ABS Warning Light Troubleshooting Guide, GM 3800 Series II Engine PCV Valve Replacement Guide, Pontiac Grand Prix Alternator Replacement Guide, GM Wheel Bearing Hub Assembly Replacement Guide, Eaton M90 Supercharger Oil Change Guide, and the K&N Air Filter Cleaning Guide.
For more, check out all of my Pontiac
Grand Prix DIY Repair & Maintenance Guides. |
||
| If you found this guide to be helpful,
please consider making a small donation by clicking on the PayPal.com
"Donate" button located to the right of this paragraph. Thank you!
(Note: I am not a registered charity. Donations are not tax deductible.) |