
Chevrolet
Impala Headlight Bulbs Replacement Guide
How to replace the low beam, high beam &
turn signal light bulbs in the headlights of a 2006-2011 GM Chevy Impala.

By Paul B. Michaels Author & Photographer Auto Mechanic Since 1989 |
||
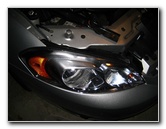
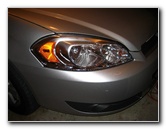 GM Impala Headlight |
 Open Hood |
 |
| This
automotive how-to guide was specifically written to assist owners of
the 9th generation (2006, 2007, 2008, 2009, 2010 & 2011) Chevrolet Impala in replacing the
low beam, high beam or parking / turn signal light bulbs in the
headlight assemblies. Owners of other similar W-Body or "W" platform vehicles such as the Lumina, Monte Carlo, Buick Regal, Century, LaCrosse, Allure, Pontiac Grand Prix, and Oldsmobile Cutlass Supreme may also find this guide to be useful. The headlight assembly of a Chevy Impala contains the following bulbs: Low Beam bulb part # H11, High Beam bulb part # H9, and Turn Signal / Parking Light bulb part # 3157NA. To remove the headlight assembly and access the bulbs, you'll need a 7mm socket and a 1/4" drive ratchet. A pair of needle nose pliers should also be able to remove the one 7mm screw. |
||
|
|
||
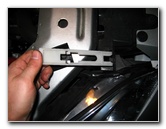
 7 MM Screw |
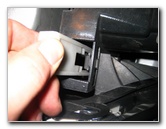
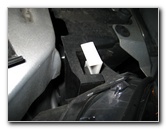 White Plastic Clip |
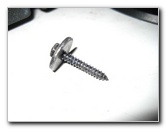 7mm Screw Removed |
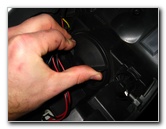
| The first step is
to open the hood of the car and move to the side of the vehicle with the
burnt out headlight bulb.
Locate the 7mm screw near the outer edge of the car and the white plastic retaining clip near the center of the vehicle. Remove the one screw with the 7mm socket and ratcheting wrench or needle nose pliers. |
||
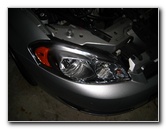
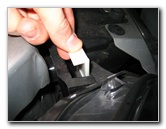 Pull Out Plastic Clip |
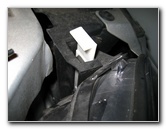
 Retainer Clip Removed |
 Pull Out Headlight Assembly |
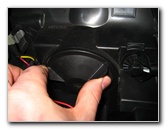
| Next, pull the
white plastic retaining clip on the headlight assembly straight up and out.
Now that the 7mm screw and plastic clip have been removed, you should be able to pull the headlight assembly away from the front of the car. Gently turn the assembly upside down and rest it on top of the lip of the bumper. You may want to put a towel underneath the headlight to protect the paint on the bumper. |
||
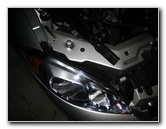
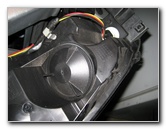
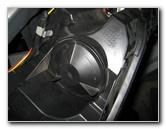
 Middle Bulb - Low Beam |
 Twist Off Dust Cover |
 1/4 Turn Counter Clockwise |
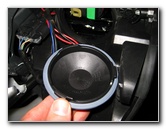
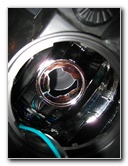
| The low beam
bulb is located in the middle of the headlight assembly.
To access it, remove the large round dust cover seal by twisting it 1/4 turn counter clockwise. |
||
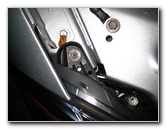
 Dust Cover Removed |
 # H11 Low Beam Bulb |
 1/4 Turn Counter Clockwise |
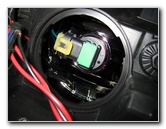
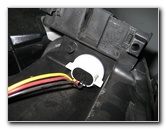
| To remove the
low beam bulb, grasp the base of it and rotate it 1/4 turn counter
clockwise.
Pull it straight out from the headlight assembly and pry up on the yellow retaining clip to separate it from the power connector. |
||
 Remove Low Beam Bulb |
 Pry Up Retaining Clip |
 Disconnect Power Wire |
| Push the power
connector plug onto a new # H11 low beam bulb and insert the bulb into the
headlight assembly.
Turn it 1/4 turn clockwise to secure it. |
||
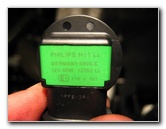 Philips H11 LL Bulb |
 |
 1/4 Turn Clockwise |
| Replace the black plastic dust cover over the low beam bulb and rotate it 1/4 turn clockwise to secure it in place. | ||
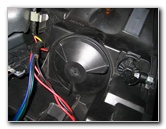 Replace Dust Cover |
 High Beam Dust Cover |
 1/4 Turn Counter Clockwise |
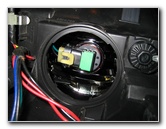
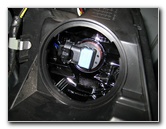
| The high beam
bulb is located under the other round black plastic dust cover located
closest to the center line of the car.
Remove it by twisting it 1/4 turn counter clockwise and pull it off the back of the headlight assembly. |
||
 1/4 Turn Counter Clockwise |
 H9 High Beam Bulb |
 Pry Off Retaining Clip |
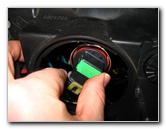
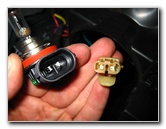
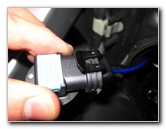
| To remove the high
beam bulb, rotate it 1/4 turn counter clockwise and pull it out of the
headlight assembly.
Pry up the power connector's black plastic retaining clip to separate it from the base of the high beam bulb. |
||
|
|
||
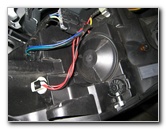
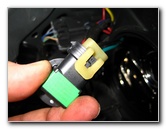
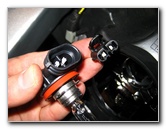 Pull Off Power Connector |
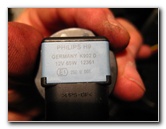 Philips H9 12V 65W Bulb |
 Insert Bulb, 1/4 Turn Clockwise |
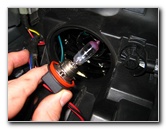
| Push the power
connector on to the base of a new # H9
high beam bulb and insert it into the
headlight assembly.
Rotate it 1/4 turn clockwise to secure it. Replace the round black plastic dust cover and rotate it 1/4 turn clockwise to lock it in place. |
||
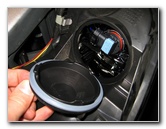
 Replace Dust Cover |
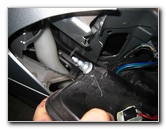
 Turn Signal / Parking Bulb |
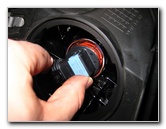
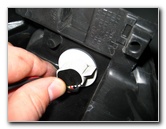 1/4 Turn Counter Clockwise |
| The turn signal or
"parking light" bulb is located on the outer edge of the headlight assembly
and has a white base.
Turn the base 1/4 turn counter clockwise and pull it straight out. |
||
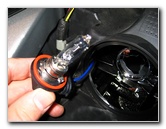
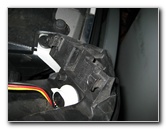
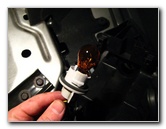 Remove Socket & Bulb |
 Pull Out Amber Bulb |
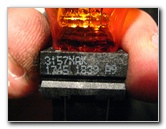 Bulb # 3157NA |
| To remove the amber
colored turn signal bulb from the socket, pull it straight out.
If it doesn't come out easily, try wiggling it while pulling it out. Replace it with a new # 3157NA bulb by pushing it straight down into the socket. The Sylvania website lists the # 4157NA bulb as the proper replacement for the 2010 Chevy Impala. Both the 3157NA & 4157NA should work. Insert the new bulb and socket back into the headlight assembly and rotate it 1/4 turn clockwise to secure it in place. |
||
 Replace Turn Signal Bulb |
 Headlight Metal Spike |
 Headlight Tab |
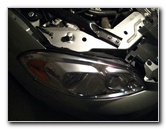
| Once you have
replaced the burnt out bulb(s), re-install the headlight assembly by lining
up the metal point on the outer edge and the black plastic tab on the other
side with the corresponding points on the car.
Push them into place. |
||
 Re-Install Headlight Assembly |
 |
 |
| To finish the job,
insert and tighten the 7mm screw and re-insert the white plastic retaining
clip.
Check that all the headlight bulbs work by turning on the lights, turn signals, and high beams. |
||
 Re-Insert Plastic Clip |
 |
 Tighten 7mm Screw |
| Please check out
all of my
GM
Chevrolet Impala DIY Repair & Maintenance Guides.
For more of my
related automotive maintenance or repair guides, click on the following
links:
Chevy Impala Front Brake Pads Replacement Guide,
Chevy Impala Cabin Air Filter Replacement Guide,
Chevy Impala Tail Light Bulbs Replacement
Guide,
Chevy Impala
3.5L V6 Engine Oil Change Guide,
Chevy Impala Key Fob
Remote Control Battery Replacement Guide,
How To Reattach Car Door Molding,
GM Power Window Door Tracks Lubrication Guide,
GM Power Window Switch Contacts Cleaning Guide,
GM Key Fob Battery Replacement Guide,
GM A/C Condensate Drain Elbow Cleaning Guide,
Meguiar's Headlight Restoration Buffing Kit Guide,
Zaino Show Car Polish Review,
GM Power Steering Whine Repair Guide,
GM Brake Line Fluid Bleeding Guide,
GM Rear Brake Pads Replacement Guide,
Tail Light & Headlight Condensation Repair Guide,
GM Power Window Motor & Regulator Replacement Guide,
GM Wheel Bearing Hub Assembly Replacement Guide,
Falken Ziex ZE-512 Tire Review,
K&N Air Filter Cleaning Guide, and
Fuzion ZRi Tire Review. |
||
| If you found this guide to be helpful,
please consider making a small donation by clicking on the PayPal.com
"Donate" button located to the right of this paragraph. Thank you!
(Note: I am not a registered charity. Donations are not tax deductible.) |