
Honda Accord
Key Fob Remote Battery Replacement Guide
How to fix a Honda Accord key fob remote
control by cleaning the protective dielectric grease from the battery or
replacing it.

By Paul B. Michaels Author & Photographer Auto Mechanic Since 1989 |
||
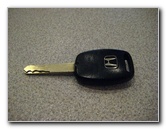
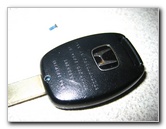
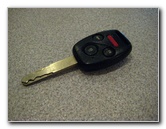 2009 Honda Accord Key Fob |
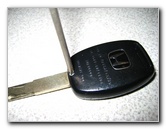
 One Tiny Screw On Back |
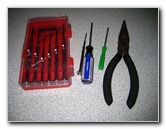 Screwdrivers & Pliers |
| This
automotive "how-to" guide was specifically written to assist owners
of the 8th generation (2008, 2009, 2010, 2011 & 2012) Honda Accord in fixing an intermittently working
key fob remote control. Owners of other Honda or Acura vehicles such as the Civic, CR-V, Element, Fit, Insight, Odyssey, Pilot, Ridgeline, RL, TL, TSX, ZDX, MDX, and RDX may also find this guide to be useful. We recently noticed that the combination car key and keyless entry remote control for our 2009 Honda Accord was not working well. It seemed like the signal was weak and the little red LED indicator light on the remote was alternating between being dimly lit or not lit at all. I read online that the problem lies with a bit of dielectric grease placed on the battery by the manufacturer that can sometimes prevent it from making good contact with the remote's circuit board. A replacement coin cell (A.K.A. "button" or "watch") battery is part number CR1616 from various manufacturers such as Panasonic, Energizer, Duracell and Sony. |
||
 Removing Fob Screw |
 Blue Loctite On Screw |
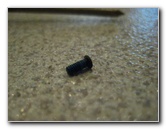 Tiny Screw Removed |
| Since the original
batteries in the key fob remote controls of my nearly ten year old 2001
Pontiac Grand Prix still work, I figured that I would try opening up the
Honda Accord remote and cleaning the battery before bothering to buy a new
one. To remove the one screw on the back of the Honda Accord key fob, you'll need a tiny # 0 Philips head screwdriver. A jeweler's screwdriver kit should contain one of these. The screw is secured in the remote with blue "medium strength" Loctite Threadlocker adhesive. If you attempt to remove the screw with a screwdriver that doesn't fit perfectly, you run the risk of stripping the screw. If necessary, you may need to secure the key fob and apply plenty of downward pressure and torque to remove the screw without stripping it. |
||
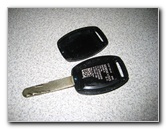 Remove Back Cover |
 Pop Out Remote Control |
 Pry Retaining Clip |
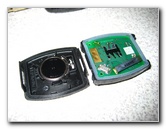
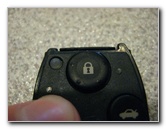
| Once the screw is
removed, pop off the back cover and remove the square remote control unit.
To open the remote control unit, gently pry apart the black plastic retaining clip located above the large "Lock" key on the remote. |
||
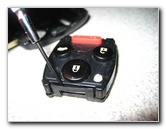
 Remote Opened |
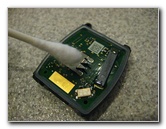
 Electrical Contacts |
 "-" Side of Battery |
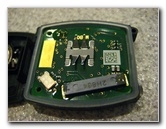
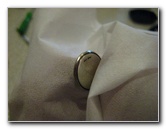
| Open the remote
control unit and separate the two pieces.
You should immediately notice some clear dielectric grease on the "-" terminal of the Panasonic CR1616 3V watch battery. Pry out the battery with a small flathead screwdriver. |
||
|
|
||
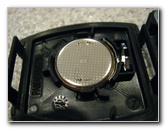
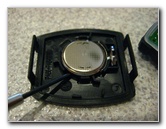 Pry Out Coin Battery |
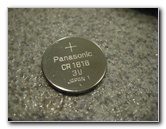 Panasonic CR 1616 3V |
 Cleaning Grease Off |
| To help establish a
better connection between the battery and the remote control circuit board,
wipe off the grease from the battery with a tissue or a Q-Tip.
Then very gently clean the four raised metal contact prongs with another cotton Q-Tip. Once everything is clean, re-assemble the square remote control unit and test it. If the small red LED light illuminates brightly when you press the buttons, you should be good to go. If the light is still dim or doesn't light up at all, double check the polarity of the battery or replace the battery with a new CR1616 3V coin battery. |
||
 Q-Tip Cleaning Contacts |
 Testing Key Fob Remote |
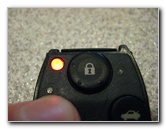 It Works Again! |
| For more of my
automotive how-to guides and product review, click on the following links:
Honda Accord Engine Oil Change Guide,
Honda
Accord Headlight Bulbs Replacement Guide,
Honda
Accord PCV Valve Replacement Guide,
Honda Accord Tail Light Bulbs
Replacement Guide,
Honda Accord Cabin Air Filter Replacement Guide,
Honda Accord Overhead Map Light Bulbs Replacement Guide,
Honda Accord Front Brake Pads Replacement Guide,
Honda
Accord Rear Brake Pads Replacement Guide,
2009 Honda Accord Review,
WeatherTech FloorLiner Car Mats Review,
Meguiar's Headlight Restoration Kit Review,
Zaino Bros Show Car Polish Review,
Corroded Car Battery Terminal Replacement Guide,
Falken Ziex ZE-512 Tire Review,
K&N Air Filter Cleaning Guide, and
Fuzion ZRi Tire Review. For more,
check out my other
2008-2012
Honda Accord Repair & Maintenance Guides. |
||
| If you found this guide to be helpful,
please consider making a small donation by clicking on the PayPal.com
"Donate" button located to the right of this paragraph. Thank you!
(Note: I am not a registered charity. Donations are not tax deductible.) |