
Honda Accord
Rear Brake Pads Replacement Guide
How to guide for replacing the rear brake pads on a 2008 to 2012
Honda Accord sedan with pictures &
instructions.

|
2008-2010 Honda Accord Rear Brake Pads Replacement & Premature Wear Repair
Guide |
||
| Please note, I am not a professional mechanic. This guide is for illustrative purposes only. If you have any doubts, do not proceed and consult with your dealership. I assume no responsibility for damage to your vehicle, persons, property or pets. | ||
 Loosen Lug Nuts |
 Raise Car - Remove Lug Nuts |
 Rear Brake Caliper & Rotor |
| This
automotive "how-to" guide was specifically written to assist owners
of the eighth generation (2008, 2009, 2010, 2011 & 2012) Honda Accord in
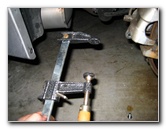
changing the rear brake pads. Owners of other Honda or Acura vehicles such as the Civic, CR-V, CR-Z, Element, Fit, Insight, Odyssey, Pilot, ILX, TLX, RLX, RDX, MDX and Ridgeline may also find this guide to be useful. The tools needed to complete this procedure include a lug nut wrench, a floor jack, jack stands, a 12mm socket, a 3/8' drive ratchet, a Lisle 28600 disc brake piston tool and a tube of brake caliper grease. A few compatible replacement brake pads with their part numbers include: Akebono ACT1336, Wagner QC1451, Honda 43022-TA0-A40, ACDelco 17D1336CH, Bosch BP1336, Raybestos ATD1336C and KFE KFE1451-104. |
||
|
|
||
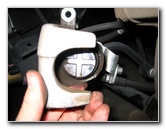
 Accord Rear Caliper |
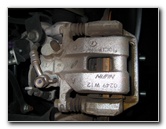 Nissin - Brake Line |
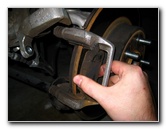
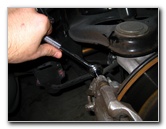
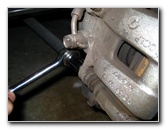 Loosen 12mm Bolt |
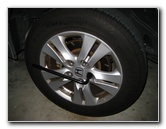
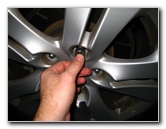
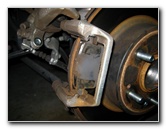
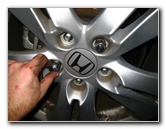
| The first step is
to loosen the five lug nut bolts while the vehicle is still on the ground
with the lug nut wrench located on top of the spare tire in the trunk.
Then raise the rear of the car with a floor jack and secure it with jack stands. Once the car is off the ground, remove the five lug nuts and take off the wheel to expose the rear brake caliper and rotor. |
||
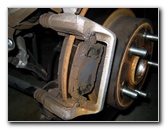
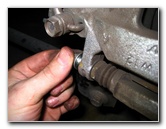
 Remove Lower Bolt |
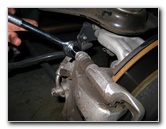 Remove Upper Caliper Bolt |
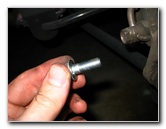
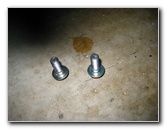 Two 12mm Caliper Bolts |
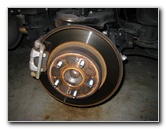
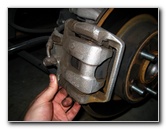
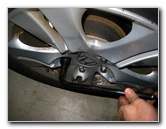
| For the
Honda Accord Front Brake Pads, I was able to just remove the lower
caliper bolt and swing it upwards to access the pads.
To be able to remove the rear pads, you have to remove both the 12mm rear caliper bolts and pull the caliper off the rotor. |
||
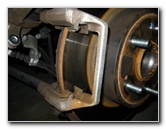
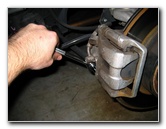
 Rear Caliper Piston |
 "F" Clamp |
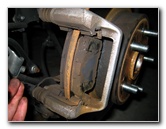 Rear Brake Pads Exposed |
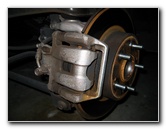
| Edit
To see how to properly turn back "screw in type" rear brake caliper pistons on the 2008, 2009, or 2010 Honda Accord, using a "Disc Brake Piston Tool" please visit my new guide at the link below. 2008-2010 Honda Accord Rear Brake Pads Replacement & Premature Wear Repair Guide In order for the caliper to fit over the new thicker brake pads, you'll need to compress the caliper piston with a "C" clamp. Be sure to first remove the cap on the brake fluid reservoir to allow the brake fluid to freely flow back to the reservoir when you compress the piston. Take your time compressing the piston and check the level in the reservoir to make sure it doesn't overflow. Don't compress the piston any more than necessary for the caliper to fit over the new brake pads. To prevent the brake caliper from just swinging freely and damaging the rubber brake line, secure it to the suspension spring with some twine or rope. |
||
 |
 Removing Outer Pad |
 Brake Pad Removed |
| To remove the rear
brake pads, just wiggle them out from the caliper body while keeping the
metal anti-rattle clips in place.
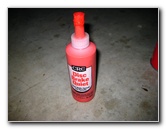
It's best to clean off the brake caliper and rotor with some brake parts cleaner spray before installing the new pads. If your vehicle is prone to squealing sounds or squeaking noises while braking, you may want to add a product such as the CRC Disc Brake Quiet gel to the back of the new brake pads where they come in contact with the caliper. |
||
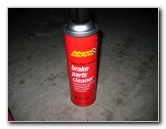 Brake Parts Cleaner Spray |
 CRC Disc Brake Quiet |
 Pad Re-Installed |
| Apply some
brake caliper grease to the pad
abutment or "anti-rattle" clips where they will come in contact with the new
brake pads. Once everything is cleaned and wiped down, install the new brake pads by sliding them back into place against the rotor in between the anti-rattle clips. Be sure to remove the wear indicator bar from the old interior brake pad on to the top of the new interior pad. |
||
 Replace Brake Caliper |
 Re-Insert Upper Bolt |
 Re-Insert Lower Caliper Bolt |
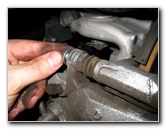
| With the new pads
securely in place and flush against the rotor, put the brake caliper back
down on top of the pads.
Check that the brake caliper pins line up correctly and then insert the two 12mm bolts to secure the caliper. Tighten down the caliper bolts to just past hand tight or about 20 ft-lbs of torque. Check your vehicle's service manual for the proper torque settings. |
||
 Tighten Upper 12mm Bolt |
 Tighten Lower 12mm Bolt |
 Brake Fluid Reservoir |
| Double check the
caliper bolts and brake lines for any problems or leaks and then replace the
rear wheel and lug nuts.
Also check the level of the brake fluid in the reservoir. Add or remove fluid until it reaches the "Max" line. It's a good idea to check the brake fluid level again when the engine is hot after your next long drive. |
||
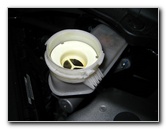 Remove Cap - Check Level |
 Put On Lug Nuts |
 Tighten Lug Nuts |
| If your brake pedal
felt soft or "mushy" or the brakes were prone to "fading" before you changed
the pads, this is a good time to bleed the brake lines to remove impurities
or moisture in the brake fluid.
Check out my Brake Line Bleeding Guide for more info on that subject. If your car shakes or vibrates while braking, you should either have the brake rotors "turned" at a repair shop or just replace them with new rotors depending on your vehicle's mileage. Replace the rear wheel and spin on the 5 lug nuts in the clockwise direction. Slightly tighten the lug nuts in a criss cross or "star" pattern. Lower the car from the jack stands by using the floor jack. Tighten the lug nuts to about 1/4 turn past hand tight or about 80 ft-lbs of torque. It would be best to use a torque wrench. To break in the new brake pads, just drive normally for a few hundred miles to allow the brake pad material to evenly transfer onto the rotors. This is called "mating" and helps the brake pad and rotor to stop the car smoothly and quietly. Try to avoid hard braking or
"panic stops" during the break-in period to prevent "brake pad glazing"
which can result in noisy brakes that don't stop well. |
||
| For more of my
automotive how-to guides and product review, click on the following links:
Honda Accord Engine Oil Change Guide,
Honda Accord Front Brake Pads Replacement Guide,
Honda
Accord Headlight Bulbs Replacement Guide,
Honda
Accord PCV Valve Replacement Guide,
Honda Accord Tail Light Bulbs
Replacement Guide,
Honda Accord Cabin Air Filter Replacement Guide,
Honda Accord Overhead Map Light Bulbs Replacement Guide,
Honda Accord Key Fob Battery Replacement Guide,
2009 Honda Accord Review,
WeatherTech FloorLiner Car Mats Review,
Meguiar's Headlight Restoration Kit Review,
Zaino Bros Show Car Polish Review,
Corroded Car Battery Terminal Replacement Guide,
Falken Ziex ZE-512 Tire Review,
K&N Air Filter Cleaning Guide, and
Fuzion ZRi Tire Review. For more, check out my other 2008-2012 Honda Accord Repair & Maintenance Guides.
2008-2010 Honda Accord Rear Brake Pads Replacement & Premature Wear Repair
Guide |
||
| If you found this guide to be helpful,
please consider making a small donation by clicking on the PayPal.com
"Donate" button located to the right of this paragraph. Thank you!
(Note: I am not a registered charity. Donations are not tax deductible.) |