
GM Chevrolet
Malibu Headlight Bulbs Replacement Guide
How to replace the low beam, high beam, &
turn signal light bulbs in the headlight assembly of a 2004-2007 Chevy Malibu.

|
|
||
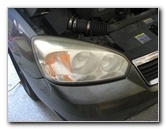 Chevy Malibu Headlight |
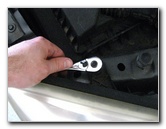
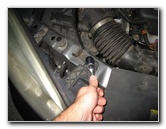 Remove 10mm Bolt |
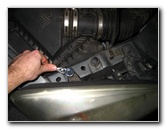 Remove 2nd 10mm Bolt |
| This
automotive "how-to" guide was specifically written to assist owners
of the 6th generation 2004, 2005, 2006 & 2007 Chevrolet Malibu and the 2008
Chevy Malibu Classic in replacing the low beam, high beam and turn
signal light bulbs in the headlight assembly. Owners of other similar General Motors vehicles based on the Epsilon platform such as the Pontiac G6, Chevy Impala, Monte Carlo, Saturn Aura, Saab 9-3, Buick Regal, Park Avenue, Riviera, Opel Vectra, Cadillac BLS, Opel GTC, and Holden Commodore may also find this guide to be useful. The light bulbs and their respective part numbers inside the headlight assembly of a 2004-2007 Malibu are as follows: Low Beam Light # H11, High Beam Light # H9, and Parking / Turn Signal light bulb # 3157. A 10mm socket and a 1/4" or 3/8" drive ratchet are the only tools needed to replace any of the headlight bulbs. |
||
|
|
||
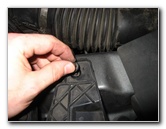
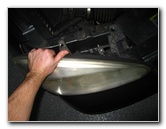 Pull Off Headlight Assembly |
 Turn Headlight Down |
 Twist Off Cap |
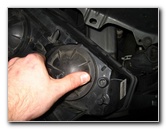
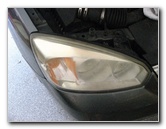
| The first step is
to open the hood of the vehicle and move to the headlight with the burnt out
bulb.
Use a 10mm socket and ratcheting wrench or a crescent wrench to remove the two 10mm bolts that hold the black plastic headlight brackets in place. Then turn the headlight assembly face down on the lip of the Malibu's bumper. I'd recommend placing a towel or rag underneath the assembly to protect the paint on the bumper and the headlight lens. |
||
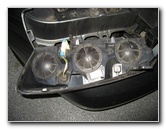
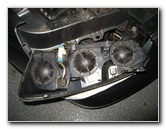
 Remove Bulb Cover |
 1/4 Turn Counter Clockwise |
 Pull Out High Beam Bulb |
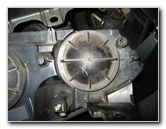
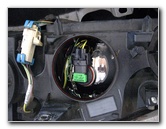
| The
H9 high beam
bulb is located under the black plastic cover nearest to the center line of
the vehicle.
The H11 low beam bulb is in the middle of the assembly and the turn signal / parking light bulb # 3157 is located closest to the outer edge of the car. |
||
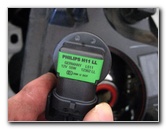
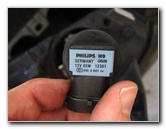 Philips H9 12V 65W |
 Replace H9 Bulb |
 1/4 Turn Clockwise |
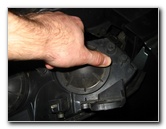
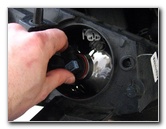
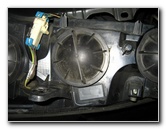
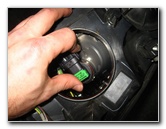
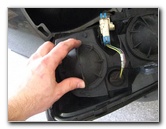
| To remove any of the black plastic covers protecting the bulbs, rotate the cover 1/4 turn counter clockwise and lift them straight off the rear of the headlight assembly. | ||
 Replace Bulb Cover |
 1/4 Turn Clockwise |
 Low Beam Bulb Cover |
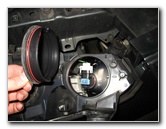
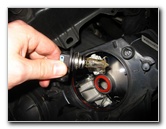
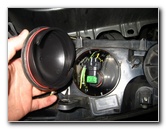
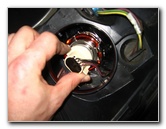
| To remove the high
beam or low beam bulbs, rotate the base of them 1/4 turn counter clockwise
and pull them straight out of the headlight assembly.
It's very important that you do not touch the glass part of the new H9 or H11 halogen headlight bulbs since the grease or oils on your fingers can cause them to burn out prematurely or even shatter. If you do touch the glass part of the bulbs, wipe them clean with some alcohol moistened tissues or paper towels. |
||
 1/4 Turn Counter Clockwise |
 Turn Base Counter Clockwise |
 Pull Out Low Beam Bulb |
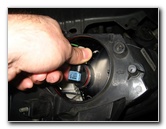
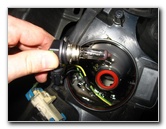
| To separate the low
beam or high beam bulbs from their power connectors, use your fingers or a
small flathead screwdriver to pry up the plastic retaining clip.
Pull the power connector straight off from the base of the bulb and replace it with a new one taking care to not touch the glass part of the bulb. Be sure to push the power connector onto the new bulb until it clicks into place and verify that the plastic retaining clip is over the small plastic bump on the bulb's base. |
||
|
|
||
 Philips H11 LL Low Beam |
 Replace Bulb |
 1/4 Turn Clockwise |
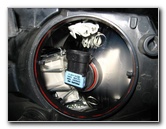
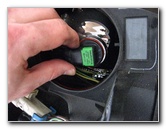
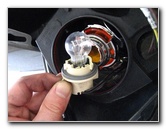
| To install the new
low beam or high beam headlight bulb, insert the bulb into the headlight
assembly until it lies flush with the silver ring of the opening and rotate
it 1/4 turn clockwise to lock it into place.
The bulb will only fit into the headlight assembly one way. You may need to rotate the base of the bulb back and forth until it drops down into the assembly. It helps to examine the positioning of the cutouts in the headlight assembly and the metal notches on the bulb. |
||
 Replace Bulb Cover |
 Remove Signal Cover |
 1/4 Turn Counter Clockwise |
| The turn signal or
"parking light" bulb is located at the outer edge of the headlight assembly
near the side of the vehicle.
Remove the dust cover by turning it counter clockwise and pulling it straight off. To remove the bulb, rotate the base 1/4 turn counter clockwise and pull it straight out of the headlight assembly. To remove the bulb from the socket, pull it straight out. If it won't come out easily, try gently wiggling the bulb while pulling it straight out. |
||
 Pull Bulb Straight Out |
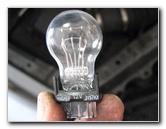 Wagner 12V 3157KX |
 Replace Parking/Signal Bulb |
| Replace the burnt
out turn signal light bulb with a new # 3157 bulb by pushing it straight
into the socket.
Since the 3157 is a standard incandescent bulb, it's not as important to avoid touching the glass with your fingers. It's good practice to wipe off the bulb after installing it anyway. |
||
 Replace Signal Bulb Cover |
 Replace Headlight Assembly |
 Insert 10mm Bolts |
| Once you're done
replacing the burnt out bulb or bulbs in the headlight assembly of your
Chevy Malibu, push the headlight assembly back into place.
Line up the holes on the black plastic headlight brackets with the two holes on the engine bay of the vehicle. Insert the two 10mm headlight bolts and begin threading them by hand. Then tighten the bolts with the 10mm socket and ratcheting wrench to just past hand tight. Don't over tighten the bolts or you risk cracking the plastic headlight brackets. |
||
 Tighten 10mm Headlight Bolts |
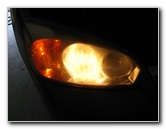 Testing Low Beam & Signal |
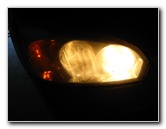 Test High Beam Bulb |
| Test the new
headlight bulb or bulbs by turning on the lights and activating the turn
signals or hazard signals.
Be sure to test the high beam bulbs by pushing
forward on the control stalk to turn them on or pulling it backwards to
flash the high beam lights. |
||
| For more of my
automotive reviews and how-to guides, click on the following links:
GM Chevy Malibu Oil Change Guide,
GM Chevy Malibu Tail Light Bulbs Replacement Guide,
GM Chevy Malibu Brake Lights Stay On When Brake Pedal Up Repair Guide,
Chevrolet Key Fob Battery Replacement Guide,
GM Chevrolet Sedan Front Brake Pads Replacement Guide,
GM Chevy Sedan Headlight Bulbs Replacement Guide,
How To Reattach Car Door Molding,
Meguiars Headlight Restoration Buffing Kit Review,
GM Power Window Tracks Lubrication Guide,
GM Power Window Switch Cleaning Guide,
GM Key Fob Remote Control Battery Replacement Guide,
GM HVAC Rubber Elbow Condensate Drain Cleaning Guide,
Zaino Show Car Polish Review,
WeatherTech FloorLiner Review,
GM Brake Line Fluid Bleeding Guide,
GM Tail Light Condensation Repair Guide,
Sunforce Solar Battery Maintainer Review,
Corroded Car Battery Terminal Replacement Guide,
GM Power Window Motor & Regulator Replacement Guide,
GM Wheel Hub Bearing Replacement Guide,
Falken Ziex ZE-512 Tire Review,
Buffing Hazy Car Headlights Guide,
K&N Air Filter Cleaning Guide, and
Fuzion ZRi Tire Review.
|
||
| If you found this guide to be helpful,
please consider making a small donation by clicking on the PayPal.com
"Donate" button located to the right of this paragraph. Thank you!
(Note: I am not a registered charity. Donations are not tax deductible.) |