
Chevrolet
Impala Tail Light Bulbs Replacement Guide
How to replace the brake light, turn
signal and reverse light bulbs in a 9th generation 2006-2011 GM Chevy Impala.

 Impala Tail Light Assembly |
 Inside Trunk |
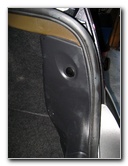
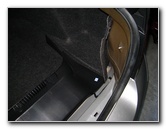
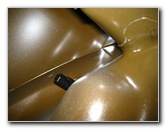
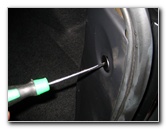 Remove Plastic Screw |
| This
automotive how-to guide was specifically written to assist owners of
the 9th generation (2006, 2007, 2008, 2009, 2010 & 2011) Chevrolet Impala in replacing the
brake light, reverse light and turn signal / parking light bulbs in
the tail light assemblies. Owners of other similar W-Body or "W" platform vehicles such as the Lumina, Monte Carlo, Buick Regal, Century, LaCrosse, Allure, Pontiac Grand Prix, and Oldsmobile Cutlass Supreme may also find this guide to be useful. The tail light assembly of a Chevy Impala contains the following bulbs with their respective part numbers: brake / stop light bulb # 3057, reverse / back up light bulb # 921, and tail light bulb # 168. Some Impala models are equipped with a rear side marker bulb which is part # 194. The only tool needed to replace any of the tail light bulbs is a flathead screwdriver. |
||
|
|
||
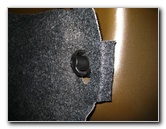
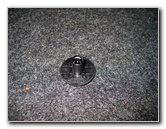 Plastic Screw Removed |
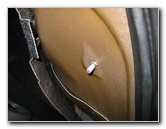 Pull Back Plastic Cover |
 Trunk Trim Piece Removed |
| The first step is
to open the trunk and move to the side of the car with the burnt out light
bulb.
Remove the round black plastic screw on the plastic trunk trim piece with a flathead screwdriver and pull it back. To make things easier, you can also remove the other plastic screw on the opposite side and pull off the entire black plastic trunk trim piece. |
||
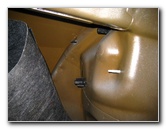
 Remove Thumb Screw |
 Peel Back Trunk Carpet |
 2nd Thumb Screw Removed |
| Then unscrew the
first black plastic thumb screw that has hooks for holding up the mesh cargo
net. Turn it counter clockwise until it comes off and pull away the grey trunk carpet. Behind the trunk carpeting, you'll find the other two black plastic thumb screws that need to be removed. |
||
 3rd Thumb Screw |
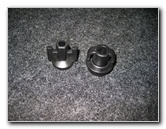
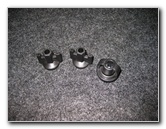 Thumb Screws Removed |
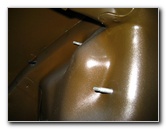 |
| Once all three
thumb screws are removed, you can gently pull the tail light assembly off
the rear of the car.
If it doesn't come off easily, try tapping on the exposed bodies of the screws in the trunk while wiggling the tail light assembly. |
||
|
|
||
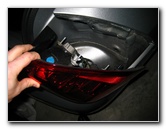 Pull Off Tail Light |
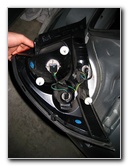 Turn Upside Down |
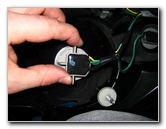 1/4 Turn Counter Clockwise |
| Turn the tail light
assembly upside down and rest it on the bumper. It would be a good idea to
put a towel underneath the tail light to protect the paint on the bumper.
To remove any of the three (or four) tail light bulbs, grasp the base of the bulb and rotate it 1/4 turn counter clockwise. Pull the socket and light bulb straight out of the assembly. |
||
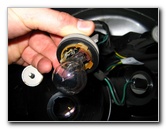 Pull Bulb Straight Out |
 Push New Bulb In |
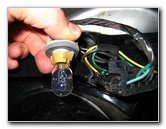 1/4 Turn Clockwise To Secure |
| To remove any of
the bulbs from their sockets, pull them straight out.
If they don't come out easily, try gently wiggling the bulb while pulling upwards on it. Replace the burnt out bulb by pushing a new one into the socket. Insert the new bulb and socket back into the tail light assembly. The brake and rear turn signal is part number 3057. The reverse light bulb is part number 921. If you have a side marker light, the bulb part number is 194. Rotate it 1/4 turn clockwise to secure it in the assembly. Test the
new bulbs by having someone step on the brakes, activate the turn signals
and put the car in reverse. |
||
| For more of my
related automotive maintenance or repair guides, click on the following
links:
Chevy Impala Front Brake Pads Replacement Guide,
Chevy Impala Cabin Air Filter Replacement Guide,
Chevy Impala Key Fob
Remote Control Battery Replacement Guide,
Chevy Impala
3.5L V6 Engine Oil Change Guide,
Chevy Impala
Headlight Bulbs Replacement Guide,
How To Reattach Car Door Molding,
GM Power Window Door Tracks Lubrication Guide,
GM Power Window Switch Contacts Cleaning Guide,
GM Key Fob Battery Replacement Guide,
GM A/C Condensate Drain Elbow Cleaning Guide,
Meguiar's Headlight Restoration Buffing Kit Guide,
Zaino Show Car Polish Review,
GM Power Steering Whine Repair Guide,
GM Brake Line Fluid Bleeding Guide,
GM Rear Brake Pads Replacement Guide,
Tail Light & Headlight Condensation Repair Guide,
GM Power Window Motor & Regulator Replacement Guide,
GM Wheel Bearing Hub Assembly Replacement Guide,
Falken Ziex ZE-512 Tire Review,
K&N Air Filter Cleaning Guide, and
Fuzion ZRi Tire Review. |
||
| If you found this guide to be helpful,
please consider making a small donation by clicking on the PayPal.com
"Donate" button located to the right of this paragraph. Thank you!
(Note: I am not a registered charity. Donations are not tax deductible.) |