
Dodge Caravan Tail Light
Bulbs Replacement Guide
Pictures illustrated instructions for how
to replace the brake light or rear turn signal bulbs on a 2001 to 2007 Dodge
Caravan.

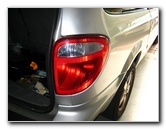 2006 Dodge Caravan |
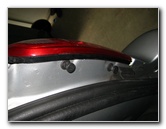
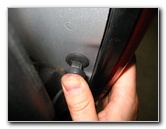
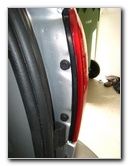 Two Plastic Pop Rivets |
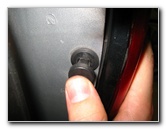
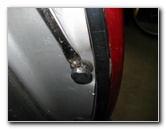 Prying Up Pop Rivet |
| This
automotive "how to" instruction guide was specifically written to
assist owners of the 2006 Dodge Caravan minivan in replacing a burnt
out brake light bulb and/or rear turn signal (parking) light bulb. Owners of other fourth generation Dodge Caravans, Grand Caravans, Chrysler Voyager or Chrysler Town & Country minivans from 2001, 2002, 2003, 2004, 2005, 2006 and 2007 may also find the guide to be useful. The 2001-2007 Dodge Caravan uses # 3057 Sylvania light bulbs for both the brake lights and the rear turn signals or "parking" lights. Part number 3057 light bulbs are available from any auto parts store and are made by a variety of manufacturers. If you would like to have brighter tail lights, install some compatible replacement 3057 LED bulbs. The only tool needed to replace the brake light or rear turn signal bulb is a small flathead screwdriver. |
||
|
|
||
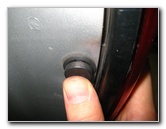
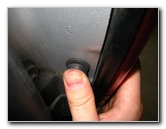
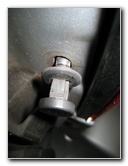 Plastic Pop Rivet Loosened |
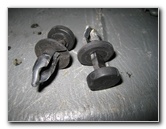 Two Black Plastic Rivets |
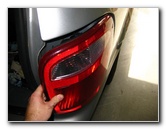
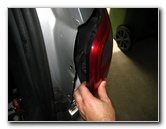 Removing Tail Light |
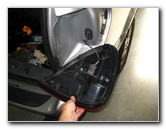
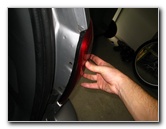
| The first step to
replacing the brake light or rear turn signal (parking) light bulbs on a
2001-2007 Dodge Caravan is to open the trunk lid.
Then locate the two black plastic pop rivets on the side of the tail light assembly. You'll need something flat and thin such as a flathead screwdriver to pop them out. A car key, coin or fingernail might do if you have nothing else. |
||
 |
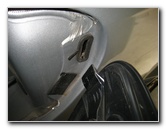 Tail Light Assembly Tab |
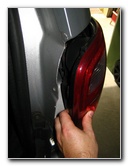
 Tail Light Housing Removed |
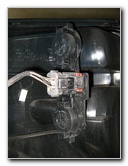
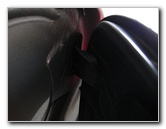
| Hold on to the tail
light assembly after you remove the two black plastic pop rivets to prevent
the housing from falling and damaging the van's paint or side body panel.
When removing the tail light assembly, you'll notice a black plastic tab that fits into a slot on the side of the Caravan. |
||
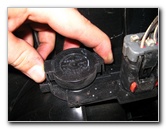
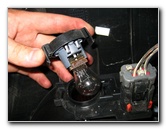
 Light Bulb Covers |
 |
 Squeeze Two Sides Together |
| The two # 3057 light bulbs (brake & parking/signal) can be removed by squeezing the two plastic tabs (one on either side) together until the socket comes loose from the tail light housing. | ||
 Squeeze & Lift |
 Light Bulb Socket & Bulb |
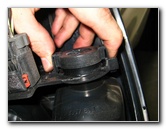 |
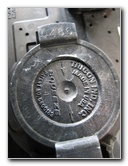
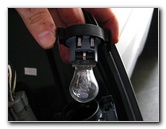
| Once you have the
burnt out bulb and socket removed from the assembly, gently wiggle the bulb
straight out of the socket.
Replace it with a new Sylvania 3057 LL bulb or a # 3057 bulb from any other manufacturer. If you plan on keeping your Caravan / Voyager / Town & Country for a long time, choose a "LL" "Long Life" light bulb or a compatible 3057 LED bulb. |
||
 |
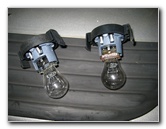 Brake Light & Turn Signal |
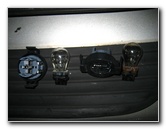 Two # 3057 Bulbs & Sockets |
 Tail Light Housing Tab & Slot |
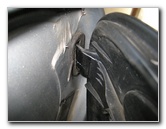 Insert Tab Into Slot On Body |
 Re-Install Tail Light Assembly |
| To re-install the
tail light assembly, first line up the black plastic tab on the housing with
the slot on the Caravan's metal body panel.
Then hold the tail light housing against the van's side while re-inserting the black plastic pop rivets. |
||
 Hold Assembly Tight |
 Insert Two Pop Rivets |
 Push In Plastic Pop Rivet |
| While still holding
the tail light assembly against the car, push the upper part of the plastic
pop rivet into the body of the minivan until it snaps into place.
Check that the tail light assembly is secure before letting go of it. Finally, test the new brake light or parking/signal light bulb by turning on the hazard lights and having someone step on the brakes. |
||
 |
 |
 |
| For more of my automotive how-to
guides and reviews, click on the following links:
Dodge Caravan
Headlight Bulbs
Replacement Guide,
Dodge Caravan Third Brake Light Bulb Replacement Guide,
Dodge Caravan Overhead Map Light Bulb Replacement Guide,
Zaino Bros Show Car Polish Review,
WeatherTech FloorLiner Mats Review,
Headlight & Tail Light Condensation Solution Guide,
Sunforce Solar Battery Maintainer Review,
Corroded Car Battery Terminal Replacement Guide,
Garmin Nuvi 260W GPS Review,
Car Interior Carpet Replacement Guide,
Falken Ziex ZE-512 Tire Review,
Buffing Faded Headlights,
K&N Engine Air Filter Cleaning Guide,
Fuzion ZRi Tire Review, &
HP iPAQ HX-4700 PDA Garmin GPS. |
||
| If you found this guide to be helpful,
please consider making a small donation by clicking on the PayPal.com
"Donate" button located to the right of this paragraph. Thank you!
(Note: I am not a registered charity. Donations are not tax deductible.) |