
Acer Aspire
11.6" Laptop ZIF Hard Drive Replacement Guide
How to remove & replace the HDD with ZIF
connector cable in an Acer Aspire AS1410 / AS1810 / AS1430 / AS1830 11.6"
laptop.

By Paul B. Michaels Author & Photographer Auto Mechanic Since 1989 |
||
| Please note, I am
not a professional computer technician. This guide is for illustrative
purposes only and I assume no responsibility for damage to your computer,
other property, persons or pets. Proceed with caution at your own risk.
|
||
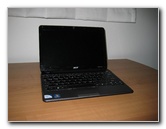 Acer Aspire AS1410-2285 |
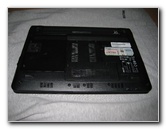 Upside Down On Shirt |
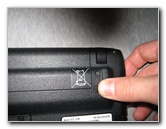 Unlock Battery |
| This
"how-to" guide was specifically written to assist owners of the Acer
Aspire AS1410 11.6" laptop computer in removing the 2.5" notebook
hard drive with ZIF (zero insertion force) cable connector and
replacing it with a new one. Owners of other similar laptops such as the Acer Aspire AS1430, AS1830, AS1551, AS1810 or netbooks such as the Acer Aspire One A0721, AOD255, and AO532 may also find this guide to be helpful. My Acer Aspire AS1410-2285 is equipped with a Western Digital Scorpio Blue 160 GB WD1600BEVT SATA 2.5" 5400 RPM hard drive. I'd like to upgrade it to a larger 250 or 500 GB hard drive spinning at a faster speed of 7200 RPM or an SSD. The only tools needed for this procedure are a small Phillips head screwdriver and a small flathead screwdriver. Be sure to discharge any static electricity by touching metal before touching the computer or wear an anti-static wrist strap. |
||
|
|
||
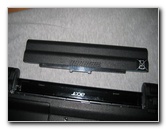 Battery Removed |
 Unscrew Hard Drive Cover |
 Lift Up HDD Cover |
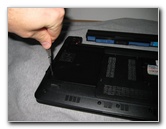
| The first step is
to power down your laptop or netbook and flip it over on to a soft towel or
t-shirt to protect the screen lid from scratches.
Then unlock the battery, slide the release lever and remove it from the computer. To remove the black plastic panel that covers the hard drive bay, unscrew the two small Phillips head screws. The screws will stay attached to the cover, so don't try to forcibly pull them out. |
||
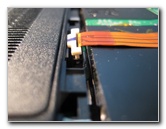
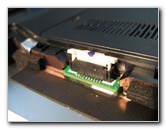
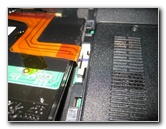
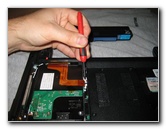
 HD ZIF Connector Cable |
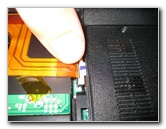
 Carefully Lift Up ZIF Lock |
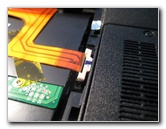
 Lift Other Side ZIF Lever |
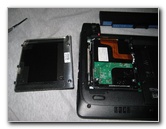
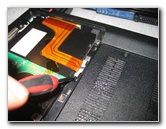
| Under the black
plastic panel, you'll find the 2.5" (or 1.8") hard drive with a gold/orange
ZIF PATA cable taped to the back of the disk.
Use a tiny flathead jewelers screwdriver to very carefully lift up each side of the white plastic ZIF lock next to the side of the hard drive that connects to the motherboard.
|
||
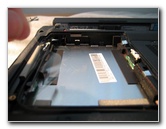
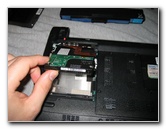
 ZIF Lock Released |
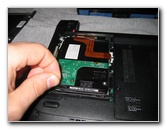 Lift Clear Plastic Tab |
 Carefully Remove HDD |
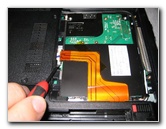
| Once the ZIF lock
has been lifted up on both sides and the connector tab is free, you can
gently lift up the hard drive by pulling upwards on the clear plastic tab
located at the bottom end of the drive. If you have trouble removing the hard drive because of the connector at the top of the drive on the SATA plug, it can help to pull the drive towards you with a screwdriver in one of the screw holes to help get the SATA adapter clear of the lip on the hard drive bay. |
||
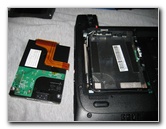
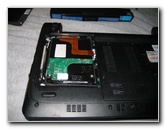
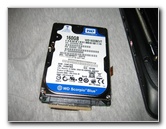 Scorpio Blue 160 GB |
 Motherboard ZIF Socket |
 2.5 Inch Hard Drive Bay |
| I haven't decided
which replacement hard drive I'd like to order yet, so the next steps are
not pictured here on this guide.
The ZIF connector cable on the old hard drive will need to be very carefully removed in order to be re-installed on the new 2.5" SATA or SATA II HDD. Both SATA and SATA II drives should all be backwards and forwards compatible with any SATA equipped motherboard. In the worst case scenario, you may just need to set a jumper on a SATA II HDD to get it to work properly with an older SATA I motherboard. First slowly lift up the thin piece of clear tape that holds the ZIF ribbon cable to the back of the hard drive. Then gently wiggle out the black plastic rectangular SATA plug that is attached to the other end of the ZIF cable at the top edge of the drive. |
||
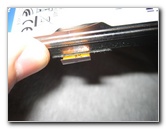 HD ZIF Connector Tab |
 Remove Replace ZIF Cable |
 Slide In Hard Drive |
| Try to avoid
bending, scratching, or stressing the ZIF ribbon cable since they are known
to be fragile and exact replacement cables must be ordered from Acer
directly.
Push the SATA female plug on the ZIF cable on to the top edge of the new hard drive. It only goes in one way, so look carefully at the hard drive and the plug before pushing it into place. Then gently tape down the loose ZIF ribbon cable down against the rear of the new hard drive. Make sure that the other curved end of the ZIF cable does not get folded over against the HDD. It should be resting near the side of the drive as shown in the pictures above. |
||
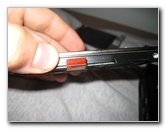
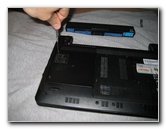
 Line Up ZIF Connector |
 Gently Insert ZIF Ribbon |
 Push Down ZIF Lock |
| Slide in the new
hard drive into the HDD bay with the ZIF cable facing up towards you and the
exposed end of the cable pointing down towards the white plastic ZIF lock.
Carefully line up the small exposed end of the ZIF cable with the ZIF socket on the computer and make sure it slides in completely. It should slide in very easily, hence the name "Zero Insertion Force" connector. |
||
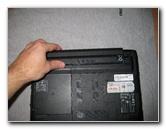
 Ensure Lock Is Secure |
 Hard Drive Installed |
 Replace Hard Drive Cover |
| With one finger
gently holding down the ZIF cable tab into the ZIF socket, push down on the
white plastic lock.
Press down a little on each side of the lock with the small flathead screwdriver until it won't go down any further. Then replace the black plastic hard drive cover and tighten the two attached Phillips head screws. |
||
 Tighten 2 Phillips Screws |
 Replace Battery |
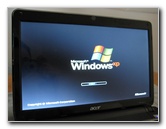 Windows Booting Up |
| Slide the
computer's battery back into the battery bay and lock it in place.
If all goes well, your computer should boot up normally. I don't have my new SSD hard drive yet, so that's why Windows XP is loading. If you installed a new hard drive, you will need to have your operating system loaded on a USB thumb drive. Be sure to enable booting up from a USB drive in the computer's BIOS settings. If you're computer won't boot up, double
check that the ZIF connector and SATA adapter plug are securely in place.
You may also need to set a jumper on your new drive. Check the HDD's user
manual for the appropiate settings. For more of my related technology
guides or reviews, click on the following links:
Acer Aspire AS1410 RAM Upgrade Guide,
Toshiba Satellite A505 Hard Drive & RAM Upgrade Guide,
Canon Underwater Camera Case Review,
Samsung Captivate i897 Smartphone Review,
Toshiba A505 i7 Laptop Review,
Laptop To HDTV HDMI Via CAT6 Extender Guide,
Acer Aspire AS1410-2285 11.6" Laptop Review,
Sony Pocket Reader Review, and
Toshiba A105 RAM & Hard Drive Upgrade Guide. |
||
| If you found this guide to be helpful,
please consider making a small donation by clicking on the PayPal.com
"Donate" button located to the right of this paragraph. Thank you!
(Note: I am not a registered charity. Donations are not tax deductible.) |