
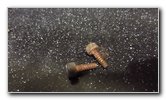
GE Oven Hot
Surface Igniter Cleaning Guide
How to solve a slow ignition problem by
cleaning the HSI hot surface igniter in a GE convection natural gas oven.

By Paul B. Michaels Author & Photographer Auto Mechanic Since 1989 |
||
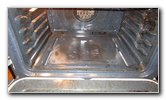
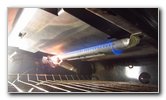
 GE Natural Gas Oven |
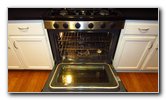 Open Oven Door |
 Metal "Floor" Panel |
| If your GE natural
gas convection oven has been very slow to turn on, heat up, baking takes
longer than usual and you hear a "pop", "boom" or "whoosh" mini explosion
sound when the flames finally ignite, you probably need to clean or possibly
replace the hot surface igniter (also known as the "HSI" ignitor, glow bar
or glow coil). These instructions for accessing and cleaning the hot surface igniter in a GE (General Electric) natural gas oven should also be helpful for owners of other brands such as Whirlpool, KitchenAid, Jenn-Air, Bosch, Frigidaire, Kenmore, LG, Samsung and Maytag. The tools that may be needed to complete this procedure include a flat head screwdriver, a toothbrush, baking soda, a paper clip or a needle and a wet/dry shop vacuum. If after thoroughly cleaning the HSI, your oven still doesn't turn on or takes too long to ignite, you may need to purchase a new GE Hot Surface Igniter unit.
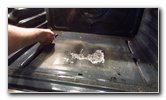
For safety, the first two steps are to unplug the appliance from the electrical outlet and turn off the natural gas valve. Make sure the oven and range / stove top are completely cool before continuing with the next steps. Open the oven door and remove the wire racks. Set the racks aside in a safe place. |
||
|
|
||
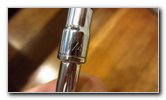
 Left Thumb Screw |
 Right Thumb Screw |
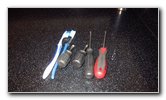 Toothbrush, Screwdriver |
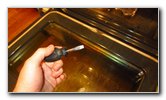
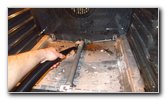
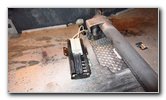
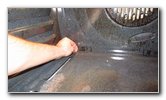
| Locate the two thumb screws on the rear edge of the oven's "floor" panel. | ||
 Stubby Flat Head |
 Loosen Left Screw |
 1st Screw Removed |
| If the screws are too rusted to turn with your fingers, use a flat head screwdriver to loosen them. | ||
 Remove Right Screw |
 Two Screws Removed |
 Lift Up Rear of Panel |
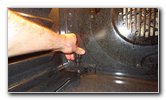
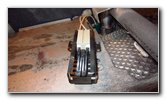
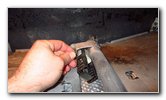
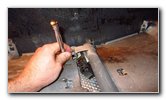
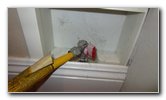
| Set the two screws
aside in a safe place. Carefully lift the rear edge of the bottom cover and slide it back to remove it from under the bracket at the front of the oven. |
||
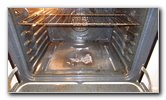
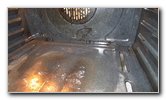
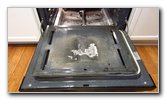 Bottom Cover Removed |
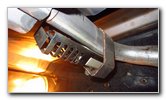
 Oven Bake Burner Bar |
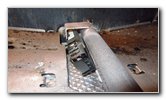 HSI On Left of Bar |
| Set the bottom
cover aside in a safe place. Once the access panel has been removed, you'll be able to see the natural gas burner bar and the flat coil hot surface igniter inside a mounting bracket with a cage. |
||
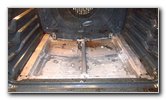
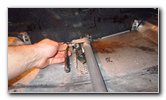
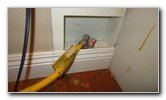
 Two Small Bolts |
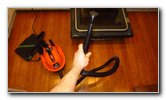 Wet/Dry Shop Vacuum |
 Clean Out Dust & Debris |
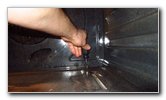
| Use the wet/dry
shop vacuum to thoroughly clean out any dust, debris or food particles from
the bottom of the oven. You could probably just clean the HSI with the toothbrush with out detaching the mounting bracket and removing it from the cage. I chose instead to detach the bracket and remove the HSI from the cage for a thorough cleaning. |
||
 1/4" Socket & Ratchet |
 Loosen Counterclockwise |
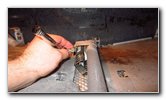 Remove Second Bolt |
| Use a 1/4" socket with a 1/4" drive ratchet to loosen the two bolts on the left side of the mounting bracket. | ||
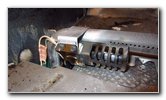
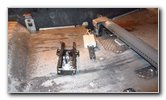
 Screws & Bolts |
 Pull Off Igniter |
 Dirty Old Flat Glow Bar |
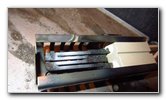
| Set the two small
bolts aside in a safe place. Gently pull the mounting bracket and cage off the side of the burner bar. The old ceramic heated surface igniter might be fragile, especially after many years of use. So try to be gentle with the assembly. Most modern HSI units are made of silicon nitride ceramic and are very durable but you should still take care to not break them. The older silicon carbide ceramic HSI units are much more fragile. |
||
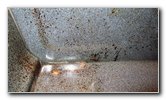
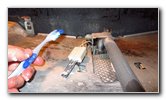
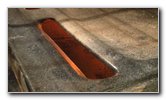
 Baking Soda & Water |
 Close Up of Glow Coil |
 Check / Clear Gas Holes |
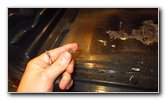
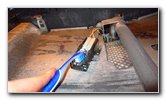
| The best way to
gently clean the HSI is by using a toothbrush along with a paste of baking
soda and water. An optional step is to use a paper clip or a needle to make sure the small holes in the side of the baking burner bar are free of debris or rust so that the natural gas will flow out properly towards the HSI. |
||
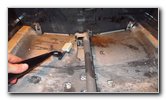
 Clean With Toothbrush |
 Clean Off Baking Soda |
 Remove From Bracket |
| Gently and
carefully scrub the flat heating element with the toothbrush and the baking
soda paste. If your HSI is very dirty or coated with rust, consider carefully removing it from the metal mounting bracket and cage. |
||
 Clean Both Sides |
 Vacuum & Brushing |
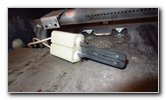 Cleaned HSI Like New |
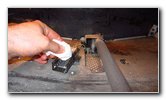
| After some gentle
brushing with the baking soda paste, the heating element should look like
new.
Gently wipe off any baking soda paste with a paper towel. I also chose to use the small round brush attachment on my wet/dry shop vacuum to clean off the baking soda paste. |
||
 Re-Attach Housing |
 Spin In Two Bolts |
 Tighten Bolts Clockwise |
| Carefully slide the
HSI back into the metal housing. Line up the bracket with the mounting bar on the burner and spin in the two bolts. Tighten the two bolts in the clockwise direction with the 1/4" socket and the ratchet until they are snug. |
||
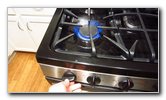
 Gas Hose & Valve |
 Turn Off Natural Gas |
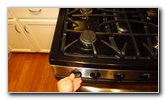 Verify Gas Is OFF |
| Double check that
the natural gas valve has been turned to the "OFF" position. To verify that the gas valve is off, try turning on one of the stove top burners. |
||
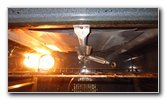
 Turn On Oven - Bake |
 Igniter Glowing Bright Red |
 Lower In Bottom Panel |
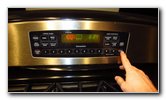
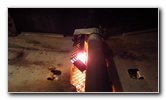
| To test the freshly
cleaned HSI, turn on the oven by pressing "Bake" and choose a common
temperature setting such as 350 degrees Fahrenheit.
Keep the oven door open and watch the hot surface igniter's heating element. I chose to turn off the overhead lights in the kitchen to make it easier to see when the HSI started to glow red hot. The HSI should start glowing a bright red color within 15 to 30 seconds. If the HSI doesn't start glowing bright red, you may need to purchase a new GE Hot Surface Igniter unit. To replace the HSI, you'll have to slide the oven out away from the countertop and remove a panel on the back of the appliance to access the electrical connector for the HSI. After you've verified that the HSI seems to be working properly, lower in the bottom cover. |
||
 Spin In Thumb Screws |
 Floor Cover Secured |
 Broiler Gas Bar - Top |
| Spin in the two
thumb screws in the clockwise direction until they are snug. You may need to use the flat head screwdriver to properly tighten the screws. |
||
 Broil Hot Surface Igniter |
 Turn On Gas Valve |
 Check Gas Is ON |
| You may want to
also clean the HSI for the broiler at the top of the oven. Replace the oven racks and close the oven door. Plug in the appliance to the electrical outlet and turn on the gas valve. Verify that the natural gas is on by turning on one of the stove top burners. |
||
 Bake Gas Fire Flickering |
 Testing Broiler |
 GE Oven Fixed! |
| Then test the
baking and broiler functions. I found that I could now see the hot surface igniter glow bright red and the baking burner bar would ignite with flames much faster than before I cleaned the HSI. I now plan on cleaning both the baking and broiler HSI units in our GE convection oven at least every five years to keep them working properly. Please check out all of my
Home DIY Repair &
Maintenance Guides. |
||
| If you found this guide to be helpful,
please consider making a small donation by clicking on the PayPal.com
"Donate" button located to the right of this paragraph. Thank you!
(Note: I am not a registered charity. Donations are not tax deductible.) |