
Toshiba
Satellite A105 Laptop RAM & HDD Upgrade Guide
A pictures illustrated guide to upgrading
the RAM memory & SATA hard drive in a Toshiba Satellite A105 laptop computer.

|
This guide was specifically written to assist owners of the Toshiba Satellite A105 series of laptops in upgrading the RAM memory and internal Hard Disk Drive. Owners of other Toshiba laptops including the A205, A305, M115, A135, A215, A300, A355, L300, L305, L355, M105, M205, M300, M305, P105, P205, P305, S300, or U400 series may find this guide to be useful due to a similar body style. |
||
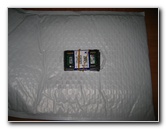
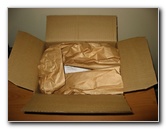 Package From Dell |
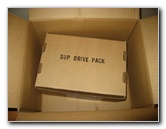 "SUP" Drive Pack Box |
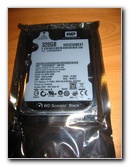
 Hard Drive # WD3200BEKT |
| I bought my
Toshiba Satellite A105-S4254 laptop computer back in October of
2006. It came equipped with an Intel Core Duo T2050 (1.6Ghz x 2)
processor, 1GB of 533Mhz RAM, and an 80GB 5400 RPM SATA hard drive. Almost three years later, this laptop still meets my computing needs. These include web surfing, emailing, picture processing, light video editing, website building, watching movies and a limited amount of gaming. The two bottlenecks in my recent workflow had been my laptop's lack of free hard drive space and the slowdowns occurring during heavy multitasking. I decided to purchase a larger hard drive and more RAM to get a few more years of useful life from this computer rather than buying a new one. |
||
|
|
||
 New Hard Drive In Foam |
 Western Digital 320GB |
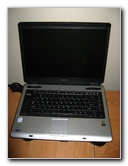 Toshiba Satellite A105 |
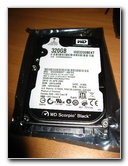
| After some
research, I purchased a Western Digital Scorpio Black 7400 RPM 320GB SATA
hard drive for about $80 from Dell.
The price was slightly better at NewEgg but I used some of my American Express Membership Rewards points to get a $50 Dell.com certificate. The hard drive cost me a total of about $30 after the AMEX credit was applied and they shipped it for free via FedEx 2 day. But now SSD drives are so inexpensive, I highly recommend you buy one of those instead to speed up your laptop. For the new RAM, I went directly to Kingston's website since I had read about others having problems with generic or other name brands of RAM in Toshiba Satellite laptops. I purchased two of the 2GB DDR2 PC2 5300 667Mhz (Kingston Model # KTT667D2/2G) sticks of RAM for a total of 4 gigabytes. I read that Windows XP can only see about 3-3.5 GB of RAM, but I ordered the 4GB anyway. I wanted to upgrade the laptop to it's maximum RAM amount to prepare for possibly upgrading to Windows Vista or Windows 7, which can utilize the full four gigabytes. The total cost was $64 with free UPS ground shipping. |
||
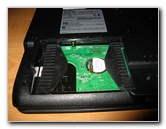
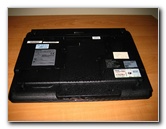
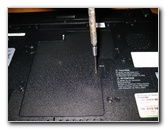
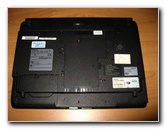 Underside of Laptop |
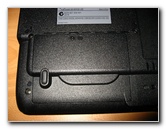 Hard Drive Cover |
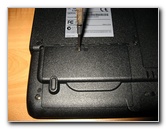 Unscrewing HDD Cover |
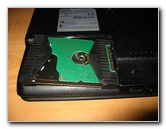
| I received the hard
drive first since it came via FedEx 2 Day service.
To install it, I had to flip over the laptop to access the hard drive cover on the underside of the computer. The cover is held in place by one small Phillips head screw. |
||
 Removing Old 80GB Drive |
 Taking Off Rubber Covers |
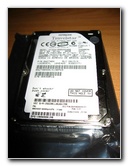
 Scorpio Black 7400RPM |
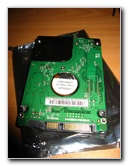
| If you live in a
climate prone to static electricity, be sure to discharge your self by
touching any large metal appliance or piece of furniture near you before
touching the hard drives.
To be extra safe, buy an
anti-static wrist band.
Once the cover was removed, I slid the old 80GB hard drive to the left to disconnect it and then lifted it out of the hard drive cavity. The HD is cushioned by two removable rubber end caps. |
||
 Underside New Hard Drive |
 Rubber Shock Absorbers |
 New Drive Installed |
|
|
||
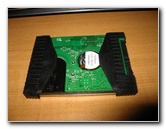
| Next, I removed the
new WD320GB hard drive from it's anti-static bag and placed the rubber
sleeves on both ends.
The new hard drive had the same physical dimensions as the old Hitachi Travelstar so it fit perfectly. As you can see in the pictures above, the hard drive goes in with the label facing the top of the laptop so that the SATA connectors line up with the plugs in the laptop's hard drive cavity. |
||
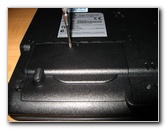 Re-installing Drive Cover |
 Old Hitachi Travelstar |
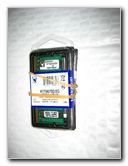 New Kingston RAM |
| I re-installed the
hard drive cover and put the old Hitachi 80GB 5400RPM into the anti-static
bag.
I plan on keeping the old hard drive so that if the new one fails in a few years, I'll be able to swap in the old drive and keep on working until a replacement arrives. The Dell "SUP" Drive Pack box makes a great storage container to keep an old HDD safe. |
||
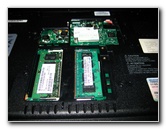
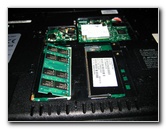
 Two 2GB 667Mhz RAM |
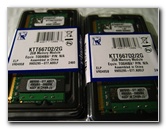 200 Pin DDR2 PC2 5300 |
 Bottom of A105-S4254 |
| A few days later, I
received the new 2GB RAM modules from Kingston via UPS Ground.
The RAM sticks can be accessed by removing a cover in the middle of the laptop's underside. It is also held in place by just one Phillips head screwdriver and a few plastic clips. |
||
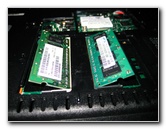
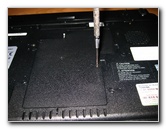
 Unscrewing RAM Cover |
 Old 512MB RAM Sticks |
 DDR2 PC2-4200 533Mhz |
| Don't forget to
discharge yourself of any static electricity before touching the RAM
modules.
They are very sensitive to electrostatic discharges. Under the plastic RAM cover, there were two 512MB modules of DDR2 PC4200 533Mhz RAM. |
||
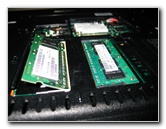
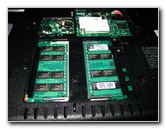
 Removing Old RAM |
 Old Samsung RAM Removed |
 Inserting New 2GB RAM |
| To remove the old
RAM, I gently pushed the spring-loaded retaining clips on either side of the
RAM modules away from it.
When both the metal & white plastic arms are moved away from the RAM, the module will raise up away from the laptop. The RAM sticks can be removed completely by pulling them straight away from the connector. To insert the new RAM, just reverse the procedure. If the computer won't start after replacing the RAM, try firmly re-seating the modules or swapping their positions. |
||
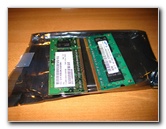
 4GB RAM Installed |
 Replacing RAM Cover |
 Before Results - 440 |
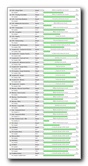
| I wanted to verify
the performance gains achieved by these upgrades so I installed the free 30
day free trial of PassMark Performance Test computer benchmarking software.
Before either upgrade, my computer scored a 440. Upgrading the RAM from 1GB of PC2-4200 533Mhz to 4GB of PC2-5300 667Mhz increased the score 27.7 points to 467.7. Upgrading the Hitachi Travelstar 80GB 5400RPM hard drive to the Western Digital 320GB 7200RPM Scorpio Black drive upped the PassMark score 86.1 points to 526.1. Both the new RAM and the new hard drive together raised the score 121.8 points to 561.8. Just by looking at the numbers, it seemed that the hard drive made a dramatic change in the Passmark score while the RAM barely made a dent. The increase in hard drive speed is very noticeable with faster boot times, program loading, video opening, and even internet downloads. But I plan on eventually upgrading it to an SSD drive since they are dropping in price. I didn't discern much of a performance increase with just the new RAM by itself. Where the increased amount of RAM really makes a difference is when I multi-task with many memory intensive programs running and dozens of Firefox browser windows open. In the past with only 1 GB of RAM, the laptop would make heavy use of the Windows XP Page File and slow down considerably. The system properties dialog box shows that WinXP SP3 sees 2.99 GB of total system memory. |
||
 New RAM Only - 467.7 |
 New HD Only - 526.1 |
 New RAM & HD - 561.8 |
| For more of my
related photo galleries, click on the following links:
Toshiba Satellite A105 Overheating Dust Removal Guide,
Toshiba Satellite A105-S4254 Review,
Acer Aspire One 10.1" Netbook Review,
Toshiba Satellite M115 Laptop Review,
Laptop CMOS Battery Replacement Guide, and
HP iPAQ HX4700 PDA GPS Navigation. |
||
| If you found this guide to be helpful,
please consider making a small donation by clicking on the PayPal.com
"Donate" button located to the right of this paragraph. Thank you!
(Note: I am not a registered charity. Donations are not tax deductible.) |