
Hunter
"Just Right" Digital A/C Thermostat Installation Guide
Instructions for replacing an analog mercury
thermostat with a Hunter 42999B digital air conditioner thermostat.

| This guide was
specifically written to assist owners of the Hunter "Just Right" 42999B A/C
thermostat in removing an old analog mercury thermostat and installing the
new Hunter digital unit in its place.
|
||
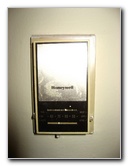 Old Honeywell Thermostat |
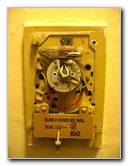 Honeywell Cover Removed |
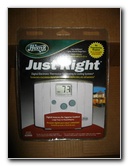 New Digital Thermostat |
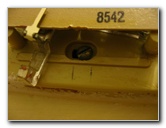
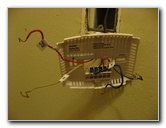
| The old
Honeywell brand analog mercury A/C thermostat pictured above had
become inaccurate after many years of use. To replace it, I purchased a Hunter brand "Just Right" 42999B digital electronic HVAC thermostat for about $28. Some of the features of this new air conditioner thermostat include a digitally accurate thermometer, a filter change indicator, soft touch buttons, and a large LCD screen. The Hunter "Just Right" (model 42999 & 42999B) thermostat is compatible with most 24 volt or 24 millivolt heating and air conditioning systems such as gas/electric/oil furnaces, boilers, air conditioners, and hot water heaters. I started the installation process by popping off the plastic cover on the Honeywell thermostat and removing the two screws holding the interior part of the unit to the wall. |
||
|
|
||
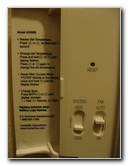
 Hunter Just Right 42999 |
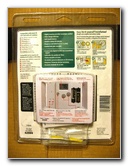
 Abbreviated Instructions |
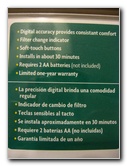 Features & Benefits |
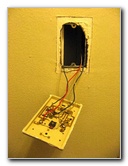
| With the old
Honeywell thermostat hanging from the wall by its wires, I continued to the
next step by labeling the wires with the stickers included by Hunter.
The letters "G", "W", "Y", "Rh", and "Rc" were stamped on the rear of the old Honeywell thermostat which made it easy to affix the corresponding stickers on the correct wires. |
||
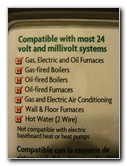 Compatibility List |
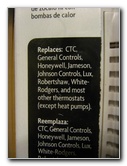 Brands Replaced |
 Buttons & Functions |
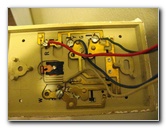
| Then I unscrewed the wires from the Honeywell thermostat, discarded it, pulled the wires through the hole in the new Hunter base plate and secured it to the wall with the two included screws. | ||
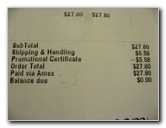 Shipping Form $27.80 |
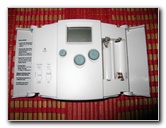 Front of New Thermostat |
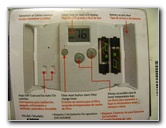
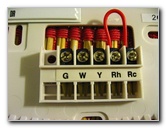 Electrical Connections |
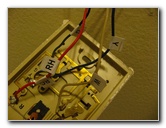
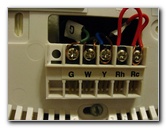
| The stickers on the
wires made the task of screwing in the connections on the new thermostat an
easy job.
Make sure that the bare ends of the wires are clear of each other to avoid an electrical short. |
||
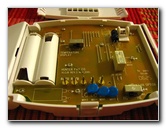 Hunter Circuit Board |
 Mercury Thermometer Switch |
 Lower Screw |
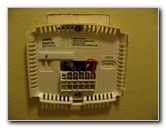
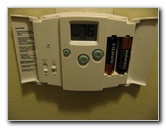
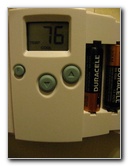
| The last few steps
are to pop the Hunter face plate on to the base plate, install two AA
batteries, and turn the home's power back on.
I set the "Fan" switch to "Auto" and the "System" switch to "Cool". After a few seconds, I heard a faint click and the air conditioner began to blow out cool air. |
||
 Old Thermostat Removed |
 Wires On Rear of Honeywell |
 Wires Labeled With Stickers |
| Since installing
the Hunter digital thermostat, it has been much easier to keep our air
conditioner set to a consistent temperature.
Our power bill has also declined slightly since we're able to accurately raise or lower the temperature setting when leaving or returning to the house. |
||
 Wires Pulled Through Hunter |
 New Base Plate Attached |
 Wires Secured To Terminals |
 Face Plate Popped On |
 Auto Fan - A/C On |
 2 AA Batteries Installed |
| For more, check out
the following related links:
Air Conditioner Capacitor Replacement Guide,
Leaking Refrigerator Repair,
Toilet Water Supply Valve Replacement Guide,
Kenmore Electric Range 220V Power Connection Repair Guide,
HVAC Air Handler Evaporator Coils Cleaning Guide,
A/C Air
Handler Condensate Drain Pipe Cleaning Guide, and the
Sticky Door Lock Repair Guide. |
||
| If you found this guide to be helpful,
please consider making a small donation by clicking on the PayPal.com
"Donate" button located to the right of this paragraph. Thank you!
(Note: I am not a registered charity. Donations are not tax deductible.) |