
VW Tiguan
Reverse Light Bulbs Replacement Guide
How to change a burnt out reverse light
bulb on the rear bumper of a 1st generation 2009 to 2017 Volkswagen Tiguan

By Paul B. Michaels Author & Photographer Auto Mechanic Since 1989 |
||
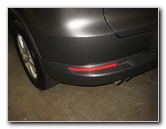 2016 Tiguan Rear Bumper |
 Rear Wheel Well Liner |
 Torx Screw Bottom Edge |
| This
automotive maintenance tutorial was specifically written to assist
owners of the first generation (2009, 2010, 2011, 2012, 2013, 2014,
2015, 2016 and 2017) Volkswagen Tiguan SUV in changing a burnt out
reverse light bulb in the housing attached to the rear bumper cover. Owners of other VW or Audi vehicles such as the Jetta, Passat, CC, Atlas, Touareg, Golf, Beetle, A3, S3, RS 3, A4, S4, A5, A6, S6, A7, S7, RS 7, A8, Q3, Q5, TT and Q7 may also find these DIY instructions to be helpful. The compatible replacement miniature wedge base light bulb part number is 921 (also known as W16W). You could also install some brighter 921 LED bulbs. The tools needed to remove the rear bumper cover and access the light bulb socket include a Torx T-25 star bit socket and also a Torx T-30 socket or screwdriver. |
||
|
|
||
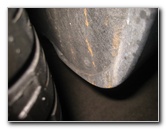
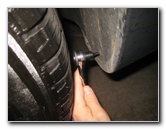 Loosen Counterclockwise |
 Bottom Screw Removed |
 Bottom Outer Edge |
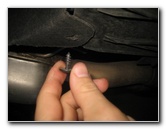
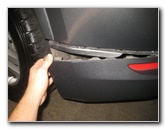
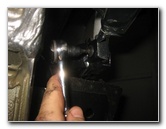
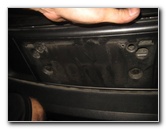
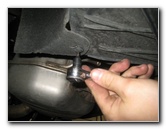
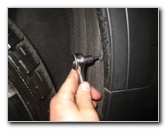
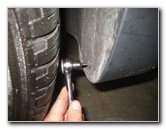
| The first step is
to move to the rear wheel well closest to the burnt out reverse light bulb. Then locate the two small screws on the wheel well liner. One is located at the bottom edge and the other is closer to the outside of the vehicle. Remove the two screws by turning them counterclockwise with a Torx T-25 socket and a ratchet. |
||
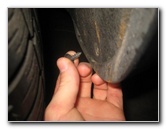
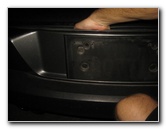
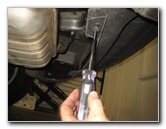
 2nd Screw Removed |
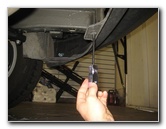
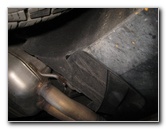 Look Under Rear Bumper |
 Remove T-25 Screw |
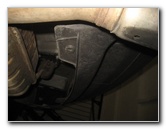
| Set the two wheel
well liner screws aside in a safe place. Then look under the rear bumper cover and locate the other Torx T-25 screw. Remove the screw by turning it counterclockwise and set it aside in with the other two screws. |
||
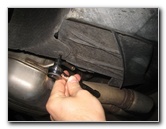
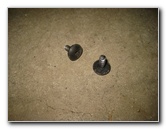
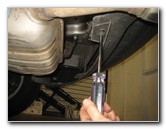
 T25 Screw Removed |
 Further In - T-30 Screw |
 Loosen Counterclockwise |
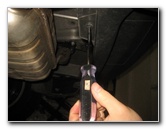
| Then locate the two
larger screws on the underside of the bumper cover closer to the center of
the SUV. Remove the two screws by turning them in the counterclockwise direction with a Torx T-30 screwdriver or a socket with a ratchet. |
||
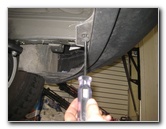
 T30 Screw Removed |
 Second T30 Screw |
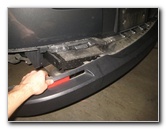
 Gently Pull Off Bumper |
| Set the two T-30
screws aside in a safe place. (If you plan on replacing the second reverse light bulb at the same time, continue removing the three T-25 screws on the other side of the bumper cover.) Gently pull the rear bumper cover away from the back of the SUV. |
||
 Bumper Partially Removed |
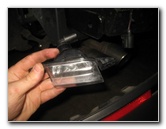
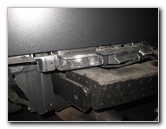 Light Housing Exposed |
 Two Screws - Back Side |
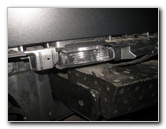
| Gently rest the
bumper cover on the ground. I recommend placing a towel under the bumper cover to protect the paint from being scratched. Once the bumper cover is out of the way, you'll be able to easily access the reverse light bulb housing. There are two screws on the back side of the housing that secure it to the vehicle. |
||
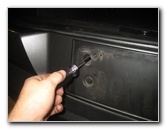
 Loosen Counterclockwise |
 Torx T-25 Socket |
 Loosen 2nd Screw |
| Use the Torx T-25
socket to loosen the two screws in the counterclockwise direction. I found it easier to attach the T-25 socket to a short extension bar to loosen the screws. |
||
 Second Screw Removed |
 Two Screws Removed |
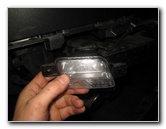 Pull Out Light Housing |
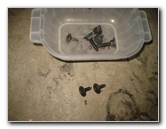
| Set the two screws
aside in a safe place. Gently remove the light housing from the vehicle. |
||
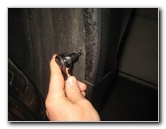
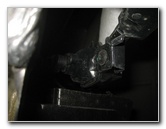
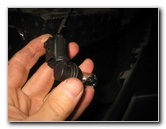
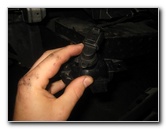
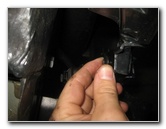
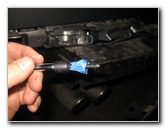
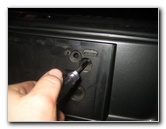
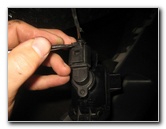 Push In Release Tab |
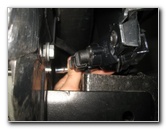
 Power Plug Disconnected |
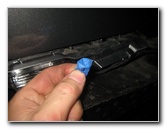
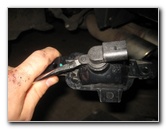 Lift Up Plastic Lock Tab |
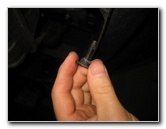
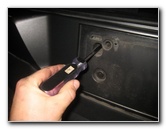
| Firmly push in the
release tab on the electrical connector with a small flathead screwdriver
before pulling it straight out of its socket. Then lift up the plastic tab on the bulb socket until the hole is clear of the plastic peg. |
||
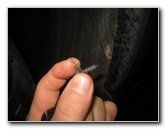
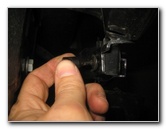
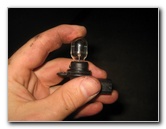
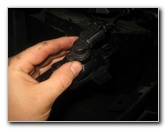
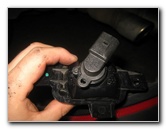 Rotate Counterclockwise |
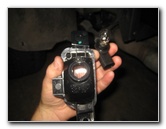 Remove Bulb Socket |
 Pull Out Old Light Bulb |
| Rotate the bulb
socket 1/4 turn counterclockwise before pulling it straight out of the
housing. Pull the old light bulb straight out of the socket. |
||
|
|
||
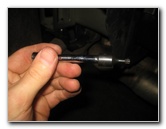
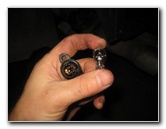
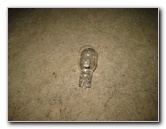 Old Light Bulb Removed |
 Push In New Light Bulb |
 Push On Power Plug |
| Push a new
miniature wedge base number
921 light bulb straight
into the socket. If you would like to have brighter reverse lights (that have a longer life span), install some compatible 921 LED bulbs. Push the electrical connector straight on to the bulb socket until it clicks securely into place. |
||
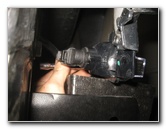
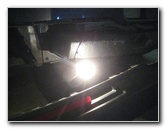 Test New Light Bulb |
 Re-Insert Bulb Socket |
 1/4 Turn Clockwise - Lock |
| I recommend testing
the new reverse light bulb before re-assembling the light housing and
re-attaching the rear bumper cover. Have an assistant step on the brake pedal and place the transmission in reverse. Re-insert the bulb socket into the housing and rotate it 1/4 turn clockwise to secure it in place. The hole in the tab on the bulb socket should securely snap into place over the plastic peg. |
||
 Replace Light Housing |
 Spin In Screw By Hand |
 Tighten Clockwise |
| Re-insert the light
housing back into place on the rear of the vehicle. Tighten the two screws a few turns by hand to prevent them from becoming cross threaded or being dropped and lost. |
||
 Attach Screw With Tape |
 Tighten Inner Screw |
 Pull Off Painters Tape |
| I recommend
attaching the inner screw to the socket with a piece of painter's tape to
hold it in place. Then tighten it a few turns in the clockwise direction. |
||
 Tighten T-25 Clockwise |
 Light Housing Secured |
 Push Bumper In Place |
| Then attach the
ratchet to the T-25 socket and tighten the two screws until they are snug. Raise the bumper cover and carefully push it back into place. |
||
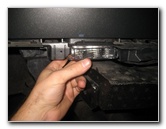
 Remove License Plate |
 Screws By License Plate |
 Pull Back Plastic Panel |
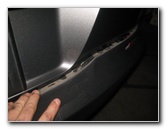
| If there is still a
gap in between the rear bumper cover and the upper panel, proceed with the
following steps. Remove the two screws that hold the license plate in place and remove the plate. Then remove the two screws that are located behind the license plate by turning them in the counterclockwise direction with the Torx T-25 screwdriver. Gently pull back the top of the plastic panel above the license plate mounting location. |
||
 Firmly Push In Bumper |
 Replace Two Screws |
 Tighten T-25 Screws |
| Push out from the
top of the license plate mounting area and firmly push in the rear bumper
cover with your other hand or your leg.
Double check that the rear bumper cover is flush with the other body panel. Replace the two T-25 screws. Replace the license plate and the two screws that secure it in place. |
||
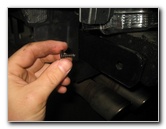
 Tighten T-30 Screws |
 |
 Tighten Clockwise |
| Then slide under
the rear bumper cover and replace the two larger T-30 screws near the center
of the SUV. Tighten the two screws in the clockwise direction. |
||
 Tighten T-25 Screw |
 Upper Wheel Well Screw |
 Tighten Bottom Screw |
| Next, replace the
small screw near the outer edge with the Torx T-25 socket and a ratchet by
turning it in the clockwise direction. Finally, replace the two small screws into the rear wheel well liner by turning them in the clockwise direction with the T-25 socket and ratchet. To perform a final test of the new light bulbs, have a helper step on the brake pedal and place the transmission in reverse. Be sure to record the bulb change in your vehicle's service records. For more, please check out my other
2009-2017 VW Tiguan DIY Repair & Maintenance Guides. |
||
| If you found this guide to be helpful,
please consider making a small donation by clicking on the PayPal.com
"Donate" button located to the right of this paragraph. Thank you!
(Note: I am not a registered charity. Donations are not tax deductible.) |