
VW Jetta Tail
Light Bulbs Replacement Guide
How to change a brake, turn signal,
reverse or parking bulb in the tail lights of a 2011 to 2016 MK6 Volkswagen Jetta.

By Paul B. Michaels Author & Photographer Auto Mechanic Since 1989 |
||
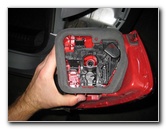
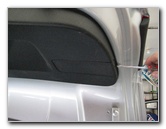
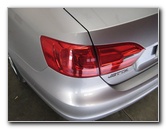 2012 Jetta Tail Light |
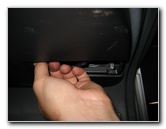
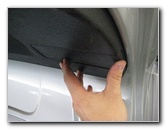
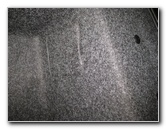 Fabric Access Cover |
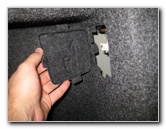 Pull Out Access Panel |
| This
automotive maintenance tutorial was specifically written to assist
owners of the 6th generation MK6 (2011, 2012, 2013, 2014, 2015 &
2016)
Volkswagen Jetta in changing a burnt out cargo area light bulb in
the trunk. Owners of other VW Group vehicles with similar cargo area or trunk light bulb housings such as the Passat, CC, Tiguan, Golf, Touareg, Beetle, GTI, SportWagen, Eos, Rabbit, Bora, Vento, Lavida, Audi A3, A4, S4, A6, S6, A7, A8, Q5, Q7, A5, S5, and TT may also find these DIY instructions to be helpful. Replacement bulbs with their part numbers are as follows: Brake # 7528 (A.K.A. 1157 or P21/5W), Rear Turn Signal # 7506 (A.K.A. 1156 or P21W), Reverse # 7506 (A.K.A. 1156 or P21W) and Parking Light # 5007 (or R5W). No tools are needed to replace the brake or rear turn signal light bulbs. To replace the reverse or parking light bulbs located in the inner housing on the trunk lid, you'll need a flathead screwdriver or a 10mm socket with a 1/4" drive ratchet. |
||
|
|
||
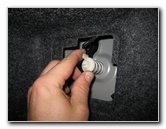
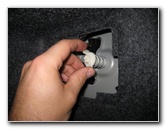 Loosen Counter Clockwise |
 Remove Plastic Screw |
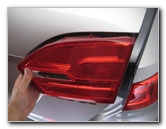
 Pull Off Tail Light Assembly |
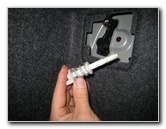
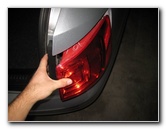
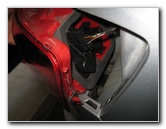
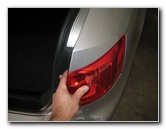
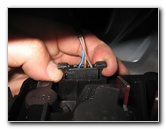
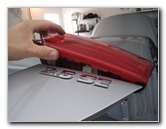
| The first two steps
are to pop open the trunk and then move to the side of the vehicle with the
burnt out bulb. To replace either the Brake or Rear Turn Signal light bulbs, move to the inside corner of the trunk and pull out the rectangular fabric access panel from the carpeted trunk liner. Loosen the white plastic spring loaded screw by turning it counter clockwise until it can be removed. Set it aside in a safe place. Gently pull off the tail light assembly from the rear corner of the vehicle. If you have trouble removing the tail light, try gently wigging the housing while pulling it straight back. |
||
 Tail Light Power Plug |
 Pinch Sides - Release Plug |
 Turn Signal & Brake |
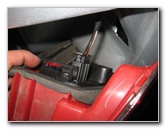
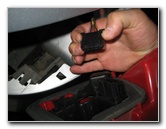
| Squeeze together
the two sides of the black plastic power plug to disconnect it from the
housing. Turn over the housing and locate the two plastic release tabs. |
||
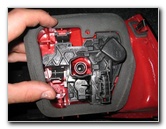 Two Plastic Release Tabs |
 Squeeze Together Tabs |
 Lift Out Bulb Bracket |
| Gently pinch the two release tabs towards each other and lift the bulb bracket out of the tail light housing. | ||
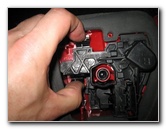
 Brake / Parking Light Bulb |
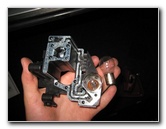 Turn Signal Light Bulb |
 Push Down Bulb Bracket |
| The silver metal
around the brake light bulb is marked with the letters "P21W/5W" and the
turn signal bulb is marked by the letters "P21W". To replace either one, push down on the bulb and rotate it 1/4 turn counter clockwise before pulling it straight out of the socket. Push in a new bulb and rotate it 1/4 turn clockwise to secure it in place. A new dual filament brake light bulb is part number 7528 which is also known as 1157 or "P21/5W". |
||
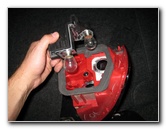
 Pop In Retaining Clips |
 Plug In Electrical Connector |
 Line Up Friction Fastener |
| Line up the bulb
bracket and push it down on to the rear of the housing until it clicks
securely in to place. Push the power plug in to its socket on the rear of the housing. Line up the friction fastener on the rear of the housing with its corresponding slot on the vehicle. |
||
|
|
||
 Push On Tail Light Housing |
 Tighten Spring Loaded Screw |
 Re-Insert Trunk Liner Cover |
| Push the tail light
assembly back in to place on the rear corner of the vehicle. Re-insert the plastic spring loaded screw and tighten it in the clockwise direction until it is snug. Do not over tighten the screw to avoid cracking the plastic housing. Push the fabric access cover back in to place on the carpeted trunk liner. |
||
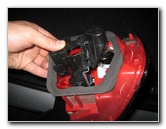
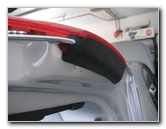
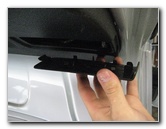
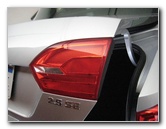 Parking & Reverse Lights |
 Underside of Trunk Lid |
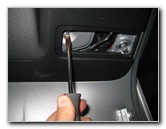
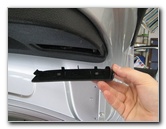 Pry Off Plastic Cover |
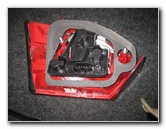
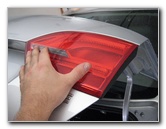
| The Rear Parking
and Reverse (or "back up") bulbs are located inside a separate light
housing attached to the trunk lid. Pry off the rectangular plastic access cover on the underside of the trunk lid just behind the light housing. |
||
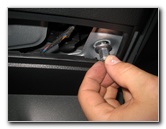
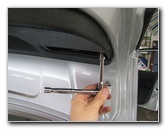
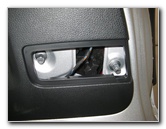 Two 10mm / Flathead Nuts |
 Loosen with 10mm Socket |
 Or Use Flathead Screwdriver |
| Loosen the two nuts by turning them counter clockwise with either a flathead screwdriver or a 10mm socket and ratcheting wrench. | ||
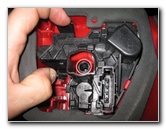
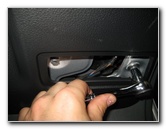
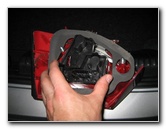
 Spin Off Two Nuts |
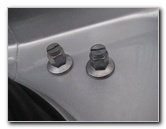 2 Nuts Removed |
 Pull Off Inner Tail Light |
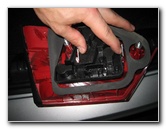
| Set the two nuts
aside in a safe place. Gently pull the inner tail light housing off the trunk lid. If you have trouble removing the tail light assembly, try gently wiggling the tail light by pulling on it and/or tap on the metal screw ends. |
||
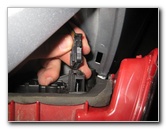
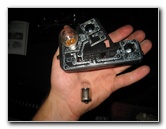
 Squeeze - Release Plug |
 Parking & Reverse Lights |
 Gently Push Out Tabs |
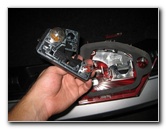
| Squeeze together
the two sides of the black plastic power connector to release it from the
rear of the housing. Gently push out the silver metal tabs to release the black plastic bulb bracket from the housing. |
||
 Lift Off Bulb Bracket |
 5007 (R5W) Parking Light |
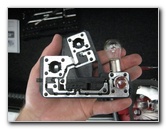 Push Down & 1/4 Turn CC |
| Lift the bulb
bracket out of the housing and turn it over to access the bulbs. The reverse bulb is marked on the silver metal surrounding the socket by the letters "P21W" and the rear parking light bulb is marked by the letters "R5W". To remove either bulb, push down on the bulb and rotate it 1/4 turn counter clockwise before pulling it straight out of the socket. Push in a new bulb and rotate it 1/4 turn clockwise to secure it in place. A new reverse bulb is part number 7506 and is also known as # 1156 or "P21W". A new rear parking light bulb is part number 5007 from Sylvania or "R5W" from various other manufacturers. |
||
 Push Down Bulb Bracket |
 Snap Tabs In Place |
 Push In Power Plug |
| Push the bulb
bracket down in the housing until it snaps securely in to place. Push the power plug back in to its socket at the rear of the housing. |
||
 Lower Outer Edge In Place |
 Lower Inner Edge |
 Push Down Light Housing |
| Lower the outer edge of the housing back in to place first over the lip of the trunk lid and then lower down the inner edge. | ||
 Spin On Two Nuts |
 |
 Tighten Both 10mm Nuts |
| Spin on the two nuts in the clockwise direction and tighten them with the 10mm socket and ratcheting wrench or a flathead screwdriver. | ||
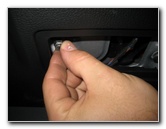
 Line Up Plastic Cover |
 Snap Access Panel In Place |
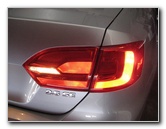 Test New Tail Light Bulbs |
| Line up the plastic
access panel and gently pop it back in to place. Test the new tail light bulbs by having someone step on the brake pedal, turn on the parking lights, activate the hazard signals and place the transmission in reverse. Be sure to record the bulb change in your vehicle's service records. For more, check out my other
VW Jetta DIY Repair Guides. |
||
| If you found this guide to be helpful,
please consider making a small donation by clicking on the PayPal.com
"Donate" button located to the right of this paragraph. Thank you!
(Note: I am not a registered charity. Donations are not tax deductible.) |