
VW Beetle
Front Side Marker Light Bulb Replacement Guide
How to change a burnt out front side
marker light bulb in a 2nd generation 2012-2016 "New" Volkswagen Beetle.

By Paul B. Michaels Author & Photographer Auto Mechanic Since 1989 |
||
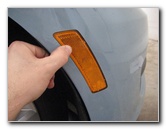
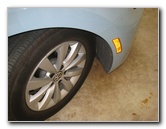 2015 Beetle Side Marker |
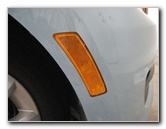 Side Marker Light Housing |
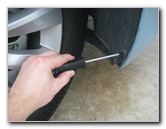 Remove Wheel Well Screws |
| This
automotive maintenance tutorial was specifically written to assist
owners of the second generation (2012, 2013, 2014, 2015 and most
likely also the 2016 model year) "New" VW Beetle in changing a burnt
out front side marker light bulb located in the front bumper cover
by the wheel well. Owners of other Volkswagen Group vehicles such as the Passat, CC, Tiguan, Golf, Touareg, Jetta, GTI, SportWagen, Eos, Rabbit, Bora, Vento, Lavida, Coccinelle, Maggiolino, Fusca, Audi A3, A4, S4, A6, S6, A7, A8, Q5, Q7, A5, S5, and TT may also find these DIY instructions to be helpful. A replacement bulb is part number W3W or 2821 which is available from various manufacturers such as Sylvania, GE, PIAA and Eiko. You may also be able to use # W5W, 168 or 2825 or a brighter LED unit. The only tool needed to access and replace the light bulb is a Torx T25 star bit screwdriver. |
||
|
|
||
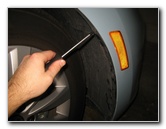
 Loosen Counterclockwise |
 Remove Third Screw |
 Three Torx T-25 Screws |
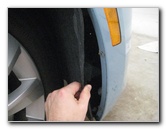
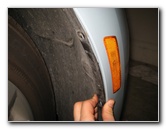
| The first step is
to turn the steering wheel all the way in the opposite direction of the
burnt out side marker bulb. Turning the front wheels will create some more working room in the wheel well. Remove the three screws that secure the outer edge of the black plastic wheel well liner or "splash guard" in to place by turning them counterclockwise with the Torx T25 star bit screwdriver. Set the three screws aside in a safe place. |
||
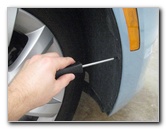
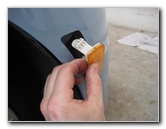
 Pull Back Wheel Well Liner |
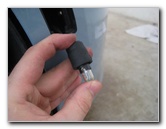
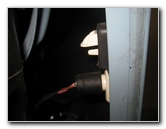 Rubber Bulb Socket |
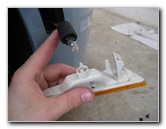
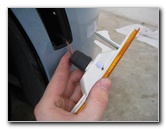
 Optional - Housing Removed |
| Carefully pull back
the wheel well liner to access the back side of the housing. I popped out the entire light housing from the bumper cover in order to take clear pictures of the process. This is an optional step and you could easily replace the bulb with out removing the housing. |
||
|
|
||
 Pull Out Bulb Socket |
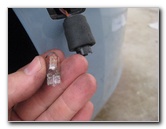 Pull Out Old Bulb |
 Push In New # W3W Bulb |
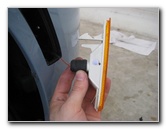
| Pull the rubber
bulb socket straight off the housing. Pull the old bulb straight out of the socket and push in a new # W3W or 2821 bulb. You may also be able to use any other miniature wedge base bulbs such as the # 158, W5W, 2825, 168, 194 or a compatible LED unit. |
||
 Push In Bulb Socket |
 Re-Insert Light Housing |
 Pop In Retaining Clip |
| Push the rubber
bulb socket straight on to the light housing. If you removed the light housing from the bumper cover, gently pop it back in to place. |
||
 Replace Splash Guard |
 Tighten 3 Torx T25 Screws |
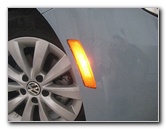 Test New Side Marker Bulb |
| Push the plastic
wheel well liner back in to place. Re-insert the the three screws and tighten them in the clockwise direction with the Torx T-25 star bit screwdriver until they are snug. Test the new side marker light bulb by turning on the headlights and activating the hazard signals. For more,
check out my other
2012-2016 VW Beetle DIY Repair & Maintenance Guides. |
||
| If you found this guide to be helpful,
please consider making a small donation by clicking on the PayPal.com
"Donate" button located to the right of this paragraph. Thank you!
(Note: I am not a registered charity. Donations are not tax deductible.) |