
Toyota Corolla Brake Line
Fluid Bleeding Guide
How to "bleed" or flush the brake lines
of a 2003 to 2008 Toyota Corolla with fresh DOT3 fluid including pictures.

By Paul B. Michaels Author & Photographer Auto Mechanic Since 1989 |
||
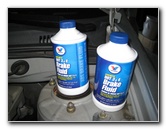 New Brake Fluid $3.42 Each |
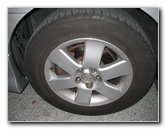 Corolla Rear Wheel |
 Loosen Five Lug Nuts |
| This
automotive "how-to" guide was specifically written to assist owners
of the ninth generation (2003, 2004, 2005, 2006, 2007 & 2008) Toyota Corolla in flushing or
"bleeding" out the brake lines to replace old dirty brake fluid with
fresh DOT 3 or DOT 4 brake fluid to restore braking performance. Owners of other Toyota, Scion or Lexus vehicle such as the Matrix, Camry, Yaris, Avalon, Sienna, RAV4, FJ Cruiser, Venza, Highlander, 4Runner, Sequoia, Land Cruiser, Tacoma, Tundra, tC, xB, xD, iQ, FR-S, IS 250, and ES 350 may also find these DIY instructions to be helpful. The items needed to complete this procedure include a floor jack, jack stands, some new DOT 3 brake fluid, a tire iron or lug nut wrench, an 8mm wrench, rubber tubing, an old brake fluid catch bottle and either a Motive Products Power Bleeder kit or an assistant to pump the brake pedal. Update - I now recommend the Allstar Performance Bleeder Bottle. It makes this an easy one man job.
|
||
|
|
||
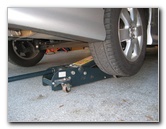 Raise Vehicle - Floor Jack |
 Support With Jack Stands |
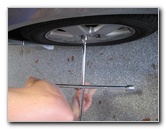
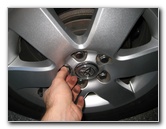 Spin Off 5 Lug Nuts |
| The brake lines
should be bled in order from the brakes furthest from the reservoir in the
engine bay to the closest.
So on a Toyota Corolla, you would start by bleeding the rear passenger drum brake, then the rear driver side drum brake, the front passenger side disc brake and finally the front driver side disc brake located closest to the reservoir. The first steps are to chock the front wheels, loosen the five lug nuts on the rear wheels, raise the rear of the vehicle with a floor jack and securely support it with the two jack stands. Then spin off the five lug nuts on each rear wheel, pull off the wheels and set them aside in a safe place. (If you have four jack stands, you can remove all four wheels to make the process easier.) |
||
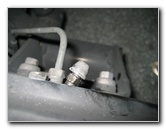
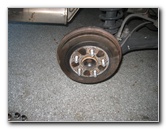 Rear Passenger Side Drum |
 Brake Fluid Bleeder Valve |
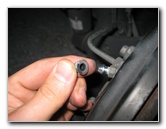 Remove Rubber Valve Cap |
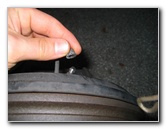
| Look on the back of
the rear passenger side drum brake and locate the brake fluid bleeder valve.
Remove the rubber cap and set it aside in a safe place. |
||
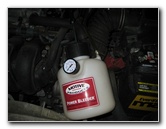
 Power Bleeder Box |
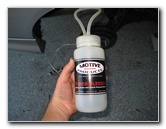 Motive Fluid Catch Bottle |
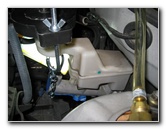
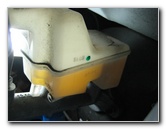
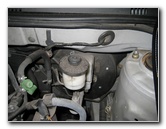 Brake Fluid Reservoir |
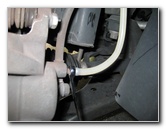
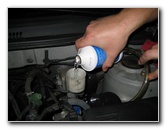
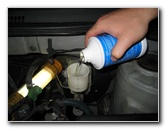
| Remove the cap on
the brake fluid reservoir by twisting it off counter clockwise and top it
off with some fresh DOT 3 or DOT 4 brake fluid.
Keep in mind that brake fluid is hygroscopic (absorbs water), so replace the brake fluid reservoir cap whenever possible to prevent the brake fluid from becoming contaminated. |
||
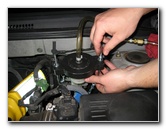
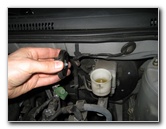 Remove Reservoir Cap |
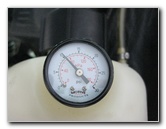
 Set Up Power Bleeder |
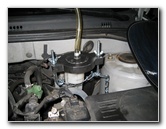 Attach Universal Adapter |
| If you have a
Motive Products Power Bleeder kit, attach the universal brake fluid
reservoir cap or the Toyota specific cap to the top of the brake fluid
reservoir.
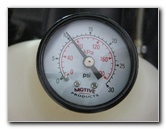
Pump the handle at the top of the Power Bleeder until the pressure gauge reaches about 10 PSI. Some people choose to pour new brake fluid into the Power Bleeder and have it continuously refill the brake fluid reservoir as you flush the brake lines. We found it less of a hassle to just use the Power Bleeder to maintain constant pressure on the reservoir, remove it, and re-fill the reservoir manually with more brake fluid as needed. If you don't have a Power Bleeder kit, you'll need your assistant to sit in the driver's seat of the vehicle. Attach the rubber tubing and old brake fluid catch bottle to the bleeder valve on the rear passenger side drum brake. Have your assistant place pressure on the brake pedal as you crack open the bleeder valve with an 8mm wrench. Instruct them to stop pushing on the pedal when it reaches 2/3 to 3/4 of the way down to the floorboard but not to release it. Then close the valve and ask them to release the pedal. Repeat these steps multiple times for each brake assembly (RR, LR, RF, LF) until the brake fluid coming out of the bleeder valve is clear. |
||
|
|
||
 Achieve 10 PSI Pressure |
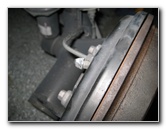
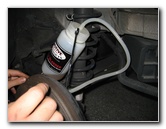
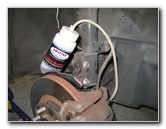
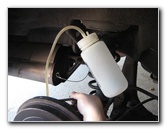 Hang Catch Bottle |
 Attach Tube - Open Valve |
| Hang the Power
Bleeder old brake fluid catch bottle above the rear passenger side drum
brake and attach the tube securely to the bleeder valve. Open the bleeder valve by turning it clockwise (as seen from the outside of the vehicle) and watch as the old brake fluid travels up through the rubber tubing into the catch bottle. |
||
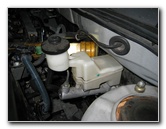
 Check Reservoir Fluid Level |
 Check Power Bleeder Pressure |
 Close Bleeder Valve |
| Move to the engine
bay as the brake fluid is being flushed out and check the level in the
reservoir and also the PSI pressure level in the Power Bleeder unit. When the brake fluid level in the reservoir approaches the half way point, go back to the drum brake and close the bleeder valve by turning it counter clockwise with the 8mm wrench. |
||
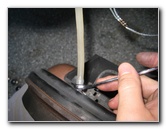
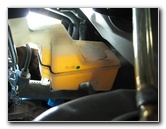 Fluid Sensor - Other Side |
 |
 |
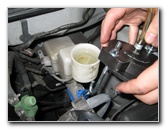
| Remove the rubber
tubing from the bleeder valve and the catch bottle from the suspension.
Re-install the tubing and catch bottle to the bleeder valve and suspension on the rear driver side drum brake. Repeat the process of opening the bleeder valve and be sure to check the level in the reservoir along with the pressure in the Power Bleeder unit. Do not allow the level in the reservoir to dip below the "Low Brake Fluid" sensor located on the passenger side of the reservoir bottle. |
||
 Bleeding Front Disc Brake |
 Old Dirty Brake Fluid |
 Low Reservoir Level |
| Remove the Power
Bleeder reservoir cap adapter and refill the reservoir with fresh brake
fluid to the "Max" line. Repeat all of the steps for the front passenger side disc brake and the front driver side disc brake. |
||
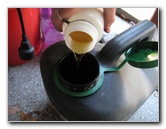 Pour Out Old Brake Fluid |
 Detach Universal Adapter |
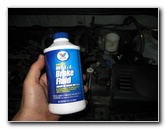 Valvoline Brake Fluid |
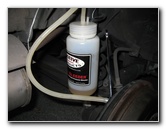
| Once the catch bottle is almost full with old brake fluid, empty it out into an automotive catch container for proper disposal later. | ||
 Pour In New Brake Fluid |
 Re-Attach Universal Adapter |
 Flushing Rear Passenger |
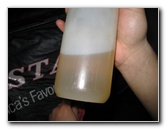
| Repeat the process
of filling up the brake fluid reservoir and bleeding each brake assembly
from furthest to closest until the brake fluid coming out of the bleeder
valves look almost completely clear. We used two 12 ounce bottles of new brake fluid to thoroughly flush out the brake lines and re-fill the reservoir to the "Max" line. Replace the brake fluid reservoir cap as soon as possible. |
||
 Brake Fluid Much Cleaner |
 Replace Bleeder Valve Caps |
 |
| When you have
finished flushing the brake lines, double check that all the bleeder valves
are tight by turning them counter clockwise with the 8mm wrench.
Replace the rubber valve caps to help prevent debris from entering the valve stems. |
||
 Fill Reservoir To "Max" |
 Replace Reservoir Cap |
 Tighten Lug Nuts |
| Replace the wheels,
spin on the lug nuts by hand to prevent them from becoming cross threaded,
and tighten down the lug nuts to 1/4 to 1/2 turn past hand tight or about 75
lb-ft of torque with a torque
wrench. The service manual for the 2003-2008 Toyota Corolla specifies 76 lb-ft of torque for the wheel lug nuts. Sit in the driver seat of the vehicle and pump the brake pedal a few times to restore brake line pressure. If the brake pedal feels firm, take the car for a short test drive on low speed streets. If the pedal is still very soft or sinks to the floor, you may need to repeat the procedure to clear out any remaining air bubbles or if your car has ABS, use a bi-directional OBD2 Scanner that is specifically listed as having ABS bleeding capability for your vehicle. For more,
please check out my other
Toyota Corolla Repair & Maintenance Guides. |
||
| If you found this guide to be helpful,
please consider making a small donation by clicking on the PayPal.com
"Donate" button located to the right of this paragraph. Thank you!
(Note: I am not a registered charity. Donations are not tax deductible.) |