
Toyota Avalon
Front Turn Signal Light Bulb Replacement Guide
How to change a burnt out front turn
signal light bulb in a 4th generation 2013 to 2017 Toyota Avalon XLE sedan.

By Paul B. Michaels Author & Photographer Auto Mechanic Since 1989 |
||
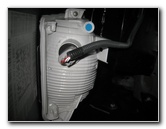
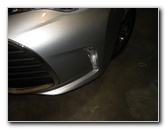 2016 Avalon Turn Signal |
 Turn Front Wheels |
 Loosen Counterclockwise |
| This
automotive maintenance tutorial was specifically written to assist
owners of the fourth generation (2013, 2014, 2015, 2016, 2017 and
the face lifted 2018 model year) Toyota Avalon sedan in changing a
burnt out front turn signal light bulb in the bumper cover. Owners of other Toyota, Lexus and Scion vehicles such as the Yaris, Corolla, Matrix, Prius, Camry, RAV4, Sienna, Tacoma, Tundra, FJ Cruiser, Venza, Highlander, 4Runner, Sequoia, Land Cruiser, IS 250, IS 200t, IS 300, NX 200t, NX 300h, RX 350, RX 450h, LS 460, LS 600h, ES 350, ES 300h Hybrid, RC F, GS 350, CT 200h, LX 570, GX 460, tC, iA, iM, xB, xD, iQ and FR-S may also find these DIY instructions to be helpful. The compatible replacement light bulb part number is 7444NA. (If your Avalon is equipped with halogen fog light bulbs, the replacement part number is H11.) The tools needed to access and replace the front turn signal bulb socket include a Phillips head screwdriver, a flathead screwdriver, a 10mm socket and a 1/4" drive ratchet. |
||
|
|
||
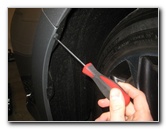
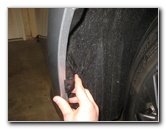
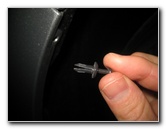 Pull Out Plastic Fastener |
 1/4 Turn Counterclockwise |
 Remove Lower Fastener |
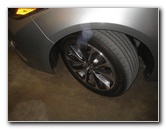
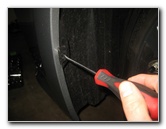
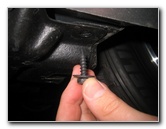
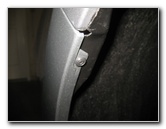
| The first step is
to turn the steering wheel all the way in the opposite direction of the
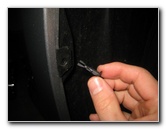
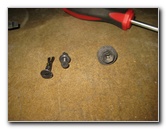
burnt out front turn signal light bulb. Moving the front wheels will create more working room in the wheel well to access the bulb sockets in the front bumper cover. There are three fasteners that secure the front edge of the black plastic wheel well liner or "splash guard" in place. Loosen the black plastic screw near the top of the wheel well liner by turning it counterclockwise with a Phillips head screwdriver. Set the plastic Phillips head screw and the base of the fastener aside in a safe place. Move down towards the middle of the wheel well liner. Rotate the second fastener 1/4 turn counterclockwise with a flathead screwdriver before pulling it straight out. |
||
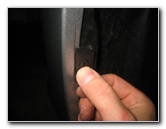
 Bottom of Bumper Cover |
 Loosen 10mm Screw |
 10mm Screw Removed |
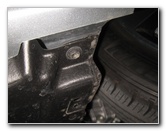
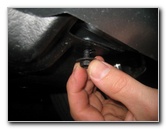
| Then look under the
front bumper cover and locate the black metal screw. Remove the screw by turning it counterclockwise with either a Phillips head screwdriver or a 10mm socket with a 1/4" drive ratchet. Set the screw aside with the other fasteners. |
||
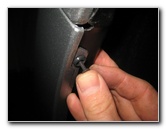
 3 Fasteners Removed |
 Pull Back Wheel Well Liner |
 Light Bulb Housing |
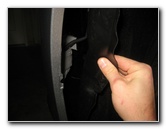
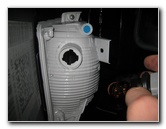
| Gently pull back
the wheel well liner to access the rear of the bulb housing. Locate the front turn signal light bulb socket. If your Avalon is equipped with fog lights, you should see two bulb sockets. |
||
|
|
||
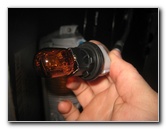 1/4 Turn Counterclockwise |
 Pull Out Old Light Bulb |
 Push In New 7444NA |
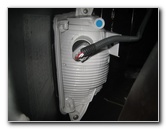
| Rotate the base of
the bulb socket 1/4 turn counterclockwise before pulling it straight out of
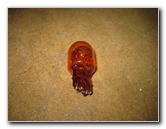
the housing. Pull the old light bulb straight out of the socket. Push a new amber colored number 7444NA light bulb straight in to the socket. (If your Avalon has fog lights, the bulb part number is H11.) |
||
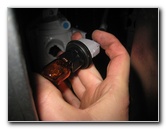
 Re-Insert Bulb Socket |
 1/4 Turn Clockwise - Lock |
 Replace Splash Guard |
| Re-insert the bulb
socket in to the housing and rotate it 1/4 turn clockwise to secure it in
place. Push the wheel well liner back in to place. |
||
 Pop In Lower Fastener |
 Push In Top Plastic Screw |
 Plastic Phillips Screw |
| Push the lower
fastener back in to place. Then push in the upper fastener and pop in the black plastic screw. Move to the bottom edge of the front bumper cover. |
||
 Re-Insert 10mm Screw |
 Tighten Clockwise |
 Test New Turn Signal |
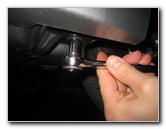
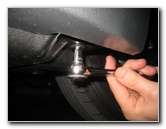
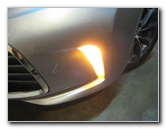
| Re-insert the 10mm
screw and tighten it in the clockwise direction until it is snug. Test the new front turn signal light bulbs by turning on the hazard signal switch. For more,
check out all of my
Toyota Avalon DIY Repair & Maintenance Guides. |
||
| If you found this guide to be helpful,
please consider making a small donation by clicking on the PayPal.com
"Donate" button located to the right of this paragraph. Thank you!
(Note: I am not a registered charity. Donations are not tax deductible.) |