
Nissan
Frontier 3rd Brake / Cargo Light Bulbs Replacement Guide
How to change a burnt out high mount
third brake or cargo bed light bulb on a 2nd generation 2005 to 2016 Nissan
Frontier.

By Paul B. Michaels Author & Photographer Auto Mechanic Since 1989 |
||
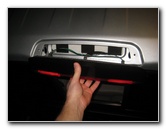
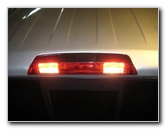 2016 Frontier High Mount Lights |
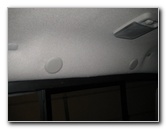 Round Plastic Covers |
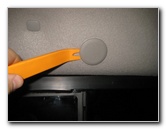 Remove With Pry Bar Tool |
| This
automotive maintenance tutorial was specifically written to assist
owners of the second generation "D40 Series" (2005, 2006, 2007,
2008, 2009, 2010, 2011, 2012, 2013, 2014, 2015 & 2016) Nissan
Frontier pickup truck in changing a burnt out high mount third brake
light or the two cargo bed light bulbs in the housing attached to
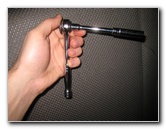
the roof just above the rear window. Owners of other Nissan or Infiniti vehicles such as the Navara, Versa, Maxima, Juke, Rogue, Altima, Xterra, Pathfinder, Murano, Cube, Armada, Leaf, Quest, Sentra, Teana, 370Z, GT-R, Titan, G25, G37, M35, QX56, QX60 and M37 may also find these DIY instructions to be helpful. The replacement bulb part numbers for the 3rd brake light and both cargo area light bulbs is number 912 which is available from various manufacturers such as Sylvania, GE, PIAA and Eiko. You can also use a brighter compatible 912 LED bulb. The tools needed to access and replace the light bulbs include a plastic pry bar tool, a deep well 8mm or 5/16" socket, a short extension bar and a 1/4" drive ratchet. |
||
|
|
||
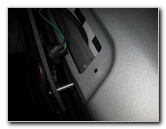
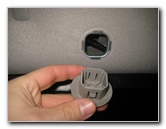 Plastic Cover Removed |
 Pry Out 2nd Plastic Cap |
 Plastic Covers Removed |
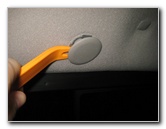
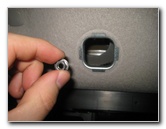
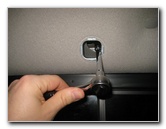
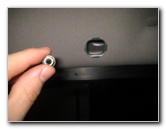
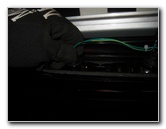
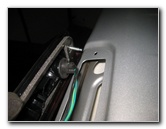
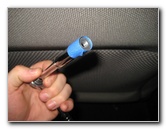
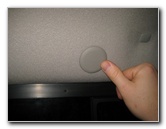
| The first step is
to sit in the back row of seats of your Frontier. Then gently pry out the round plastic trim covers located just above the rear window with an automotive panel pry bar tool. Set the two plastic caps aside in a safe place. |
||
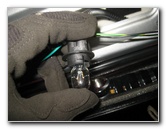
 10mm Nut & Bolt Threads |
 Deep Well 8mm Socket |
 Remove 8mm Nut |
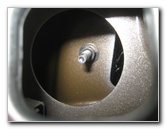
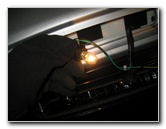
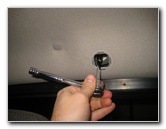
| Attach the deep
well
8mm or a
5/16" socket to the
extension bar and a 1/4" drive ratcheting wrench. Loosen the two nuts by turning them counterclockwise. |
||
 Loosen Second 8mm Nut |
 2nd 8mm Nut Removed |
 Two 8mm Nuts |
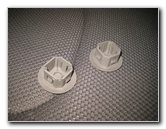
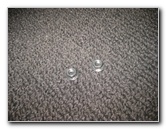
| Set the two 8mm nuts aside in a safe place. | ||
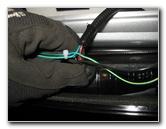
 Gently Pull Off Light Housing |
 1/4 Turn Counterclockwise |
 Cargo Area Bulb Socket |
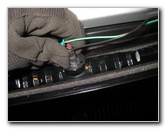
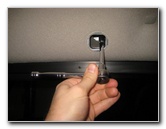
| Climb in to the
cargo bed of the truck. Gently pull the light housing straight off the rear of the passenger compartment. If you have trouble removing the light housing, gently loosen it with the plastic pry bar tool. |
||
 1/4 Turn Counterclockwise |
 High Mount Brake Light |
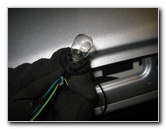
 Pull Out Old # 912 Bulbs |
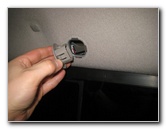
| Rotate the base of
the bulb socket 1/4 turn counterclockwise before pulling it straight out of
the housing. The high mount 3rd brake light is located at the center of the housing. The two cargo bed lights are located on the left and right side of the housing. Pull the old bulb straight out of the socket. If the old light was recently turned on, be careful since it might still be hot enough to burn your fingers. |
||
|
|
||
 Push In New # 912 Bulb |
 1/4 Turn Clockwise - Lock |
 Push In New 912 Bulb |
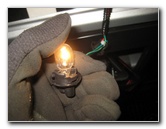
| Push a new #
912 bulb straight in to the
socket. If you want to have brighter cargo area lights or a brighter third brake light, choose an LED bulb. (If necessary, you might be able to use a # 921 bulb that is a higher wattage and slightly brighter. But it draws more power and creates more heat which could lead to a deformed or melted plastic light housing depending on your climate.) |
||
 Replace 3rd Brake Socket |
 Line Up Two Fasteners |
 Re-Insert Bolt Ends |
| Re-insert the bulb
socket in to the housing and rotate it 1/4 turn clockwise to secure it in
place. Line up the two bolt threads on the back of the light housing with their corresponding holes in the roof. |
||
 Push Housing In Place |
 Tape Nut To Socket |
 Tighten 8mm Clockwise |
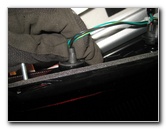
| Push the tail light
housing straight on to the roof of the truck. Move to the rear seats of the passenger cabin. Loosely attach the 8mm nut to the end of the 8mm socket with some painter's tape to hold it in place. Tighten the 8mm nut by turning it clockwise until it is snug. |
||
 Replace 2nd 8mm Nut |
 Line Up Plastic Covers |
 Pop In Trim Panels |
| Repeat the steps to
replace the second 8mm nut.
Try to avoid over tightening the two nuts to prevent from cracking the plastic brake/cargo light housing. Gently push in the two plastic trim caps to complete the job. Test the new light bulbs by pressing the "Unlock" button on the key fob and have someone step on the brake pedal. For more,
check out my other
Nissan Frontier DIY Repair & Maintenance Guides. |
||
| If you found this guide to be helpful,
please consider making a small donation by clicking on the PayPal.com
"Donate" button located to the right of this paragraph. Thank you!
(Note: I am not a registered charity. Donations are not tax deductible.) |