
Nissan Armada
Cabin Air Filters Replacement Guide
How to clean, replace or install the HVAC cabin air
filters in a 1st generation 2004-2015 Nissan Armada SUV with photos.

By Paul B. Michaels Author & Photographer Auto Mechanic Since 1989 |
||
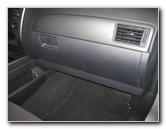
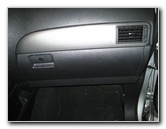 2012 Armada Glove Box |
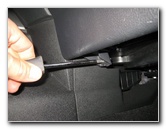
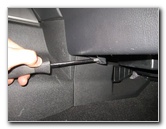
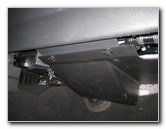 Plastic Foot Well Cover |
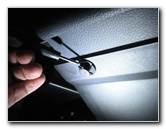 Pry Out Center of Fasteners |
| This
automotive "how-to" guide was specifically written to assist owners
of the first generation (2004, 2005, 2006, 2007, 2008, 2009, 2010,
2011, 2012, 2013, 2014 & 2015) Nissan Armada in cleaning, replacing or
installing the two HVAC cabin air filter elements located behind the
glove box. Owners of other Nissan or Infiniti vehicles such as the Versa, Cube, Sentra, Altima, LEAF, Maxima, 370Z, Juke, Rogue, Murano, Xterra, Pathfinder, Quest, Frontier, Titan, QX56, Q50, G37, EX37, QX60, FX37, FX50 and QX80 may also find these DIY instructions to be helpful. A few compatible replacement filters with their part numbers are as follows: TYC 800044P2, Purolator C15850, Wix 24854, Pentius PHB5850, Fram CF10388, ATP RA-18, Beck Arnley 042-2052, Mahle LAK 771S, and Hastings AFC1341. The tools required for this procedure include a small flathead screwdriver, a Phillips head screwdriver, an 8mm socket and a ratcheting wrench. A wet/dry shop vacuum can be useful for cleaning and re-using the existing filters. |
||
|
|
||
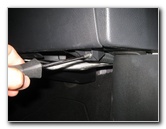
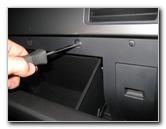
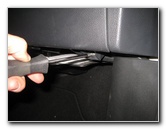
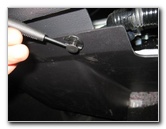 Pry Out 2nd Fastener |
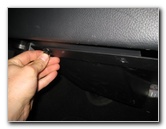
 Remove Foot Well Cover |
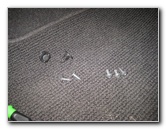
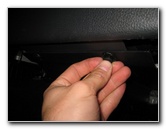
 Remove 2nd Lower Screw |
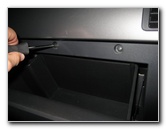
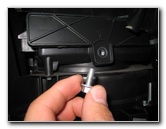
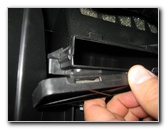
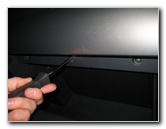
| The first step is
to look below the glove box and locate the black plastic passenger foot well
cover. Use the small flathead screwdriver to pry out the center piece of each of the two black plastic fasteners. Pull the fasteners straight out of the foot well cover. Pull the foot well cover out from underneath the glove box and set it aside in a safe place with the two fasteners. Then remove the two Phillips head screws at the bottom of the glove box that were hidden by the foot well cover. Turn the screws counter clockwise with the Phillips head screwdriver to loosen them. |
||
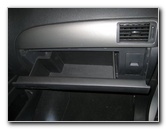 Open Glove Box |
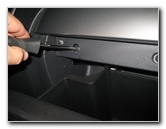 3 Phillips Head Screws |
 Remove Center Screw |
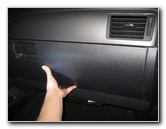
| Open the glove box
to access the other 3 Phillips head screws that need to be removed in order
to pull out the glove box. Remove the three Phillips head screws along the upper edge of the glove box and set them aside in a safe place. |
||
 3rd Upper Phillips Screw |
 2 Fasteners - 5 Screws |
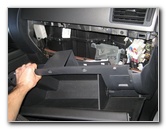 Pull Out Glove Box |
|
|
||
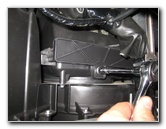
| Pull the glove box
straight out of the dashboard and set it aside. Behind the glove box you'll see the black plastic blower motor housing and HVAC cabin air filters access cover. |
||
 Glove Box Removed |
 Cabin Air Filters Cover |
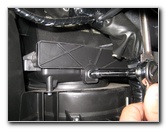 Remove 8mm Screw |
| Use an 8mm socket and ratcheting wrench to remove the single screw at the bottom of the filter access cover by turning it counter clockwise. | ||
 8mm Bolt Removed |
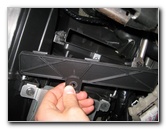 Lift Cover Up & Away |
 Empty Air Filter Slot |
| Lift the filter
access cover up and away from the blower motor housing. This 2012 Nissan Armada is an "SV" model that did not come equipped with the two cabin air filters from the factory. |
||
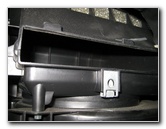
 Slide Slots On Tabs |
 Tighten 8mm Socket |
 Re-Install Glove Box |
| If your old filters
are not very dirty, just tap out any large debris and vacuum them clean with
a wet/dry shop vacuum. If your old filters are dark grey or black and clogged with dirt, dust, hair, insects, twigs and leaves, they should be replaced with new elements. I recommend buying the Fram CF10388 filters since they have excellent reviews on Amazon. Slide the two cleaned or new air filters in to the housing side by side. (The shorter sides of each filter should be facing out towards you.) Be sure to orientate the "Air Flow" indicator arrows on the two filters in the downward direction. Slide the slots at the top of the air filter access panel over the tabs at the top of the housing. Re-insert the bolt at the bottom of the cover and tighten it with the 8mm socket and ratcheting wrench. Line up the glove box and re-insert it back in to the dashboard. |
||
 Tighten 3 Upper Screws |
 Tighten Lower Phillips Screw |
 Tighten 2nd Lower Screw |
| Tighten the 3
Phillips head screws along the upper edge of the glove box opening. Then tighten the two Phillips head screws at the bottom edge of the glove box by turning them clockwise. |
||
 Re-Install Foot Well Cover |
 Push In Two Fasteners |
 Cabin Filters Replaced |
| Re-install the
black plastic foot well cover and pop in the two black plastic fasteners to
hold it in place. For more,
check out my other
Nissan
Armada Repair & Maintenance Guides. |
||
| If you found this guide to be helpful,
please consider making a small donation by clicking on the PayPal.com
"Donate" button located to the right of this paragraph. Thank you!
(Note: I am not a registered charity. Donations are not tax deductible.) |