
Nissan Armada
Fog Light Bulbs Replacement Guide
How to change a burnt out fog light bulb
in the front bumper of a 1st generation 2004 to 2015 Nissan Armada SUV.

By Paul B. Michaels Author & Photographer Auto Mechanic Since 1989 |
||
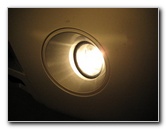
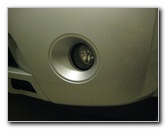 2012 Armada Fog Light |
 Look Under Bumper |
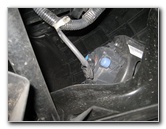
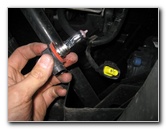
 1/4 Turn Counter Clockwise |
| This
automotive "how-to" guide was specifically written to assist owners
of the first generation (2004, 2005, 2006, 2007, 2008, 2009, 2010,
2011, 2012, 2013, 2014 & 2015) Nissan Armada in changing a burnt out
fog light bulb in the bottom of the front bumper. Owners of other Nissan or Infiniti vehicles such as the Versa, Cube, Sentra, Altima, LEAF, Maxima, 370Z, Juke, Rogue, Murano, Xterra, Pathfinder, Quest, Frontier, Titan, QX56, Q50, G37, EX37, QX60, FX37, FX50 and QX80 may also find these DIY instructions to be helpful. A replacement fog light bulb is part number H11 from various manufacturers such as Sylvania, GE, Eiko, PIAA, Philips and Nokya. If you would like to have brighter fog lights, install some compatible H11 LED bulbs. No tools are needed to replace the fog light bulbs. |
||
|
|
||
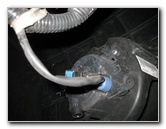
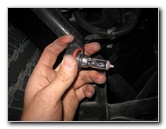
 Remove Fog Light Bulb |
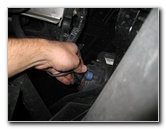
 Disconnect Power Plug |
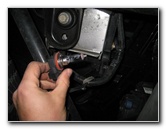
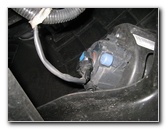
 Old Fog Bulb Removed |
| Move to the side of
the vehicle with the burnt out fog light bulb. Slide underneath the front of the SUV and locate the fog light housing with the black plastic base of the old bulb. Rotate the base of the bulb 1/4 turn counter clockwise and pull it straight out of the housing. Disconnect the power plug from the base of the old bulb. |
||
|
|
||
 Insert New Fog Light Bulb |
 1/4 Turn Clockwise |
 Test New Fog Light Bulb |
| Try to avoid
getting the glass part of the new halogen bulb dirty by touching it with
your fingers or anything greasy in the engine bay.
If you do get the new bulb dirty, wipe it clean with an alcohol moistened paper towel. Insert the new # H11 bulb in to the fog light housing and rotate it 1/4 turn clockwise to secure it in place. Push the power plug straight on to the base of the new bulb until it clicks securely in to place. Test the new fog light bulbs by turning on the headlights and activating the fog lights switch. For more,
check out my other
Nissan
Armada Repair & Maintenance Guides. |
||
| If you found this guide to be helpful,
please consider making a small donation by clicking on the PayPal.com
"Donate" button located to the right of this paragraph. Thank you!
(Note: I am not a registered charity. Donations are not tax deductible.) |