
Nissan Altima Brake Light
Bulb Replacement Guide
A pictures illustrated instruction guide
to replacing the rear brake light or "tail light" bulb on a 2002 to
2006 Nissan Altima
sedan.

|
This guide was specifically written to assist owners of the 2002, 2003, 2004, 2005 & 2006 Nissan Altima 2.5 sedan in replacing a burnt out rear brake light bulb. It may also be useful for owners of other Nissan or Infiniti (made by Nissan Motors) vehicles such as the Sentra, Maxima, the Infiniti G sedan, and the Infiniti M sedan. I am not a professional mechanic. I take no responsibility for damage to your vehicle, property, person, or pets. If you have any doubts, please consult an ASE certified mechanic. Shortly after replacing the Third (High Mount) Brake Light Bulb in our 2002 Nissan Altima, one of the tail brake light bulbs also burned out. If you need to replace the third brake light bulb, click on the link at the beginning of this paragraph. The replacement light bulbs with their part numbers are as follows: Brake # 3157, Rear Turn Signal # 3156 and Reverse Light # 921. |
||
|
|
||
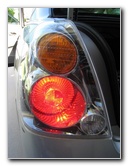
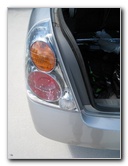 Nissan Altima Tail Lights |
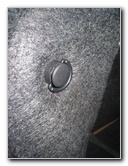
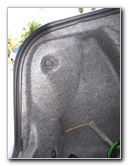 Two Pop Rivets |
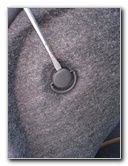 Use Screwdriver |
|
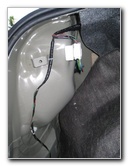
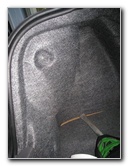
The rear brake light bulbs can be accessed
through the trunk.
First I had to pop out two snap rivets by using a flat head screw driver. These two pop rivets hold the trunk carpet liner to the interior walls of the trunk. |
||
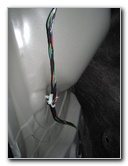
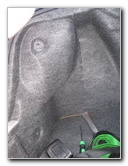 Pop Rivets Removed |
 Trunk Carpet Pulled Back |
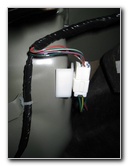
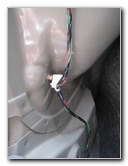 Tail Light Wire Harness |
| Once the pop rivets were removed, I pulled the carpet back to reveal the tail light wire looms and the 8mm nuts that secure the tail light assembly to the vehicle's frame. | ||
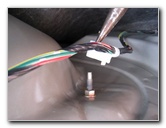 Harness Clip Pulled Off |
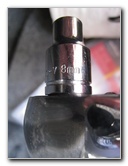 8mm Socket & Wrench |
 Removing Tail Light Bolts |
|
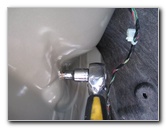
Before I could unscrew the 8mm nuts holding the tail light assembly to the car, I had to pull the wiring harness clips off the end of the screw with a pair of needle nose pliers. Then I loosened the 8mm nuts with an 8mm socket and ratcheting wrench. |
||
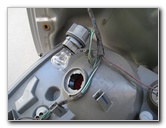
 Tail Light Assembly Out |
 Rear Brake Light Bulb |
 Reverse Light Bulb |
|
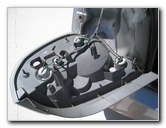
It took a bit of wiggling to get the tail light assembly to pop off the car. I let the assembly hang off the back of the car being supported by the wires. Now I could access the brake light bulb socket, the reverse light bulb and the hazard/signal light bulb. |
||
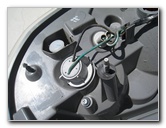 Signal Light & Hazard Bulb |
 Brake Light Bulb Removed |
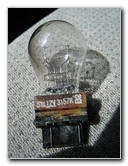 Old Sylvania Brake Bulb |
|
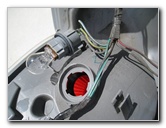
To access the brake light bulb, turn the socket counter clockwise about half a turn until it easily comes out of the tail light assembly. The old rear brake light bulb had "SYL 12V 3157K B2" written on the black plastic base. I took the old 3157 bulb with me to the Pep Boys auto parts store to buy a new one. A two pack of new Sylvania 3157 LL "Long Life" brake light bulbs was $4.99 plus tax. |
||
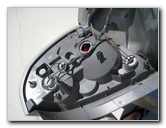
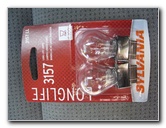 New 3157 LL Sylvania Bulbs |
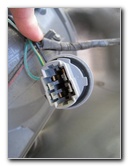 Brake Light Bulb Socket |
 New Bulb Inserted In Socket |
|
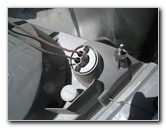
The new bulb only goes in one way and it takes minimal effort to insert it. Once the new bulb is seated into the socket, test it by having someone, or something, press on the brake pedal. If it works, re-install it into the tail light assembly by twisting it about a half turn clockwise into the hole. The rear turn signal light bulb is part number 3156 and the reverse light bulb is part number 921. |
||
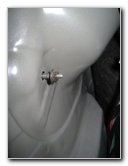
 Assembly Re-Inserted |
 8mm Nut Attached |
 Tighten 8mm Nuts |
| I
reattached the tail light assembly by lining up the two metal screws and the
plastic spike on the back of the assembly with the holes in the rear corner
of the car.
Then I threaded on the 8 mm bolts and tightened them with the 8mm socket and ratcheting wrench. |
||
 Upper Wire Loom Attached |
 Lower Wire Loom Clip Attached |
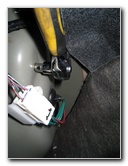
 Carpet Back In Place |
|
Next I pushed the wire loom clips back on to the ends of the 8mm screws and folded the trunk carpet liner back over the metal. The last step was to line up the holes in the carpet with the holes in the metal and pop the snap rivets back into place. Once again, I put a heavy box on the brake pedal and verified that all of the turn signal, reverse, and brake light bulbs were working properly. |
||
 Snap Rivets Re-Inserted |
 Pop Rivet Pushed In |
 New Brake Light Bulb Working |
| I hope
you found this guide useful. For more related photo galleries check out the
following links:
Nissan Altima Third Brake Light Bulb Replacement Guide,
Nissan Altima Headlight Bulb Replacement Guide,
Nissan Altima Crankshaft Position & Camshaft Sensor Replacement Guide,
Nissan Altima Engine Oil Change Guide,
Car Interior Carpet Replacement,
K&N Air Filter Cleaning Guide,
Buffing Faded Headlights Guide, and a
Garmin Nuvi 260W Portable GPS Navigator Review |
||
| If you found this guide to be helpful,
please consider making a small donation by clicking on the PayPal.com
"Donate" button located to the right of this paragraph. Thank you!
(Note: I am not a registered charity. Donations are not tax deductible.) |