
Nissan Altima
Front Brake Pads Replacement Guide
How to replace the front brake pads on a
4th generation 2007 to 2012 Nissan Altima with picture illustrated instructions.

By Paul B. Michaels Author & Photographer Auto Mechanic Since 1989 |
||
| Please note, I am not a professional mechanic. This guide is for illustrative purposes only. If you have any doubts, do not proceed and consult with your dealership. I assume no responsibility for damage to your vehicle, persons, property or pets. | ||
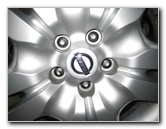
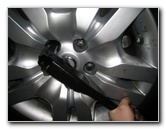
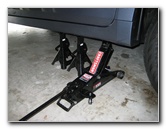 Loosen Lug Nuts & Raise Car |
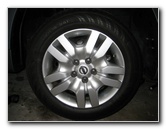 Front Passenger Wheel |
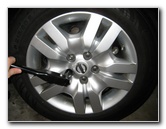 Remove 5 Wheel Lug Nuts |
| This
automotive "how-to" guide was specifically written to assist owners
of the 4th generation 2007 to 2012 Nissan Altima in replacing the
front brake pads.
Owners of other Nissan or Infiniti vehicles such as the Versa, Maxima, Juke, Rogue, Murano, Xterra, Pathfinder, Sentra, Cube, Armada, Quest, Frontier, Titan, G25, G37 and M37 may also find this guide to be helpful. To complete this front brake job, you'll need the following items: a floor jack, jack stands, a lug nut wrench, a 14mm socket with ratchet, a "C" or "F" clamp and a set of new brake pads. New front brake pads for the 2007-2012 Nissan Altima cost anywhere from about $15 for "economy" semi-metallic pads to almost $70 for "performance" ceramic pads. I've had good luck with the Wagner ThermoQuiet QC815 ceramic pads. |
||
|
|
||
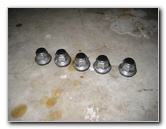 Five Lug Nuts Removed |
 Pull Off Wheel From Hub |
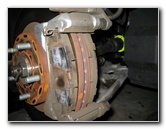
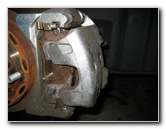
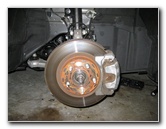 Brake Rotor & Caliper |
| The first step is
to slightly loosen the five lug nuts on the front wheel with the lug nut
wrench.
Then raise the front side of the car that you plan on working on first with the floor jack and securely support it with jack stands. (Alternatively, you could lift the entire front of the car by the center jack point and support each side with jack stands.) Completely remove the five lug nuts and carefully pull the wheel off the wheel bearing hub. Behind the wheel, you'll find the brake rotor and the brake caliper. |
||
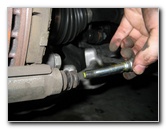
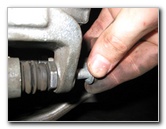
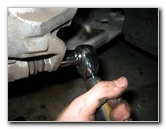
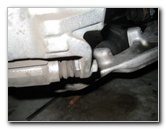 14mm Lower Caliper Bolt |
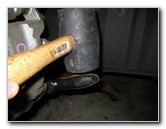 Break Free Lower Bolt |
 Lower Caliper Bolt Removed |
| To access the old
brake pads, you'll need to remove the lower caliper bolt and swing the
caliper upwards off the pads.
Use a 14mm socket with ratcheting wrench to loosen the lower caliper bolt by turning it counter clockwise. If you have trouble turning the bolt, use a rubber mallet or place a breaker bar over the wrench to help break it free. |
||
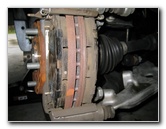
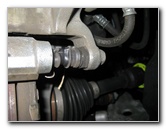
 Swing Caliper Upwards |
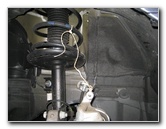 Secure Caliper To Shock |
 Front Brake Pads Exposed |
| Once the lower
caliper bolt has been removed, you can rotate the caliper body up towards
the front of the car and off the brake pads.
To prevent the caliper from crashing down on your fingers or the brake rotor, secure it to the suspension spring using a piece of twine or rope. |
||
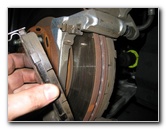
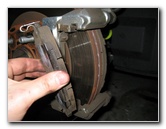 Carefully Slide Off Old Pads |
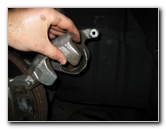
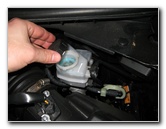
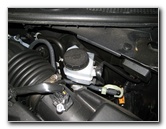 Brake Fluid Reservoir |
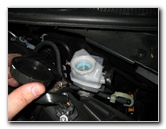 Remove Reservoir Cap |
| The old brake pads
are now exposed and can be carefully pulled off the brake rotor.
If you have trouble removing them, try wiggling the brake pads while pulling or tapping the caliper assembly with the rubber mallet. If your new brake pads didn't come with metal backing plates, save the old ones and install them on to the new pads. You'll also need to take off the wear indicator or "squeal" bar from the top of the outer brake pad and install it in the same location on the new outer brake pad. Next, remove the cap from the brake fluid reservoir located within the engine bay just behind the engine air box. This will allow brake fluid from the caliper piston to easily flow back in the system when it is compressed during the next step. |
||
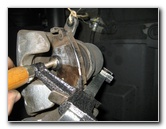 Compress Caliper Piston |
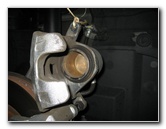 Caliper Piston Pushed Back |
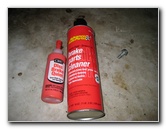 Brake Cleaner & Disc Quiet |
| In order for the
new thicker brake pads to fit inside the caliper, the caliper piston will
need to be compressed backwards using a "C" or
"F" clamp.
Place the friction material side of one of the old brake pads evenly across the brake caliper piston and use the clamp to very slowly compress the piston back until it lies flush with the rubber boot. Do not push the piston past where it lies even with the rubber boot. Occasionally check the level in the brake fluid reservoir while you compress the caliper piston to make sure it doesn't overflow. Use some brake parts cleaner spray to clean the caliper and both sides of the brake rotor. If your brakes are prone to squeaking or squealing, apply some CRC Disc Brake Quiet gel on the back plates of the new pads where they come in contact with the caliper. (Do not apply anything and avoid touching the friction material side of the new pads.) If your vehicle exhibits shuddering, pulsating, or vibrations while braking, you may need to have your rotors "turned" (resurfaced) or just replace them altogether with brand new rotors. |
||
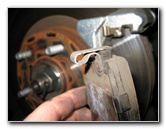 Wear Indicator Bar |
 Install New Brake Pads |
 Pads Flush Against Rotor |
| Place the new brake
pads into the caliper bracket and push them until the friction surface rests
flush against the brake rotor.
Be sure that the wear indicator or "squeal" bar is installed into the same location and orientation as it was on the old pads. The wear bar was installed at the top of the outer brake pad on this particular Nissan Altima. |
||
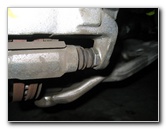
 Lubricate Lower Caliper Pin |
 Lubricate Upper Pin |
 Lower Caliper Over Pads |
| Then move to the
lower caliper pin and gently pull it out of the caliper bracket while
holding the rubber boot.
If the pin is not adequately lubricated, apply some brake caliper grease or "high pressure moly-grease" and re-install it into the bracket. Carefully cut the twine to release the brake caliper from the suspension spring and slowly swing it downwards over the new brake pads. If it doesn't fit over the new pads, you may need to compress the caliper piston some more. |
||
 Line Up Caliper Pin |
 Insert Caliper Bolt |
 Tighten Caliper Bolts |
| Line up the hole in
the caliper pin with the hole in the caliper bracket and thread the lower
caliper bolt by hand. Move to the upper caliper bolt and remove it using the
14mm socket. Rotate the caliper outwards slightly and pull out the upper
caliper pin to check that it is well lubricated. Re-insert the upper caliper
pin, replace the caliper over the pads and insert the upper caliper bolt. Tighten the two caliper bolts using a 14mm socket and ratcheting wrench to just past hand tight. The Nissan Altima service manual specifies that the front caliper bolts should be tightened to 20 ft lb using a torque wrench. Make sure that the caliper bolts are tight enough so that they will not vibrate loose. They should be difficult to loosen with just a small ratcheting wrench by itself. |
||
 New Brake Pads Installed |
 Replace Wheel & Lug Nuts |
 Replace Reservoir Cap |
| Check that the two
caliper bolts are properly tightened before replacing the wheel and spinning
on the five lug nuts by hand. Tighten the lug nuts evenly in a crisscross or
"star" pattern using the lug nut wrench. Torque the lug nuts to 80 ft lb as
specified in the owner's manual using a torque wrench. For extra safety,
check the lug nuts again in a day or two and tighten them if necessary. Check that the brake fluid in the reservoir is at the cold "Max" level. If it is above it, remove a bit with a spray bottle head, a turkey baster, or soak some up with a paper towel. If the level is too low, add a bit of fresh DOT 3 brake fluid until it reaches the cold "Max" line. Then replace the brake fluid reservoir cap to complete the job.
To break in your new brake pads, just drive
normally for the first few hundred miles while trying to avoid hard or
"panic" stops. |
||
| For more of my
maintenance instructions, click on the following links:
2007-2012 Nissan Altima 2.5 S Maintenance Guides, and
2002-2006 Nissan Altima 2.5 S Maintenance Guides. |
||
| If you found this guide to be helpful,
please consider making a small donation by clicking on the PayPal.com
"Donate" button located to the right of this paragraph. Thank you!
(Note: I am not a registered charity. Donations are not tax deductible.) |