
Nissan Altima
Cabin Air Filter Replacement Guide
How to clean or replace the cabin air
filter element in a 4th generation 2007 to 2012 Nissan Altima sedan or coupe.

By Paul B. Michaels Author & Photographer Auto Mechanic Since 1989 |
||
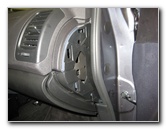
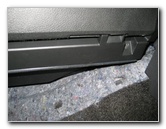
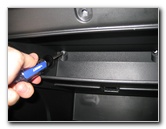
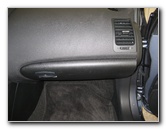 Glove Box |
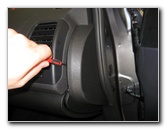
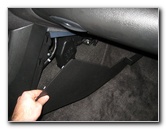
 Passenger Kick Panel |
 Pry Off Kick Panel |
| This
automotive "how-to" guide was specifically written to assist owners
of the 4th generation 2007 to 2012 Nissan Altima coupe or sedan in
cleaning or replacing the HVAC system's cabin air filter element. Owners of other Nissan or Infiniti vehicles such as the Versa, Maxima, Juke, Rogue, Murano, Xterra, Pathfinder, Sentra, Cube, Armada, Quest, Frontier, Titan, Armada, Quest, G25, G35, G37 and M37 may also find this guide to be helpful. Some of the replacement cabin air filter elements that should be compatible with any 2007-2012 Nissan Altima with their part numbers include the following: Purolator # C45871 (verified on Amazon & Advance Auto Parts), Fram CF11173, Ecogard XC45871, TYC 800107P, ACDelco CF3290, Denso 453-5016, Hastings # AFC1356, and the "Replacement" brand part # N420106. The only tools needed to complete this procedure are a Phillips head screwdriver and a small flathead screwdriver. |
||
|
|
||
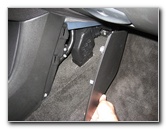
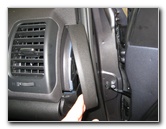
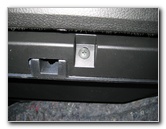
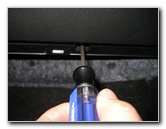
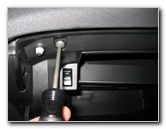
 Dashboard Side Trim Piece |
 Pry Off Dashboard Piece |
 |
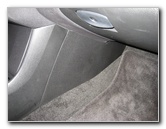
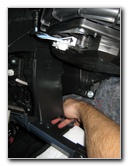
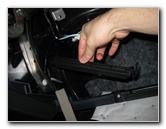
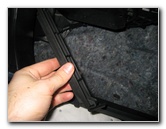
| The first step is
to gently pry off the passenger side kick panel located just below and to
the left of the glove box.
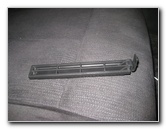
Then use the small flathead screwdriver to remove the small trim piece on the far right edge of the dashboard. |
||
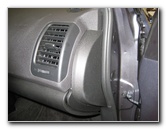
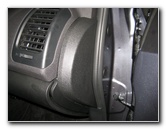
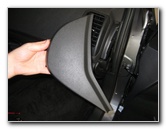 Side Panel Removed |
 |
 Screws Below Glove Box |
 |
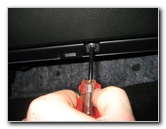
 Remove Lower Screws |
 3 Phillips Head Screws |
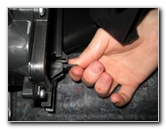
| Move to below the glove box and remove the three lower Phillips head screws. | ||
 Open Glove Box |
 Remove Upper Screws |
 3 Upper Screws Removed |
| Then open the glove box and remove the three screws along the upper edge. | ||
 Two Interior Screws |
 Remove Two Screws |
 8 Total Glove Box Screws |
| The last two of the eight total Phillips head screws are located inside the glove box at the back of the upper compartment. | ||
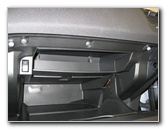
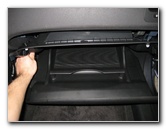 Pull Out Glove Box |
 Gently Lower Glove Box |
 Cabin Air Filter Cover |
| Once all eight screws have been removed, you can gently pull out the glove box and rest it on the floor mat. | ||
|
|
||
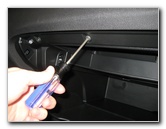
 Reach In To Left |
 Unclip Filter Cover |
 Cabin Air Filter Cover |
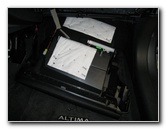
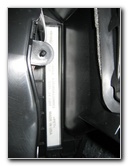
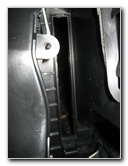
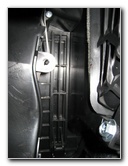
| The access cover
for the cabin air filter is located behind the glove box and to the left
near the firewall just in front of the center console.
There is a small plastic latch at the bottom end of the filter cover holding it in place. Gently pull up on the tab and lift the filter cover away from the housing. |
||
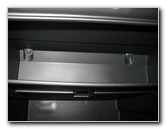
 Cabin Air Filter |
 Pull Filter Element Out |
 Clean Or Replace |
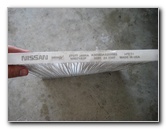
| If you're lucky,
the old cabin air filter will have a fabric tag sticking out that you can
use to easily pull it out from the filter housing.
I had trouble removing the old filter and had to use a metal wire clothes hanger bent into a hook in order to get a good grip on it. |
||
 Nissan MicronAir Filter |
 Empty Air Filter Slot |
 |
| If the old filter
isn't too dirty, you can tap out the large debris and blow out the dust with
a shop vacuum.
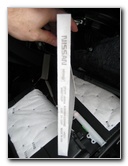
Replace the filter if it is very dark and clogged with leaves, bugs, dirt and dust. I'd recommend using the TYC 800107P cabin air filter since it has the best reviews on Amazon. |
||
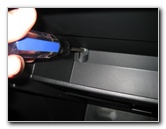
 Insert New Filter |
 Replace Filter Cover |
 Secure Filter Cover Clip |
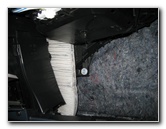
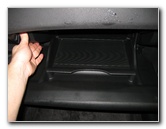
| Check the
orientation of the new or cleaned filter by locating the "Air Flow" arrow or
indicator before inserting it into the filter housing.
The cabin air filter seems to be a bit too small for the housing, so it may be necessary to slightly compress it. |
||
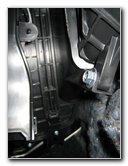
 Filter Housing Near Firewall |
 Re-Insert Glove Box |
 Tighten 2 Interior Screws |
| Snap the filter
housing cover back in place with the black plastic tab at the bottom and
pointing outwards. Insert the glove box back into the void and tighten the two interior screws inside the upper compartment. |
||
 Tighten 3 Upper Screws |
 Tighten 3 Lower Screws |
 Replace Side Dash Panel |
| Tighten the three screws along the upper edge of the glove box and the three screws along the lower edge. Then pop the dashboard trim panel back in place. | ||
 |
 Replace Kick Panel |
 |
| To complete the job, push the
kick panel back into place at the lower left of the passenger footwell area.
Test out your A/C system and enjoy the fresh air! |
||
| For more of my
maintenance instructions, click on the following links:
2007-2012 Nissan Altima 2.5 S Maintenance Guides, and
2002-2006 Nissan Altima 2.5 S Maintenance Guides. |
||
| If you found this guide to be helpful,
please consider making a small donation by clicking on the PayPal.com
"Donate" button located to the right of this paragraph. Thank you!
(Note: I am not a registered charity. Donations are not tax deductible.) |