
Mitsubishi
Mirage Serpentine Belt Replacement Guide
How to change the serpentine accessory
belt on the 1.2L engine in a 6th generation 2012 to 2016 Mitsubishi Mirage.

By Paul B. Michaels Author & Photographer Auto Mechanic Since 1989 |
||
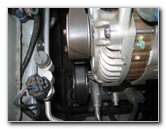
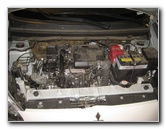 2015 Mirage 1.2L Engine |
 Left Side - Belt & Pulleys |
 Alternator Pulley |
| This
automotive maintenance tutorial was specifically written to assist
owners of the sixth generation (2012, 2013, 2014, 2015, & 2016)
Mitsubishi Mirage in changing the serpentine accessory belt on the
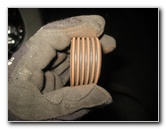
1.2 liter three cylinder 3A92 DOHC MIVEC 12V engine. Owners of other Mitsubishi vehicles such as the Lancer, Outlander, Galant, Montero, Eclipse, 3000GT, Endeavor, Raider, Diamante, Attrage, Carisma, Colt, Grandis, Magna, Pajero, Space Star and the revised 2017 Mirage may also find these DIY instructions to be helpful. The OEM replacement part number is Mitsubishi 1340A146. A new belt can be purchased at Amazon or at your local Mitsubishi dealership's parts counter. The tools needed to complete this procedure include a 12mm socket, a 14mm socket and a 3/8" drive ratchet. |
||
|
|
||
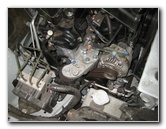
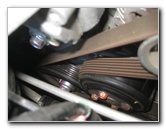
 Crankshaft Pulley |
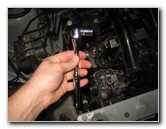
 |
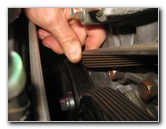
 Study Belt Routing |
| The first two steps
are to open the hood and then move to the left (passenger) side of the
engine bay. Take a moment to study how the OEM belt is routed around the various pulleys such as the alternator, water pump, air conditioning compressor pulley and the crankshaft pulley. If you feel that you will have trouble installing the new belt correctly, draw a routing diagram or use the pictures on this page as a reference. |
||
 |
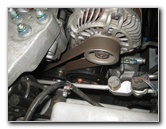
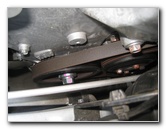
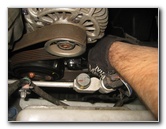
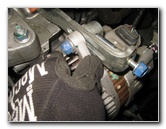
 Belt Tension Bracket |
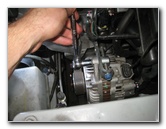
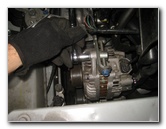 Loosen Top Alternator Bolt |
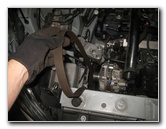
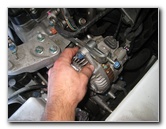
| To release the
tension on the old belt, you will have to loosen the two bolts that secure
the alternator in place and the long tension adjustment bolt at the front of
the alternator. Use a 12mm socket and a 3/8" drive ratcheting wrench to loosen the top alternator bolt in the counterclockwise direction a few turns. The top bolt is mounted with the bolt head on the left side of the car. Do not remove the bolt. |
||
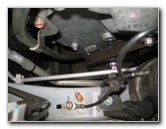
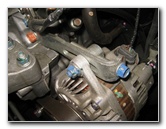
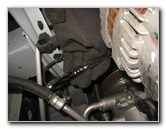
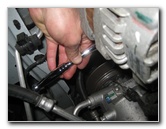
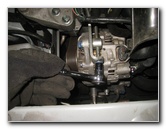 Loosen Tensioner Bolt |
 Two 12mm Bolts |
 Bottom Alternator Bolt |
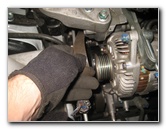
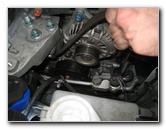
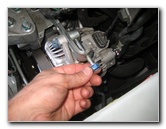
| To help remember
the tension adjust bolt's OEM position, I'd recommend using a Sharpie marker
to draw a line on the bolt where it meets the alternator mounting bracket. Loosen the belt tension adjustment bolt (the long bolt with the head facing towards the front of the car) by turning it counterclockwise with the 12mm socket and a 3/8" drive ratchet. Then locate the larger bolt on the bottom of the alternator. On this 2015 Mirage the bolt was covered with some blue paint. |
||
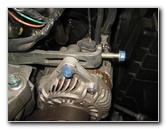
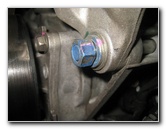
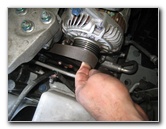
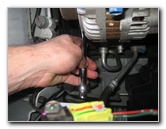
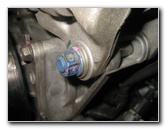
 14mm Socket & Ratchet |
 Loosen Counterclockwise |
 Lower 14mm Alternator Bolt |
| Loosen the bottom alternator bolt by turning it counterclockwise with a 14mm socket and the 3/8" drive ratcheting wrench a few turns. Do not remove the bolt. | ||
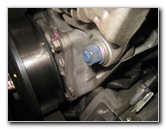
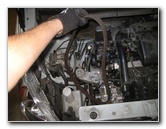
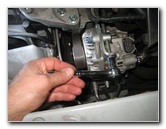
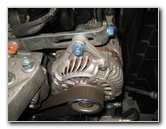
 14mm Bolt Loosened |
 Alternator Bracket Loose |
 Pivot Back Alternator |
| Firmly push on the alternator to pivot it back towards the rear of the engine to release the tension on the OEM belt. | ||
|
|
||
 Slip Old Belt Off Pulley |
 Remove Old Belt |
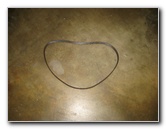 Old Belt Removed |
| Slip the old belt
off the top of the alternator pulley. If you have trouble removing the old belt, loosen the tension adjustment bolt a few more turns and firmly push back the alternator to create more slack. Pull the old belt off the other pulleys and remove it from the engine bay. |
||
 Inspect For Cracks |
 Lower In New Belt |
 Route Over Pulleys |
| Inspect the old
belt for cracks, chunks of missing rubber and fraying.
If the old belt is in relatively good condition, consider saving it in your trunk for emergency use just in case the new belt fails prematurely. Lower the new Mitsubishi 1340A146 OEM serpentine belt down on to the left (passenger) side of the engine. A good tip to remember when routing the belt is that the ribbed side of the belt gets wrapped around ribbed pulleys and the smooth outside of the belt goes against the smooth pulley. |
||
 Crankshaft Pulley |
 Slip New Belt Over Alternator |
 Pull Alternator Forward |
| Start by wrapping
the new belt around the large crankshaft pulley at the bottom of the engine. Slip the top of the belt over the alternator pulley. Firmly pull the alternator forward until it pivots and applies some tension to the new belt. |
||
 Tension Adjustment Bolt |
 Slightly Tighten Lower Bolt |
 Tighten Tensioner Bolt |
| Spin in the tension
adjustment bolt in the clockwise direction until it approaches the mark you
drew on it earlier. Slightly tighten the bottom 14mm alternator bolt in the clockwise direction. (Do not tighten it all the way.) Tighten the long 12mm tension adjustment bolt until the belt seems to be tight enough. |
||
 Tighten Top Alternator Bolt |
 Tighten Lower 14mm Bolt |
 14mm Bolt Tight |
| Tighten the top
12mm alternator bolt in the clockwise direction until it is snug. Then tighten the lower 14mm bolt until it is snug. Double check that the two alternator bolts are tight before moving on to the next steps. |
||
 New Belt Installed |
 Check Belt Tension |
 Start Engine - Listen |
| To check the
tension on the new belt, try to rotate the longest run from the alternator
to the crankshaft pulley.
The proper tension should allow the middle of the belt to be turned about 90 degrees or perpendicular to the rest of the belt. If you can not rotate the middle of the longest run of the belt to 90 degrees, loosen the tension adjustment bolt a few turns. If the belt can be turned significantly past 90 degrees, it should be tightened. To loosen or tighten the new belt, start by loosening the two alternator bolts (top 12mm and bottom 14mm) a few turns. Then either rotate the tension adjust bolt clockwise to tighten or counterclockwise to loosen. Once you are satisfied that the belt tension is correct, start the engine and listen for any strange sounds. If you hear an occasional "chirp" noise, you may need to tighten the belt. If you hear a very loud and constant squealing sound, immediately turn off the engine. The belt might be far too tight to actually spin around the pulleys. Loosen the belt a bit and try again. For more,
check out all of my
2012-2016 Mitsubishi Mirage DIY Repair & Maintenance Guides. |
||
| If you found this guide to be helpful,
please consider making a small donation by clicking on the PayPal.com
"Donate" button located to the right of this paragraph. Thank you!
(Note: I am not a registered charity. Donations are not tax deductible.) |