
MINI Cooper
Trunk Light Bulb Replacement Guide
How to change a burnt out cargo area
light bulb in the trunk of a 3rd generation 2014 to 2020 MINI Cooper.

By Paul B. Michaels Author & Photographer Auto Mechanic Since 1989 |
||
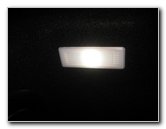
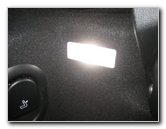 2019 MINI Trunk Light |
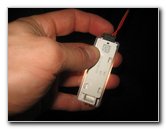
 Insert Flathead Screwdriver |
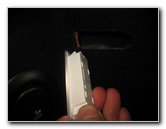
 Pry Out Light Housing |
| This automotive
maintenance tutorial was specifically written to assist owners of the 3rd
generation (2014, 2015, 2016, 2017, 2018, 2019 and 2020) MINI Cooper in
changing a burnt out cargo area light in the trunk. Owners of other MINI models or some smaller BMW vehicles such as the Cooper S, "JCW" John Cooper Works, Convertible, Hatch, Clubman, One, One First, One D, Coupe, Roadster, Countryman, Paceman, 3 Series, 318i, 328i, 320i, 323i, 325i, 330i, 340i, 230i, M240i, M2, M3, M4, i3, 228i, 230i, 128i, 135i, Z3, Z4 and Z8 may also find these DIY instructions to be helpful. The original OEM cargo area light housing was part number BMW 9313574-02. The only tool needed to remove and replace the cargo area light is a small flathead screwdriver or a plastic pry bar tool. |
||
|
|
||
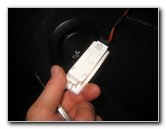
 Pry Out Power Plug |
 Housing Disconnected |
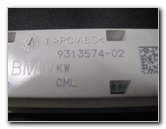
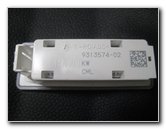 BMW 9313574-02 |
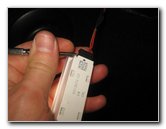
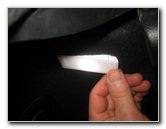
| Insert the blade of
the small flathead screwdriver in between the rear edge of the light housing
and the fabric trunk panel. Gently pry out the rear edge of the housing. Remove the housing from the trunk interior panel. Gently remove the electrical connector. You may need to use the screwdriver to push in the release tab on the power plug. |
||
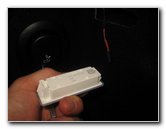
 New Cargo Light Assembly |
 Push In Power Plug |
 Re-Insert Wires First |
|
The original OEM cargo light assembly in this 2019 MINI Cooper Hatch convertible was BMW 9313574-02 (also known as 931357402). Older models may be equipped with a traditional incandescent festoon style light bulb which is part number 6418. Push the power plug into the socket. Re-insert the wires and the front edge of the housing back into the trunk panel. |
||
 Pop In Rear Edge |
 New Trunk Light Working |
 Testing Cargo Light |
| Then gently snap in
the rear edge of the light housing. Test the new trunk light bulb by opening and closing the trunk or press the "Unlock" button on the key fob. Be sure to record the bulb change in your vehicle's service records. For more,
check out all of my
MINI Cooper DIY Repair & Maintenance Guides. |
||
| If you found this guide to be helpful,
please consider making a small donation by clicking on the PayPal.com
"Donate" button located to the right of this paragraph. Thank you!
(Note: I am not a registered charity. Donations are not tax deductible.) |