
MINI Cooper Headlight Bulbs
Replacement Guide
How to change a burnt out low and high
beam halogen headlight bulb in a 3rd generation 2014 to 2020 Mini Cooper.

By Paul B. Michaels Author & Photographer Auto Mechanic Since 1989 |
||
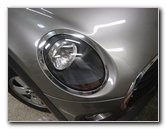 2019 MINI Headlight |
 Hood Release Lever |
 Passenger Side Headlight |
| This automotive
maintenance tutorial was specifically written to assist owners of the third
generation (2014, 2015, 2016, 2017, 2018, 2019 and 2020) MINI Cooper in
changing a burnt out dual filament combination low and high beam halogen
light bulb in the headlight housings. Owners of other MINI models or some smaller BMW vehicles such as the Cooper S, "JCW" John Cooper Works, Convertible, Hatch, Clubman, One, One First, One D, Coupe, Roadster, Countryman, Paceman, 3 Series, 318i, 328i, 320i, 323i, 325i, 330i, 340i, 230i, M240i, M2, M3, M4, i3, 228i, 230i, 128i, 135i, Z3, Z4 and Z8 may also find these DIY instructions to be helpful. The replacement low and high beam halogen light part number is 9003. If you would like to have brighter headlights, there are compatible 9003 LED bulbs available. No tools are needed to access and replace either the driver side of passenger side headlight bulbs. |
||
|
|
||
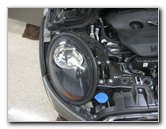
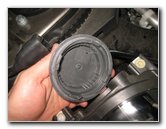
 Back Side of Housing |
 Twist Off Counterclockwise |
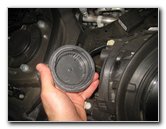 Dust Cover Removed |
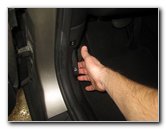
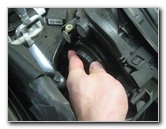
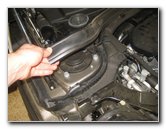
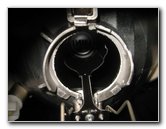
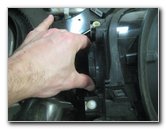
| The first step is
to open the hood by pulling the release lever twice.
The hood release lever is located close to where the driver's left foot would reside while driving. Move to the headlight assembly with the burnt out bulb. Remove the round black plastic dust cap on the back side of the headlight housing by rotating it 1/4 turn in the counterclockwise direction. Set the dust cover aside in a safe place. |
||
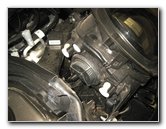
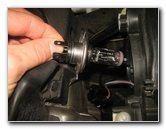
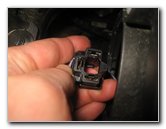
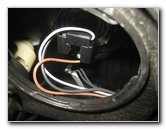 Black Electrical Connector |
 Pull Off Power Plug |
 Pull Off Weatherstripping |
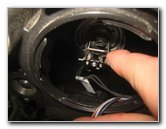
| Gently pull the
black plastic electrical connector straight off the base of the old light
bulb. If you want more working room behind the headlight housing, you can pull off the end of the rubber weatherstripping near the shock tower and the cowl area close to the windshield. |
||
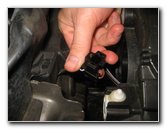
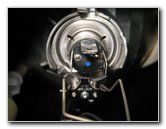
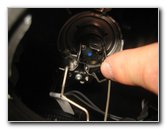
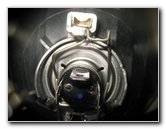
 Base of Old Light Bulb |
 Translucent Plastic Window |
 Push In & Remove Hook |
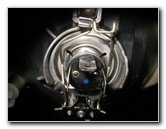
| The old light bulb
is held in place by two metal retaining arms (also known as a "spring clip").
To release the retaining arms, push in the tab on the top and move the bar to the right and out of the hook. Gently lower the hinged spring clip away from the base of the old light bulb. |
||
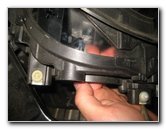
 Lower Metal Retaining Arm |
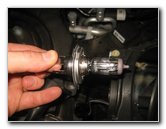 Pull Out Old Light Bulb |
 Osram HB2 9003 |
| Once the retaining
arms are out of the way, you can pull the old light bulb straight out of the
housing. (The original OEM bulb was marked as part number Osram 9003 HB2 DOT L Germany Bilux 12V 60/55W H4 U 37R E1 00801 W7n3.) |
||
|
|
||
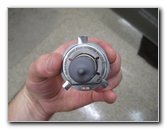
 Lower In New Bulb |
 Empty Bulb Housing |
 Middle Tab - Up |
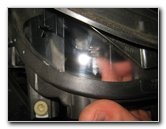
| Try to avoid
touching the glass part of the new halogen headlight bulb with your fingers
or anything dirty in the engine bay. If you do get the new bulb dirty, wipe it clean with a paper towel and some rubbing alcohol. Orientate the new 9003 bulb with the middle electrical contact facing up towards you. The other two electrical contact tabs or "blades" should be pointing out towards the left and right sides of the car. |
||
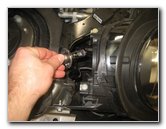
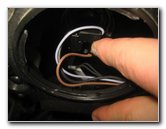
 Raise Retaining Arms |
 Secure Bar In Hook |
 Retaining Arms Secured |
| Install the new
light bulb into the socket. If you would like to have brighter headlights that will last longer, install some compatible 9003 LED bulbs. Raise the hinged metal retaining arms up and over the rear of the new light bulb. Push in the tab on the top of the retaining arms and move it to the left into the hook to secure it into place. Double check that the new light bulb is securely installed before moving on to the next steps. |
||
 Electrical Connector |
 Push On Power Plug |
 Line Up Dust Cap |
| Push the black
plastic electrical connector straight on to the three metal contacts (tabs /
blades) on the base of the new light bulb. Make sure the power plug is securely in place. |
||
 1/4 Turn Clockwise - Lock |
 Test New Headlight Bulb |
 Testing High Beam Light |
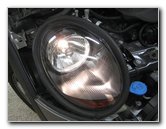
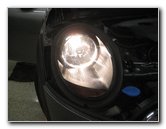
| Replace the round
black plastic debris cover by rotating it 1/4 turn in the clockwise
direction. To test the new light bulb, turn on the headlights and flash the high beams. Be sure to record the bulb change in your vehicle's service records. For more,
check out all of my
MINI Cooper DIY Repair & Maintenance Guides. |
||
| If you found this guide to be helpful,
please consider making a small donation by clicking on the PayPal.com
"Donate" button located to the right of this paragraph. Thank you!
(Note: I am not a registered charity. Donations are not tax deductible.) |