
MINI Cooper
Cabin Air Filters Replacement Guide
How to clean or change the cabin air
filters in a 3rd generation 2014 to 2020 Mini Cooper with the part numbers.

By Paul B. Michaels Author & Photographer Auto Mechanic Since 1989 |
||
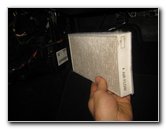
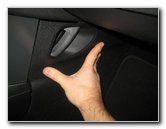
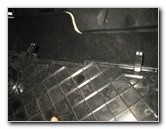
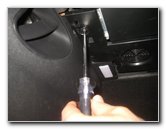
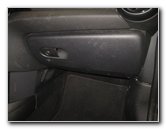 2019 MINI Glove Box |
 Panel Under Glove Box |
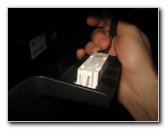
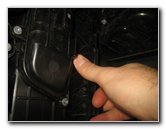
 Remove Screw On Left |
| This automotive
maintenance tutorial was specifically written to assist owners of the third
generation (2014, 2015, 2016, 2017, 2018, 2019 and 2020) MINI Cooper in
cleaning or changing the two cabin air filter elements for the A/C system
located in the HVAC blower motor housing. Owners of other MINI models or some smaller BMW vehicles such as the Cooper S, "JCW" John Cooper Works, Convertible, Hatch, Clubman, One, One First, One D, Coupe, Roadster, Countryman, Paceman, 3 Series, 318i, 328i, 320i, 323i, 325i, 330i, 340i, 230i, M240i, M2, M3, M4, i3, 228i, 230i, 128i, 135i, Z3, Z4 and Z8 may also find these DIY instructions to be helpful. A few compatible sets of new cabin air filters with their part numbers include the following: Premium Guard PC9976, EcoGard XC10389C, K&N VF2060, Beck Arnley 042-2219 and Mann-Filter CUK23-005-2. The only tool needed to access and replace the two filters is a Tox T20 star bit screwdriver. |
||
|
|
||
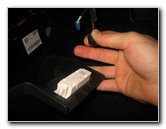
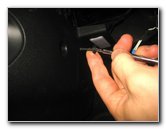
 Remove Screw On Right |
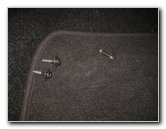
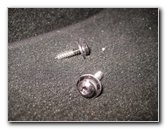 Two Screws Removed |
 Pull Off Plastic Panel |
| Move to the front
passenger seat and look under the glove box and dashboard. Locate the black plastic panel that covers the underside of the glove box. Remove the two screws on the rear edge of the plastic panel (close to the passenger seat) by turning them in the counterclockwise direction with a Torx T-20 star bit screwdriver. Set the two screws aside in a safe place. Gently pull down the rear edge of the cover (closest to you) to release the two friction fasteners. Pull the two hooks at the front edge (furthest from you, near the engine bay) out of their slots. |
||
 Plastic Panel Removed |
 Disconnect Speaker |
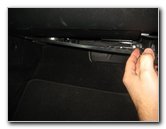
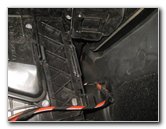
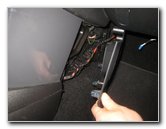
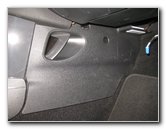 Left Side Kick Panel |
| Lower the plastic
panel down to the floor mat. Disconnect the small blue electrical connector for the speaker. Set the panel aside in a safe place. Move to the left side kick panel on the side of the center stack. |
||
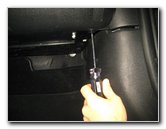
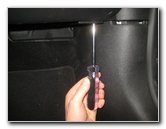
 Remove Single Screw |
 Three Torx T-20 Screws |
 Pull Off Kick Panel |
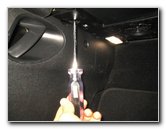
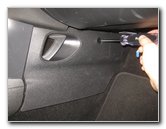
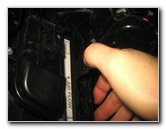
| Remove the single
screw located near the center of the kick panel by turning it in the
counterclockwise direction with the Torx T-20
screwdriver. Set the screw aside with the other two screws. Insert your fingers into the openings near the rear of the kick panel. Firmly pull out the rear edge of the kick panel (closest to the passenger seat). |
||
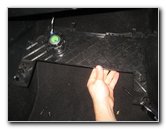
 Kick Panel Removed |
 Disconnect Footwell Light |
 Power Plug Removed |
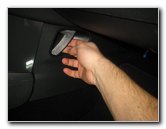
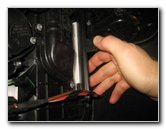
| Then pull out the
two hooks on the front edge (close to the engine bay) of the kick panel out
of their two slots. Push in the release tab on the electrical connector for the footwell light before sliding it straight out of its socket. Set the kick panel aside in a safe place. |
||
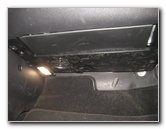
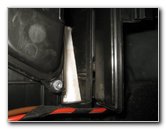
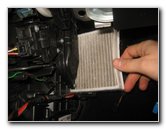
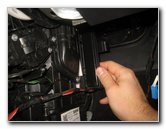
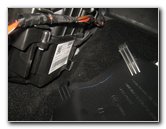
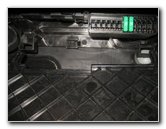
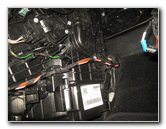 HVAC Blower Motor |
 Filter Cover & Release Tab |
 Release Tab On Left |
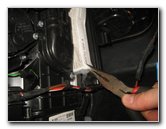
| Once the kick panel
is out of the way, you'll be able to see the HVAC blower motor housing. Locate the vertically orientated rectangular filter access cover. It might be partially obstructed by a wire loom. There is a black plastic release tab near the middle of the access cover on the rear edge of the opening (closer to the seat). |
||
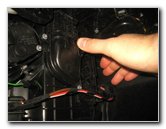
 Swing Open Hinged Cover |
 Old Filters Exposed |
 Pull Out Old Filter |
| Gently push in the
release tab towards the engine bay. Swing open the hinged cover from the left to the right (as seen from outside the car). You should now be able to see the outer edge of the top / upper air filter. I had trouble getting a grip on the old filter, so I had to use a pair of needle nose pliers to pull it out. |
||
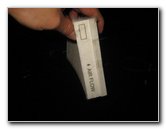
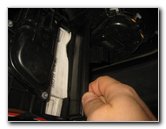
 Top Filter Removed |
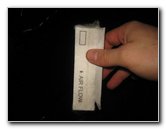 Air Flow Arrow - Rear / Left |
 Second Lower Filter |
| You'll notice that the old air filter has an "Air Flow" arrow on the outer edge that points towards the rear of the car. | ||
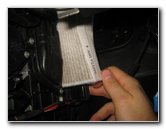
 Remove 2nd Filter |
 Second Filter Removed |
 Two Old Filters |
| Lift up the second / lower air filter out of the slot and pull it straight out of the housing. | ||
|
|
||
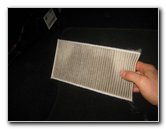
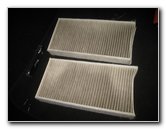
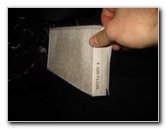
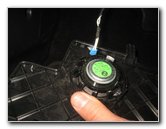
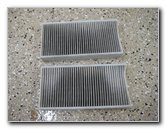 Inspect Old Filters |
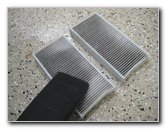 Clean With Vacuum |
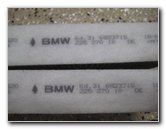
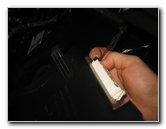
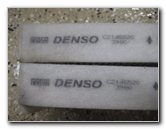 CZ145520 3980 |
| Inspect both sides
of the old filters. If the old filters are dark grey or black and clogged with pollen, soot, leaves, twigs, insects, hair, sand, dirt, dust and other debris they should be replaced with new elements. I recommend buying the Premium Guard PC9976 filters since they have excellent reviews on Amazon. If the old filters look relatively clean, just tap out the large debris and remove any fine dust with a vacuum cleaner. (The OEM filters were marked as MANN Filter Denso CZ145520 3980 BMW 64.31 6823715 225 270 10 DE.) |
||
 BMW 64.31 6823715 |
 Orientate Air Flow Arrow |
 Slide In New Lower Filter |
| Orientate the new
filters with the "Air Flow" arrow pointing back towards the rear of the car. Slide in the first filter and lower it down into the slot. |
||
 Push Down Into Slot |
 Slide In Top / Upper Filter |
 Top Filter Installed |
| Then slide in the
top / upper second filter.
Make sure that the two filters are properly seated in the slot. |
||
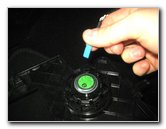
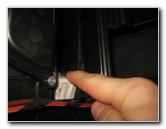
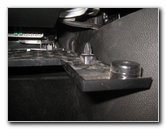
 Close Access Cover |
 |
 Push To Secure Clip |
| Swing the access
cover closed. Push on the cover to secure the retaining clip. You should feel or hear the retaining clip "click" securely into place. |
||
 Plug In Footwell Light |
 Footwell Light Connected |
 Kick Panel Hooks & Slots |
| Hold the kick panel
near the HVAC blower motor housing. Push the power plug for the footwell light back into its socket. Line up the two hooks on the front edge of the kick panel (closest to the engine bay) with their two slots. |
||
 Line Up Retaining Clips |
 Push To Secure Clips |
 Replace Single Screw |
| Line up the
retaining clips on the rear edge of the kick panel with their slots. Firmly push on the kick panel to secure the friction fasteners. Replace the single screw at the center of the kick panel by turning it in the clockwise direction with the Torx T20 screwdriver until it is snug. Try to avoid over tightening the screw to prevent from cracking the plastic panel. |
||
 Panel Under Dashboard |
 Plug In Speaker Connector |
 Plastic Hooks - Rear Edge |
| Hold the plastic
panel under the glove box. Push in the blue plastic power plug for the speaker straight into its socket. Line up the two hooks at the front of the plastic panel with their slots (closer to the engine bay). |
||
 Insert Hooks Into Slots |
 Line Up Friction Fasteners |
 Peg / Spike On Right Side |
| Insert the hooks
into their slots. Raise the rear edge of the panel and secure the two friction fasteners (pegs / spikes) into their corresponding openings. |
||
 Replace Right Side Screw |
 Tighten Screws Clockwise |
 Cabin Filters Replaced |
| Replace the two
screws on the panel by turning them in the clockwise direction with the Torx
T20 screwdriver until they are snug. Enjoy the fresh clean air from your A/C system! Be sure to record the filter change in your vehicle's service records. For more,
check out all of my
MINI Cooper DIY Repair & Maintenance Guides. |
||
| If you found this guide to be helpful,
please consider making a small donation by clicking on the PayPal.com
"Donate" button located to the right of this paragraph. Thank you!
(Note: I am not a registered charity. Donations are not tax deductible.) |