
Kia Sorento
Fog Light Bulbs Replacement Guide
How to change a burnt out fog light bulb
in the front bumper cover of a 2nd generation 2010 to 2015 Kia Sorento.

By Paul B. Michaels Author & Photographer Auto Mechanic Since 1989 |
||
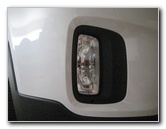 2014 Kia Sorento Fog Light |
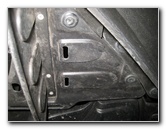 Under Bumper Cover |
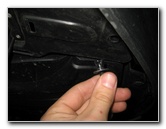
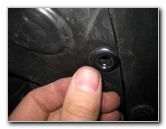
 Loosen Plastic Screw |
| This
automotive maintenance tutorial was specifically written to assist
owners of the second generation (2010, 2011, 2012, 2013, 2014 &
2015) Kia Sorento SUV in changing a burnt out fog light bulb in the
front bumper cover. Owners of other Kia and Hyundai vehicles such as the Optima, Forte, Cadenza, K900, Rio, Sportage, Sedona, Soul, Elantra, Veloster, Sonata, Azera, Tucson, Santa Fe, Genesis and Equus may also find these DIY instructions to be helpful. A replacement halogen fog light bulb is part number 881 which is also known as part # H27W/2. If you would like to have brighter fog lights, install some compatible 881 LED bulbs. The bulbs are available from various manufacturers such as Sylvania, GE, Maxell, Eiko and PIAA. The only tool needed to replace the bulbs is a standard Phillips head screwdriver. |
||
|
|
||
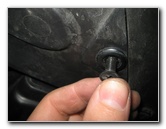
 Remove Plastic Fastener |
 Remove 2nd Plastic Fastener |
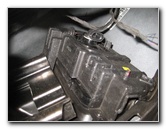
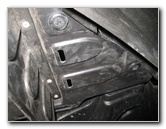
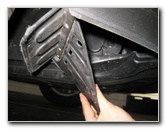 Pull Back Plastic Panel |
| The first step is
to slide under the front bumper of the vehicle below the burnt out fog light
bulb with a Phillips head screwdriver. The triangular shaped plastic access panel is held in place by two fasteners. Loosen the plastic screw in the center of each fastener by rotating them counterclockwise with a Phillips head screwdriver. Once the plastic screws have been loosened, pull out the two fasteners. Gently pull down the plastic access cover. |
||
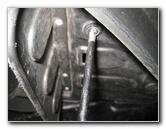
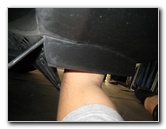
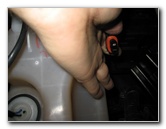
 Base of Fog Light Bulb |
 Disconnect Power Plug |
 1/4 Turn Counterclockwise |
| Reach in and
squeeze together the two sides of the electrical connector to release the
retaining clips. Slide the power plug straight off the base of the old fog light bulb. Rotate the base of the old fog light bulb 1/4 turn counterclockwise before pulling it straight out of the housing. |
||
|
|
||
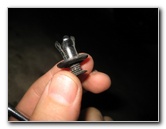
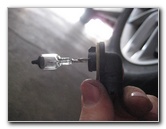
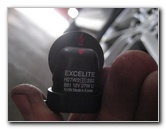 H27W/2 (881) Bulb |
 Electrical Connector |
 1/4 Turn Clockwise - Lock |
| Try to avoid
touching the glass part of the new halogen bulb with your fingers or
anything greasy in the engine bay.
If you do get the new bulb dirty, wipe it clean with an alcohol moistened paper towel. Insert the new 881 bulb in to the housing and rotate it 1/4 turn clockwise to secure it in place. If you want brighter fog lights, choose an 881 LED bulb. |
||
 Push On Power Plug |
 Re-Insert Plastic Fastener |
 Replace 2nd Fastener |
| Push the power plug
straight on to the base of the new bulb until the retaining clips click
securely in to place. Flip the plastic access panel (A.K.A. "splash guard") closed and re-insert the two plastic fasteners. |
||
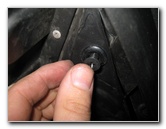
 Pop In Plastic Screw |
 Access Panel Secured |
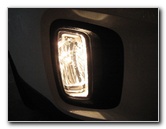 Test New Fog Light Bulb |
| Gently pop in the
black plastic screws to secure the two fasteners. Test the new fog light bulbs by turning on the headlights and then activating the fog light switch. For more, check out my other
Kia Sorento DIY Repair & Maintenance Guides. |
||
| If you found this guide to be helpful,
please consider making a small donation by clicking on the PayPal.com
"Donate" button located to the right of this paragraph. Thank you!
(Note: I am not a registered charity. Donations are not tax deductible.) |