
Kia Optima
License Plate Light Bulbs Replacement Guide
How to change a burnt out license plate
light bulb in the trunk lid of a third generation 2011 to 2015 Kia Optima sedan.

By Paul B. Michaels Author & Photographer Auto Mechanic Since 1989 |
||
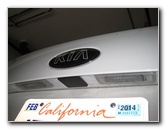 2013 License Plate Lights |
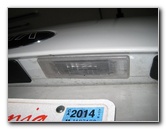 Right Side License Plate Light |
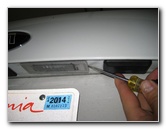 Insert Flathead Screwdriver |
| This
automotive maintenance tutorial was specifically written to assist
owners of the third generation (2011, 2012, 2013, 2014 & 2015) Kia Optima
in replacing a burnt out license plate light bulb in the underside
of the trunk lid. Owners of other Kia and Hyundai vehicles with similar license plate light housings such as the Forte, Cadenza, Rio, Soul, Sedona, Sorento, Sportage, Sonata, Accent, Elantra, Veloster, Azera, Tucson, Santa Fe and Genesis may also find these DIY instructions to be helpful. A replacement bulb is part number 168 from manufacturers such as Sylvania, GE, PIAA, Eiko and Wagner. If necessary, you may also use any other miniature wedge base bulbs including the 194, 158, W5W, 2825 or a compatible LED unit. The only tool needed to replace the bulbs is a small flathead screwdriver used to pry out the housing. |
||
|
|
||
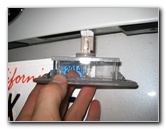 Pull Out Light Housing |
 1/4 Turn Counter Clockwise |
 Pull Out Old # 168 Bulb |
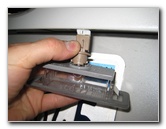
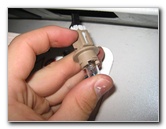
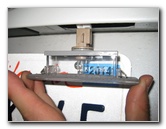
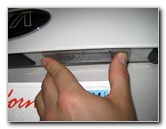
| Insert the blade of
the small flathead screwdriver in between the side edge of the license plate
light housing and the underside of the trunk lid. Gently pry out the light housing. If you have trouble prying out the housing, try inserting the screwdriver in to the other edge. Pull the housing down out of the trunk lid. Rotate the light tan colored plastic bulb socket 1/4 turn counter clockwise and pull it straight out of the housing. |
||
 Push In New # 168 Bulb |
 1/4 Turn Clockwise - Lock |
 Re-Insert Housing |
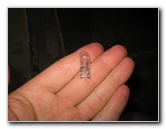
| Push a new number
168 bulb straight in to the socket.
You may also choose to use a brighter LED unit. Re-insert the socket in to the housing and rotate it 1/4 turn clockwise to secure it in place. |
||
 Push In Light Housing |
 Test New Bulbs |
 Testing License Plate Lights |
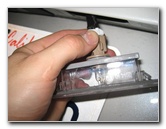
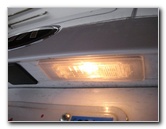
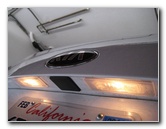
| Push the housing
back in to the underside of the trunk lid until it clicks in to place. Test the new bulbs by turning on the headlights. For more,
check out my other
Kia Optima Repair & Maintenance Guides. |
||
| If you found this guide to be helpful,
please consider making a small donation by clicking on the PayPal.com
"Donate" button located to the right of this paragraph. Thank you!
(Note: I am not a registered charity. Donations are not tax deductible.) |