
Hyundai
Veloster Fog Light Bulbs Replacement Guide
How to change a burnt out fog light bulb
in the front bumper of a 2012 to 2017 Hyundai Veloster with the part number.

By Paul B. Michaels Author & Photographer Auto Mechanic Since 1989 |
||
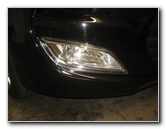 2017 Veloster Fog Light |
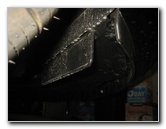
 Look Under Front Bumper |
 Locate Screws & Pop Rivets |
| This
automotive maintenance tutorial was specifically written to assist
owners of the first generation (2012, 2013, 2014, 2015, 2016 and
2017) Hyundai Veloster in changing a burnt out fog light bulb in the
front bumper cover. Owners of other Hyundai or Kia vehicles such as the Elantra, Sonata, Azera, Santa Fe, Tucson, Accent, Ioniq, Genesis, Tiburon, ix20, i20, i30, i40, Veracruz, Optima, Cadenza, K900, Soul, Niro, Sportage, Sorento, Sedona, Rio, Forte and Spectra may also find these DIY instructions to be helpful. A replacement halogen fog light bulb is part number H27W/2 (also known as part # 881). The tools needed to access and replace the fog light bulbs include a short Phillips head screwdriver and a small flathead screwdriver. |
||
|
|
||
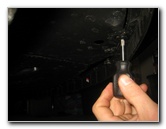
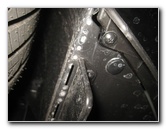 Phillips Head Screws |
 Loosen Counterclockwise |
 First Screw Removed |
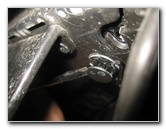
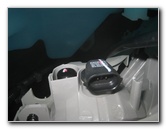
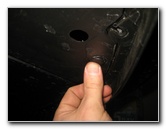
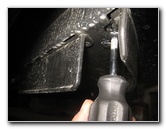
| The fog light bulbs
can be accessed from under the front bumper cover. Slide under the car near the fog light housing with the burnt out bulb with a stubby Phillips head screwdriver and also a small flathead screwdriver. Locate the somewhat triangular shaped access panel at the front corner of the under bumper cover. Remove the three Phillips head screws by turning them counterclockwise with a short screwdriver. |
||
 Loosen 2nd Screw |
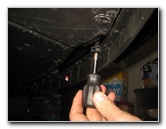 Remove Third Screw |
 Three Screws Removed |
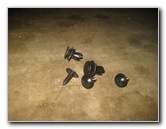
| Set the three screws aside in a safe place. | ||
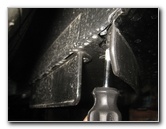
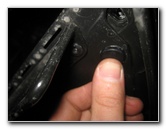
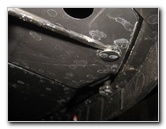 Plastic Pop Rivet |
 Pry Out Center - Remove |
 2nd Fastener Released |
| Use the blade of the small flathead screwdriver to pry out the center piece of the black plastic pop rivets. | ||
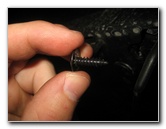
 Pull Out 2nd Pop Rivet |
 2 Pop Rivets & 3 Screws |
 Pull Open Plastic Cover |
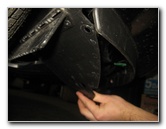
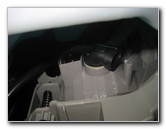
| Once the center
part of each pop rivet has been released, you can pull out the entire
fastener. Set the two pop rivets aside with the three screws. Gently pull open the plastic panel to access the old fog light bulb. |
||
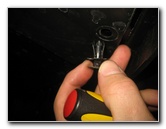
 Base of Old Fog Light Bulb |
 Pinch Tabs - Pull Of Plug |
 Old Fog Light Bulb |
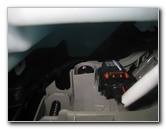
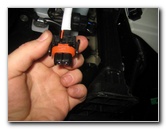
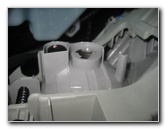
| Gently squeeze together the two plastic tabs on the sides of the electrical connector before pulling the power plug straight off the base of the old light bulb. | ||
|
|
||
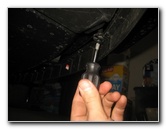
 1/4 Turn Counterclockwise |
 Old Light Bulb Removed |
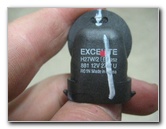 H27W/2 - 881 Bulb |
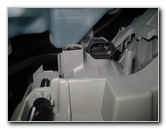
| Rotate the base of the old light bulb 1/4 turn counterclockwise before pulling it straight out of the housing. | ||
 Empty Bulb Housing |
 1/4 Turn Clockwise - Lock |
 Push On Power Plug |
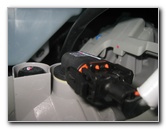
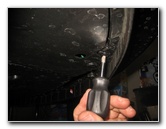
| Try to avoid
touching the glass part of the new halogen bulb with your fingers or
anything greasy inside the front bumper cover. If you do get the new bulb dirty, wipe it clean with a paper towel and some rubbing alcohol. Insert a new number H27W/2 light bulb (also known as part # 881) in to the housing and rotate it 1/4 turn clockwise to secure it in place. If you'd like to have brighter fog lights, there are compatible 881 LED bulbs available. Push the power plug straight on to the base of the new light bulb until the two retaining clips click securely in to place. |
||
 Close Access Panel |
 Push In Pop Rivet |
 2nd Pop Rivet Secured |
| Gently swing the
access cover closed. Re-insert the two plastic pop rivet fasteners and push in the center pieces to secure them in place. |
||
 Tighten Screws Clockwise |
 |
 3rd Screw Replaced |
| Replace the three screws by turning them clockwise with the Phillips head screwdriver until they are snug. | ||
 Access Panel Secured |
 |
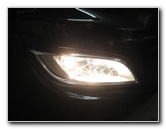 Test New Fog Light Bulb |
| Double check that
the three screws and two pop rivets are secure. Test the new fog light bulbs by turning on the headlights and activating the fog lights switch. Be sure to record the bulb change in your car's service records. For more,
check out all of my
2012-2017 Hyundai Veloster DIY Repair & Maintenance Guides. |
||
| If you found this guide to be helpful,
please consider making a small donation by clicking on the PayPal.com
"Donate" button located to the right of this paragraph. Thank you!
(Note: I am not a registered charity. Donations are not tax deductible.) |