
Hyundai
Sonata Door Panel Removal Guide
How to remove the interior door panels in
a 2011, 2012, 2013, 2014 Hyundai Sonata with picture illustrated instructions.

By Paul B. Michaels Author & Photographer Auto Mechanic Since 1989 |
||
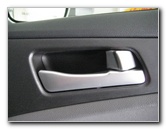
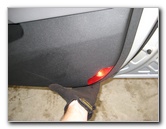
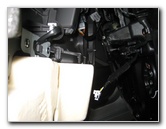
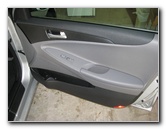
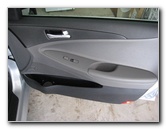 Hyundai Sonata Door Panel |
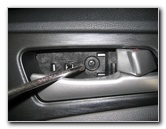
 Armrest Storage Area |
 Pry Up Screw Cover |
| This
automotive "how-to" guide was specifically written to assist owners
of the 6th generation (2011, 2012, 2013 & 2014) Hyundai Sonata in
removing the front plastic interior door panels in order to upgrade the
speaker, add soundproofing material or replace the power window
motor. Owners of other Hyundai or Kia vehicles such as the Elantra, Accent, Veloster, Tucson, Santa Fe, Veracruz, Genesis, Forte, Optima, Rio, Soul, Sedona, Sorento, Tiburon and Sportage may also find these DIY instructions to be helpful. The tools needed to remove the door panels include a small flathead screwdriver, and a Phillips head screwdriver. A panel removal pry bar tool can also be helpful. To remove the OEM door speakers, you'll need a Torx T-20 screwdriver. Either a 5 1/4" or 6 1/2" aftermarket speaker will fit in the front or rear doors with the use of a bracket. |
||
|
|
||
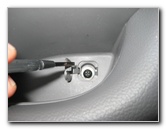
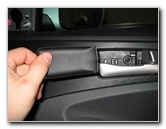
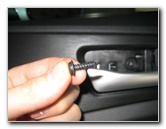
 Remove Phillips Screw |
 Arm Rest Phillips Screw |
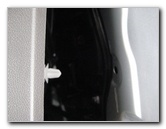
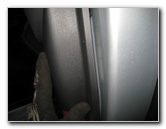
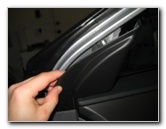 Remove Side Mirror Trim |
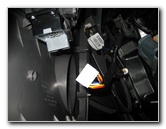
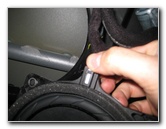
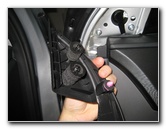
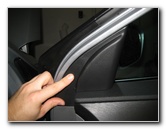
| The first step is
to use the small flathead screwdriver to pry up the small square cover in
the arm rest storage area that hides a single Phillips head screw.
Remove the screw with a standard Phillips head screwdriver. Then move to the trim piece that covers the side view mirror and gently pry it off with the flathead screwdriver. It is held in place by three friction fasteners. |
||
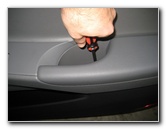
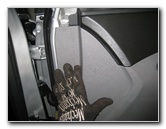
 Interior Door Pull |
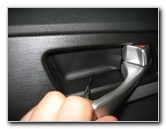 Pry Out Door Handle Trim |
 Door Handle Trim Removed |
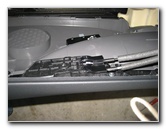
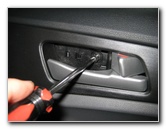
| The other Phillips
head screw that needs to be removed is hidden by the plastic trim piece
behind the door pull lever.
Gently pry out the rectangular trim piece with the small flathead screwdriver. |
||
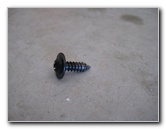
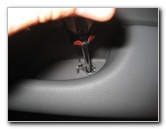
 Remove Phillips Head Screw |
 |
 Pry Off Door Panel |
| Remove the Phillips head screw behind the door pull trim piece with the screwdriver and set it aside in a safe place. | ||
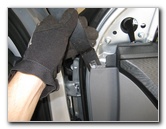
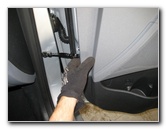 Pulling Out Door Fasteners |
 Releasing X-Mas Tree Clips |
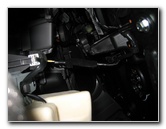 Swing Out Bottom of Panel |
| Once the two screws
and the side view mirror trim piece have been removed, you can begin
releasing the Christmas tree friction fasteners that hold the panel to the
door frame. A door panel removal tool makes the process easier but it can also be done just by pulling with your hands. |
||
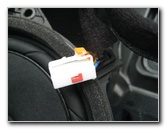
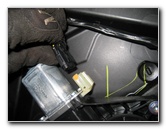
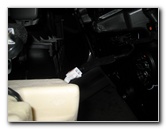 Disconnect Door Lock Plug |
 Power Window Connector |
 Pull Out Power Plug |
| Lift up the bottom
of the door panel and reach in to disconnect the power connectors for the
power window motor switch and the power door lock switch.
Press the small release tabs on the power connectors before pulling them straight out from their sockets. |
||
|
|
||
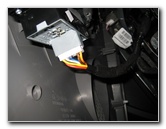
 Lock & Door Pull Cables |
 |
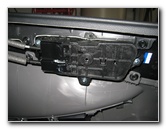 Release Tab - Blue Arrow |
| The last things
holding the door panel to the door frame are the two cables for the door
release handle and the door lock/unlock rocker switch. If you just want to swap out the OEM speaker or replace the power window motor, you don't need to fully remove the door panel. If you do want to fully remove the door panel, press the small black plastic release tab located in between the two cables to remove the door pull & lock/unlock mechanism. The release tab is illustrated with a blue arrow in Picture 21 above. |
||
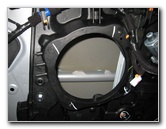
 Door Panel Removed |
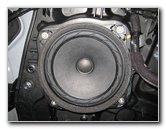 OEM Door Speaker |
 Torx T-20 Remove Screws |
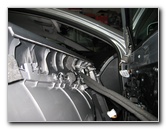
| The OEM door
speaker is held in place by four Torx screws.
Use a Torx T20 screwdriver to remove them and pull the speaker out of the inner door panel. |
||
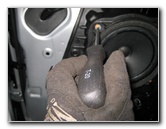
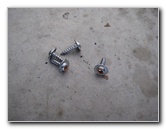 Four T-20 Screws Removed |
 Pull Out Door Speaker |
 Press Release Tab |
| Press down on the power connector's release tab and pull it straight out of the socket. | ||
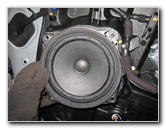
 Power Connector Removed |
 Door Speaker Opening |
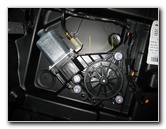 Power Window Motor |
| Either a 5.25" or a
6.5" aftermarket speaker will fit into the opening with a bracket.
I'd recommend ordering your new speakers from Amazon since you can verify which speakers will fit your car. To help reduce road noise, apply some Dynamat Sound Deadener to the metal door frame. It will help stop vibrations and rattles when you crank up the volume. |
||
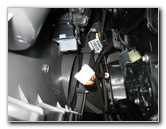
 Remove Power Connector |
 3 Torx T-20 Screws |
 Hang Panel On Door |
| If you need to
replace the power window motor, press the release tab on the power connector
and pull it straight out. Then remove the three screws holding the motor in place with a Torx T-20 screwdriver. |
||
 |
 Connect Power Plugs |
 |
| To begin
re-installing the door panel, first hang the top part on the lip of the door
frame.
Then re-connect the power plugs for the door lock and window switch by reaching in from underneath. Push them straight into their sockets. I'd recommend testing the power window switch and power door lock switch before continuing on. |
||
 Line Up Panel Fasteners |
 Push In Door Fasteners |
 |
| Line up the
"Christmas Tree" friction fasteners on the door panel with the holes in the
door frame and carefully push them together.
Apply pressure all around the door panel to ensure that all the fasteners are securely in place. |
||
 Side View Mirror Trim |
 Push Trim Piece On |
 Replace Door Pull Screw |
| Replace the side
view mirror trim piece by pushing it straight on to the door frame. Replace the Phillips head screw behind and just above the door pull handle. Re-insert the rectangular black plastic trim piece behind the door pull handle. |
||
 Replace Door Handle Trim |
 Replace Arm Rest Screw |
 Door Panel Replaced |
| The last two steps
are to replace the Phillips head screw in the arm rest storage area and flip
the screw cover closed. For more,
check out my
Hyundai Sonata Repair & Maintenance Guides page. |
||
| If you found this guide to be helpful,
please consider making a small donation by clicking on the PayPal.com
"Donate" button located to the right of this paragraph. Thank you!
(Note: I am not a registered charity. Donations are not tax deductible.) |