
Hyundai Santa
Fe Headlight Bulbs Replacement Guide
How to replace the low beam, high beam &
turn signal bulbs in the headlight of a 2007-2012 Hyundai Santa Fe SUV.

By Paul B. Michaels Author & Photographer Auto Mechanic Since 1989 |
||
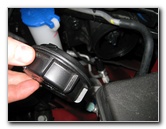
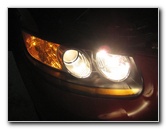
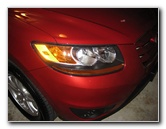 Hyundai Santa Fe Headlight |
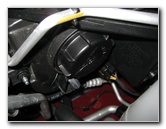
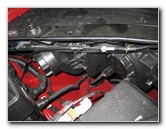
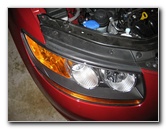 Open Hood |
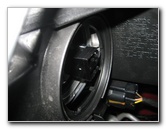
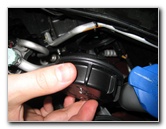
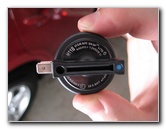
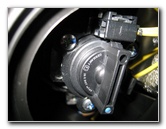
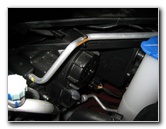 High Beam Dust Cap |
| This
automotive "how-to" guide was specifically written to assist owners
of the 2nd generation 2007, 2008, 2009, 2010, 2011 & 2012 Hyundai Santa Fe SUV in replacing
a burnt out light bulb in the headlight assembly. Owners of other Hyundai or Kia vehicles such as the Tucson, Veracruz, Accent, Elantra, Veloster, Sonata, Azera, Genesis, Equus, Forte, Optima, Sorento, Rio, Soul, Sportage and Sedona may also find this guide to be helpful. The headlight assembly of a Hyundai Santa Fe contains the following light bulbs with their respective part numbers: Low Beam # H11B, High Beam # H7, and Front Turn Signal # 1157.No tools are needed to replace the low beam or high beam headlight bulbs. You may need a 10mm socket with a 1/4" drive ratchet to access the turn signal light bulb. |
||
|
|
||
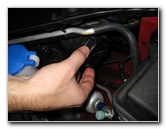
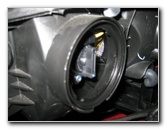
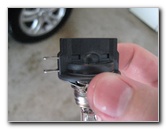
 1/4 Turn Counter-Clockwise |
 High Beam Power Connector |
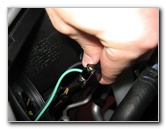 Wiggle Off Power Plug |
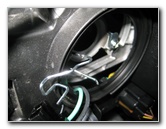
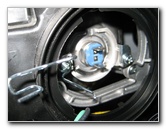
| The High Beam
bulb is located closest to the center line of the vehicle as indicated in
the
1st Picture on this page.
Remove the round black plastic dust cover by turning it 1/4 turn counter clockwise. Then wiggle off the high beam bulb's black plastic power connector. The high beam bulb is held in place by a silver metal retaining arm that is hooked on the rear of the headlight assembly. To release the arm, press down on the side closest to the passenger side of the vehicle, push it towards the front of the vehicle to unhook it, and then let it spring upwards. Swing the metal arm outwards towards the rear of the vehicle. |
||
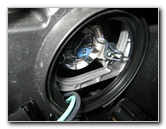
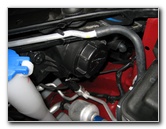
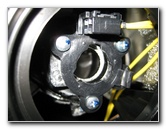
 Metal Retaining Clip |
 Press Down Arm & Swing Out |
 Remove High Beam Bulb |
| With the metal arm released, the high beam bulb can be easily pulled out of the headlight assembly. | ||
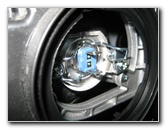
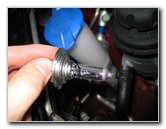
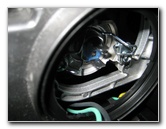
 H7 12V 55W Philips |
 High Beam Retaining Arm |
 Metal Tab Facing Up |
| Replace the old
high beam bulb with a new part # H7
bulb.
Orientate the new bulb so that the metal tab is facing upwards and insert it into the headlight assembly. |
||
 New Bulb Installed |
 Swing Metal Arm Over Bulb |
 Hook Metal Clip In Place |
| Swing the metal arm back to the passenger side of the vehicle over the new bulb and hook it in place. | ||
|
|
||
 Plug In Power Connector |
 Replace Bulb Cover |
 1/4 Turn Clockwise |
| Push the power connector on to the base of the new high beam bulb and replace the black plastic dust cover by turning it 1/4 turn clockwise. | ||
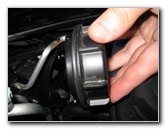
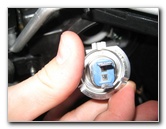
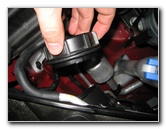
 Low Beam Dust Cover |
 1/4 Turn Counter Clockwise |
 Dust Cap Removed |
| The Low Beam
headlight bulb is located at the center of the headlight assembly between
the low beam and the turn signal light.
Remove the black plastic dust cover on the back of the low beam bulb by turning it 1/4 turn counter clockwise. |
||
 Low Beam Bulb |
 1/4 Turn Counter Clockwise |
 Remove Low Beam Bulb |
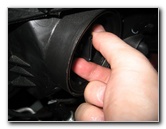
| To easily remove
the low beam bulb from the headlight assembly, just gently grasp it with
your thumb and forefinger before turning it 1/4 turn counter clockwise.
Then pull it straight out of the headlight assembly. |
||
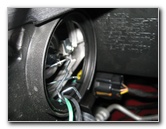
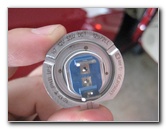
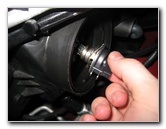
 H11B Low Beam Bulb |
 Power Prongs On Bulb Base |
 Low Beam Socket |
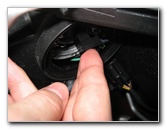
| A new low beam
headlight bulb is part # H11B, which has two metal blades on the base that
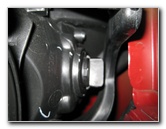
act as the power connector. (The Turn Signal light bulb is located at the corner of the headlight assembly past the low beam bulb. To remove it, turn the base 1/4 turn counter clockwise. A new turn signal light is part # 1157. If you have large hands, you may need to remove the headlight assembly by removing the 10mm bolts that hold it in place.) |
||
 Turn Signal Bulb |
 1/4 Turn Clockwise |
 Replace Low Beam Cover |
| Install a new
H11B low beam headlight bulb into the assembly and carefully rotate it 1/4 turn
clockwise to connect the power prongs on the base of the bulb to the power
connector at the top of the socket. Re-install the round black plastic low beam bulb dust cover by twisting it on 1/4 turn clockwise. |
||
 Headlight Bulb(s) Replaced |
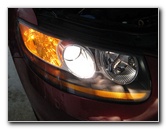 Test Low Beam Bulb |
 Test High Beam Bulb |
| Test the new
headlight bulb(s) by turning on the lights, activating the hazard signals
and flashing the high beams. For more,
visit my
Hyundai Santa Fe SUV
Repair & Maintenance Guides page. |
||
| If you found this guide to be helpful,
please consider making a small donation by clicking on the PayPal.com
"Donate" button located to the right of this paragraph. Thank you!
(Note: I am not a registered charity. Donations are not tax deductible.) |