
Hyundai Santa
Fe Cabin Air Filter Replacement Guide
How to clean or replace the A/C system's
cabin air filter element in a 2007 to 2012 Hyundai Santa Fe with pictures.

By Paul B. Michaels Author & Photographer Auto Mechanic Since 1989 |
||
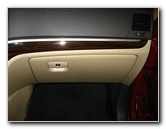 Santa Fe Glove Box |
 Open Glove Box |
 Pull Together Sides |
| This
automotive "how-to" guide was specifically written to assist owners
of the 2nd generation 2007, 2008, 2009, 2010, 2011 & 2012 Hyundai Santa Fe SUV in cleaning
or replacing the HVAC system's cabin air filter element. Owners of other Hyundai or Kia vehicles such as the Tucson, Veracruz, Accent, Elantra, Veloster, Sonata, Azera, Genesis, Equus, Forte, Optima, Sorento, Rio, Soul, Sportage and Sedona may also find this guide to be helpful. A few compatible replacement A/C system cabin air filters for the 07-12 Santa Fe with their respective part numbers include the following: TYC 800159P, Wix 24080, Fram CF11664, Fram CF10896, K&N VF2010, Beck Arnley BEC0422182, Purolator C36158, Premium Guard PC4080, ACDelco CF3247, Hastings AFC1477 and Ecogard XC36157. The only tool needed to access the cabin air filter element is a pair of pliers. I chose to use needle nose pliers. |
||
|
|
||
Please verify the correct filter part numbers for your Santa Fe by using the Amazon Part Finder. The correct part numbers vary depending on the model year. |
||
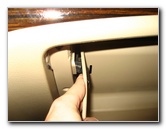
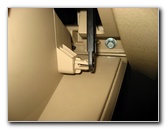
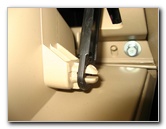
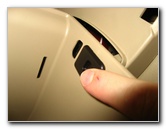
 Release Rubber Side Stop |
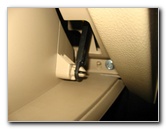 Black Plastic Retaining Arm |
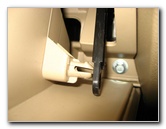 Squeeze Together Prongs |
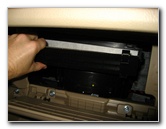
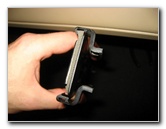
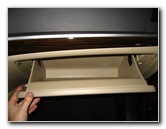
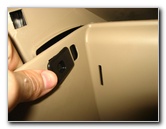
| The first two steps
are to get into the front passenger seat and open the glove box.
Locate the black plastic and rubber glove box stoppers on each side. You can either pull the two sides of the glove box towards the center or flip the stoppers into the glove box to release them. Then release the black plastic retaining arm on the right side of the glove box by squeezing together the two prongs and pulling the arm off. |
||
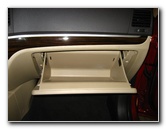
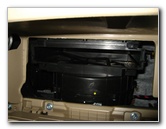
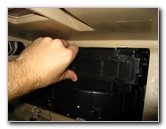
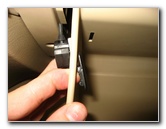
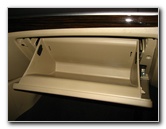
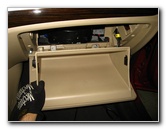 Drop Down Glove Box |
 Blower Motor Housing |
 Squeeze Tabs, Release Cover |
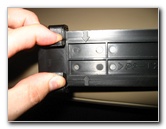
| Gently lower the
glove box down to the passenger floor mat.
Behind the glove box you'll see the black plastic blower motor housing and the rectangular cabin air filter cover. Release the cabin air filter cover by squeezing together the two tabs on each side with your thumbs and forefingers. Then pull the cover away from the blower motor housing. |
||
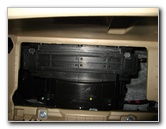
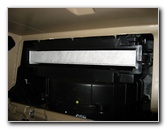
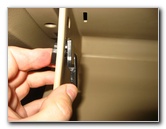
 Cabin Filter Cover Removed |
 Cover's Retaining Clips |
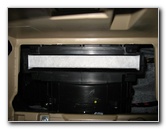 White Cabin Filter Visible |
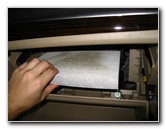
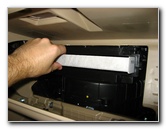
| Grab the old white
cabin air filter element and slide it out of the blower motor housing.
Make a mental note of the "Air Flow" indicator arrow on the old OEM filter that points down towards the ground. The new cabin air filter element should also have an air flow indicator arrow that needs to point down when you install it. |
||
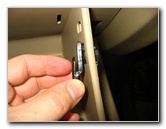
 Slide Out Old Cabin Filter |
 Hyundai Part # F784-DQ7AA |
 Vacuum Old Cabin Filter |
| If your old cabin
air filter doesn't look too dirty with mostly white pleats, just tap out the
large debris and vacuum out any dust or debris with a wet/dry shop vacuum.
Replace the old filter element with a new one if it is dark grey or black and clogged with leaves, insects, dirt, dust, hair and other debris. A new filter should range in price from about $10 for a plain white cotton paper element to around $20 for a activated carbon or baking soda treated deodorizing HEPA filter. I recommend buying the Fram CF11664 "Fresh Breeze" filter since it has excellent reviews on Amazon. It also has Arm & Hammer baking soda and carbon in the filter to keep the A/C system from smelling musty or moldy. |
||
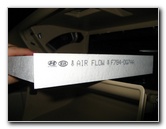
 HVAC Blower Motor |
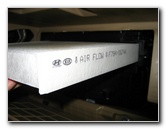 "Air Flow" Indicator Arrow |
 Slide In Cleaned/New Filter |
| Slide the cleaned or new cabin air filter element back into the blower motor housing with the "Air Flow" indicator arrow pointing down towards the floor mat. | ||
 Cabin Filter Installed |
 Replace Filter Cover |
 Snap Cover Into Place |
| Double check that the cabin air filter is pushed all the way into the blower motor housing before lining up the black plastic cover and snapping it into place on both sides. | ||
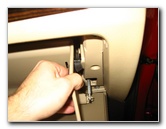
 Retaining Arm & Prongs |
 Snap Arm Back On Prongs |
 Flip Rubber Stops In Box |
| Lift up the glove box and push the black plastic retaining arm on the right side of the glove box back onto the two prongs. | ||
 Rubber Stop Inside Glove Box |
 Other Rubber Stop Pulled In |
 Raise Glove Box |
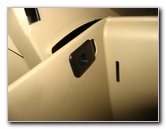
| Move the two black
plastic & rubber glove box stops towards you and into the glove box.
Then raise the glove box to where the two stoppers are past the sides of the glove box housing. |
||
 Snap Stop Into Place |
 Plastic/Rubber Stop Installed |
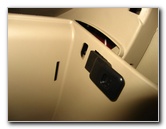 |
| Push the black plastic & rubber stops forwards and out into the voids on the sides of the glove box. | ||
 Push Stop Out & Forward |
 Glove Box Re-Attached |
 Close Glove Box |
| Double check that
the two plastic/rubber stops are securely in place along with the black
plastic retaining arm before closing the glove box. For more,
visit my
Hyundai Santa Fe SUV
Repair & Maintenance Guides page. |
||
| If you found this guide to be helpful,
please consider making a small donation by clicking on the PayPal.com
"Donate" button located to the right of this paragraph. Thank you!
(Note: I am not a registered charity. Donations are not tax deductible.) |