
Hyundai
Elantra Door Panel Removal & Speaker Replacement Guide
How to remove the interior door panels
and replace the front door speakers in a 2011, 2012 and 2013 Hyundai Elantra.

By Paul B. Michaels Author & Photographer Auto Mechanic Since 1989 |
||
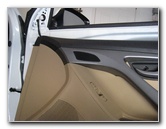
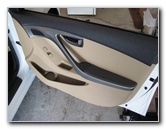 Elantra Front Door Panel |
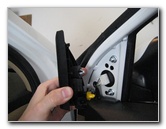 Pull Off Side Mirror Cover |
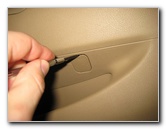
 Pry Off Door Pull Screw Cover |
| This
automotive maintenance "how-to" guide was specifically written to
assist owners of the 5th generation 2011, 2012 & 2013 Hyundai Elantra in
removing the interior door panels, upgrading the door speakers and
also replacing the power window motor. Owners of other Hyundai or Kia vehicles such as the Accent, Sonata, Azera, Veloster, Tucson, Santa Fe, Veracruz, Genesis, Forte, Optima, Rio, Soul, Sorento, Sportage, i10, i20, i30, i35, i40, Tiburon, Avante and Sedona may also find these DIY instructions to be helpful. Both 5 1/4" (5.25") or 6 1/2" (6.5") speakers will fit into the door openings of a '11-'13 Elantra with the use of brackets. I'd recommend ordering new speakers from Amazon since they show you which speakers will fit or if you will need a bracket. The tools needed to remove the door panel include a small flathead screwdriver and a Phillips head screwdriver. To remove the speaker or power window motor, you'll need a Torx T-20 screwdriver. |
||
|
|
||
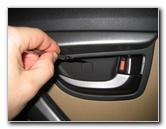
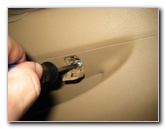
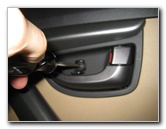
 Remove Phillips Head Screw |
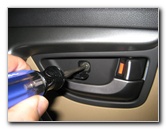
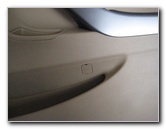 Arm Rest Screw Cover |
 Pry Out Arm Rest Screw Cover |
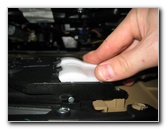
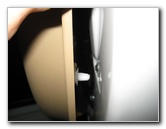
| The first step is
to gently pry off the trim piece that covers the side view mirror nuts. In
some vehicles, this trim piece may also contain a tweeter speaker. Then use the small flathead screwdriver to pry off the rectangular plastic screw cover behind the door pull lever. Remove the single Phillips head screw and set it aside in a safe place. Move to the arm rest and pry out the rectangular screw cover with the small flathead screwdriver. Remove the single Phillips head screw. |
||
 Remove Phillips Head Screw |
 Pull Off Door Panel |
 Door Panel Released |
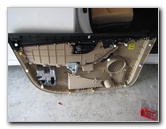
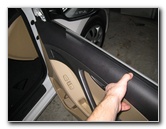
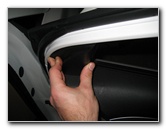
| Once the screw
behind the door pull and the screw on the arm rest have been removed, you
can carefully pull the bottom of the plastic door panel away from the metal
frame. You may need to use a small flathead screwdriver or a door panel pry bar tool to pop out some of the plastic pop rivets. |
||
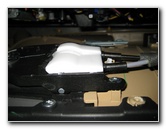 Door Pull & Lock Cables |
 White Release Switch |
 Pull Off Door/Lock Cables |
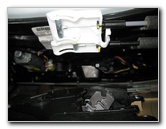
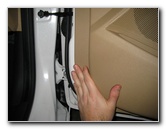
| After all of the
pop rivets are released, look behind the door panel and locate the white
plastic bracket. The bracket holds the door lock and door pull cables in place. Press on the release tab and pull the bracket away from the door panel. |
||
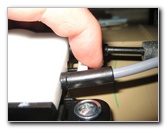
 Cable Bracket Removed |
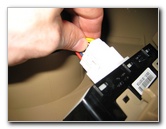
 Door Lock Power Plug |
 Press Tab - Release Power Plug |
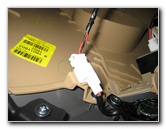
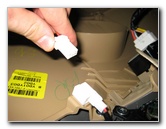
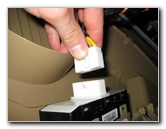
| Press the release
tab on the door lock switch power plug and pull it out of the socket. Press the release tab on the larger power window switch electrical connector and pull it straight out of the socket. |
||
|
|
||
 Remove Window Power |
 Door Panel Removed |
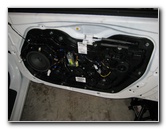 Speaker & PWR Window Motor |
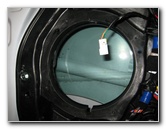
| After the cables and two power connectors have been disconnected, you can completely remove the door panel. | ||
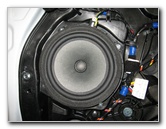 Front Door Speaker |
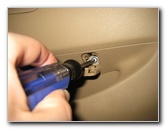
 Remove T-20 Torx Screws |
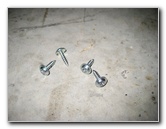 T-20 Torx Screws Removed |
| Use a Torx T20 size screwdriver to remove the four screws that hold the OEM speaker in place. | ||
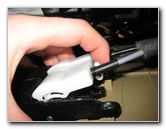
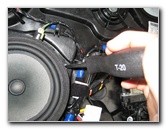
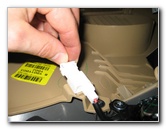
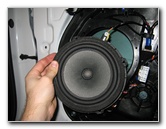 Pull Off OEM Speaker |
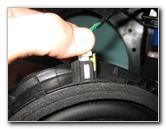 Press Tab - Release Plug |
 Speaker Power Connector |
| Pull the OEM speaker out of the door panel and press the tab on the power plug to disconnect it. | ||
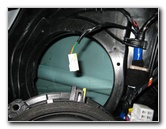
 Front Door Speaker Opening |
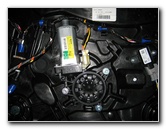 Power Window Motor |
 Re-Insert Door Lock Power |
| If you need to replace the power window motor, remove the three Torx T-20 screws that hold the motor in place. | ||
 Re-Insert Power Window Plug |
 Snap Cable Bracket In Place |
 Lower Door Panel In Place |
| To replace the door
panel, first plug in the power door lock and window connectors. Then snap the white plastic door lock / door pull cable bracket back in place. Lower the door panel down on to the top edge of the door frame and swing closed the bottom edge. |
||
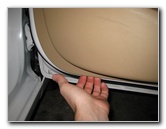
 Line Up Plastic Pop Rivets |
 Push Door Panel Flush |
 Replace Arm Rest Screw |
| Line up the white
plastic pop rivets on the door panel with the holes in the metal door frame.
Firmly push the panel all the way around to secure the door panel to the frame. Make sure the panel is flush all the way around with the door frame. Replace the Phillips head screw in the arm rest and close the rectangular cover. |
||
 Replace Door Pull Screw |
 Replace Screw Covers |
 Replace Mirror Nuts Cover |
| Replace the
Phillips head screw behind the door pull handle and close the rectangular
plastic cover. The last step is to replace the trim piece at the top corner of the door panel which hides the side view mirror screws. For more, please check out my other
Hyundai Elantra Repair & Maintenance DIY Guides. |
||
| If you found this guide to be helpful,
please consider making a small donation by clicking on the PayPal.com
"Donate" button located to the right of this paragraph. Thank you!
(Note: I am not a registered charity. Donations are not tax deductible.) |