
Honda Fit
(Jazz) Tail Light Bulbs Replacement Guide
How to replace the brake, reverse and
turn signal bulbs in the tail light assembly of a Honda Fit or a Honda Jazz.

By Paul B. Michaels Author & Photographer Auto Mechanic Since 1989 |
||
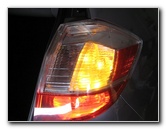
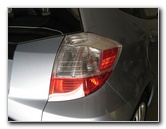 Honda Fit Tail Light |
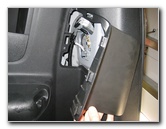
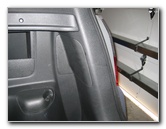 Tail Light Bulbs Access Panel |
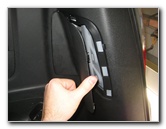
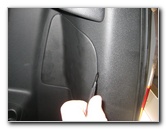 Pry Off Plastic Access Panel |
| This
automotive "how-to" guide was specifically written to assist owners
of the 2nd generation (2009, 2010, 2011, 2012, 2013 & 2014) Honda Fit or Honda Jazz vehicles in
replacing any of the bulbs in the tail light assemblies. Owners of previous generation 2001-2008 Fit or Jazz vehicles, or similar Honda Global Small Car vehicles such as the Airwave, Partner, Mobilio, Freed, Logo, City, and Aria may also find this guide to be useful. The tail light assembly of a Honda Fit or Jazz contains the following light bulbs with their corresponding Sylvania part numbers: brake (stop) light bulb # 7443, reverse (back up) light bulb # 921 and rear turn signal light bulb # 992 or 7440A. Only a small flathead screwdriver is needed to replace any of the bulbs in the tail light assembly of a Honda Fit or Jazz. |
||
|
|
||
 Opening Access Panel |
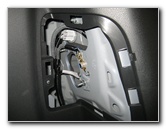 |
 1/4 Turn Counter Clockwise |
| To access any of
the tail light bulbs, you'll need to remove the plastic access panel located
inside the cargo bay.
Insert a small flathead screwdriver into the notch in the panel and carefully pry it open. |
||
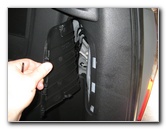
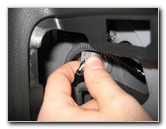
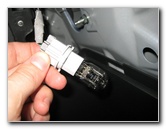
 Remove Turn Signal Bulb |
 Light Bulb # 992 (7440A) |
 Reverse (Back Up) Bulb |
| The turn signal
light bulb is located near the top of the tail light assembly and closest to
the outside of the vehicle.
Remove it by rotating the bulb's socket 1/4 turn counter clockwise and pulling it straight out from the tail light. To remove the bulb from the socket, pull it straight out. If you have trouble removing it, try gently wiggling the bulb while pulling. |
||
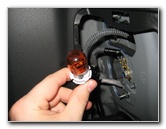
 Brake (Stop) Light Bulb |
 Pull Straight Out Of Socket |
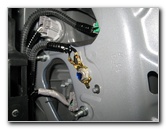 1/4 Turn Clockwise Re-Install |
| The reverse or
"back up" light bulb is also at the top of the tail light assembly but
located slightly closer to the center of the vehicle.
The brake light or "stop lamp" bulb is located at the bottom of the tail light assembly. To remove either bulb, rotate the socket 1/4 turn counter clockwise, pull the socket out of the assembly, and pull the bulb straight out from the socket. |
||
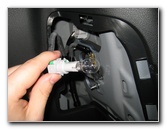
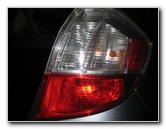 Tail Light Bulb Replaced |
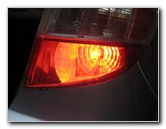 Testing Brake Light Bulb |
 Testing Hazards / Turn Signal |
| Replace the burnt
out bulb(s) with a new # 7443 brake light bulb, #
921 reverse light bulb, or
# 992 or
7440A rear turn signal light bulb.
Push the new bulb straight into the socket, insert the socket into the tail light assembly and rotate it 1/4 turn clockwise to secure it in place. If you would like to have brighter tail lights, install some compatible 7443 LED, 921 LED and 7440A LED bulbs. Test the new tail light bulb(s) by having someone press on the brakes, put the car in reverse (with the brakes applied) and activate the hazard signals or turn signals. |
||
 Tail Light Bulbs Cover |
 Snap Panel Back In Place |
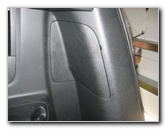 Panel Flush With Trunk |
| To finish the job,
replace the tail light bulbs access panel and make sure it rests flush with
the rest of the cargo bay. Be sure to
record the bulb change in your vehicle's service records. |
||
| If you found this guide to be helpful,
please consider making a small donation by clicking on the PayPal.com
"Donate" button located to the right of this paragraph. Thank you!
(Note: I am not a registered charity. Donations are not tax deductible.) |