
Honda Fit
(Jazz) Door Panel Removal & Speaker Replacement Guide
How to remove the front door panel and
replace the speaker in a 2nd generation 2009 to 2014 Honda Fit or Honda Jazz.

By Paul B. Michaels Author & Photographer Auto Mechanic Since 1989 |
||
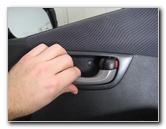
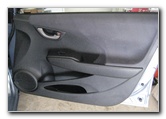 Honda Fit Door Panel |
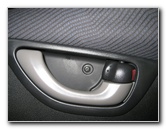 Door Handle & Lock |
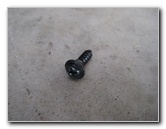
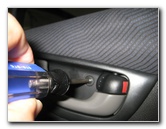 Remove Door Handle Screw |
| This
automotive "how-to" guide was specifically written to assist owners
of the 2nd generation (2009, 2010, 2011, 2012, 2013 & 2014) Honda Fit or Honda Jazz vehicles in
removing the interior door panels in order to add soundproofing
material or replace the OEM stock speakers with higher quality
units. Owners of previous generation 2001-2008 Fit or Jazz vehicles, or similar Honda Global Small Car models such as the Airwave, Partner, Mobilio, Freed, Logo, City, and Aria may also find this guide to be useful. According to Crutchfield.com and other online sources, all four OEM door speakers of a Honda Fit or Jazz can be replaced with 6 1/2" (6.5") or 5 1/4" (5.25") aftermarket speakers.Both sizes will require a bracket in order to fit properly since the factory speakers are an odd size. To remove the door panels and speakers you'll need a Phillips head screwdriver and also a flathead screwdriver. |
||
|
|
||
 |
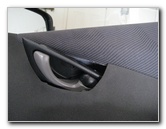
 Pull Out Door Handle |
 Handle Housing Removed |
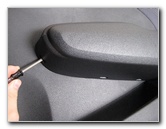
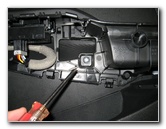
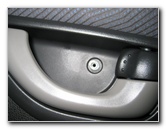
| The first step is
to locate the small black Phillips head screw located just above the door
handle and remove it with a screwdriver.
Then pull the door handle housing away from the door panel. |
||
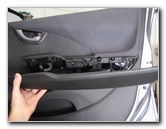
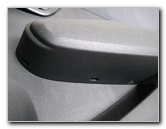 Door Panel Arm Rest |
 Release Armrest Clips |
 |
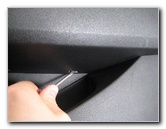
| Next move to the
armrest on the door panel and use a small flathead screwdriver to gently
release the three clips holding it in place.
It helps to carefully pull on the armrest while inserting the screwdriver into the notches where the clips are exposed. |
||
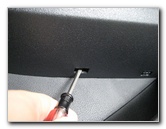
 3 Armrest Clips Released |
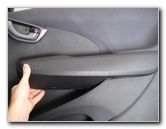 Pull Off Door Armrest |
 Arm Rest Removed |
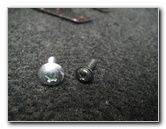
| Once the armrest has been removed, you'll be able to see the 2nd screw holding the panel to the door located just behind the window and door locks power connector. | ||
 Screw Behind Armrest |
 Remove Phillips Head Screw |
 Armrest & Handle Screws |
| Remove the silver screw behind the armrest with a Phillips head screwdriver and place it in a safe place along with the door handle screw. | ||
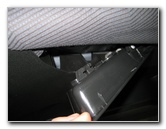
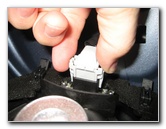
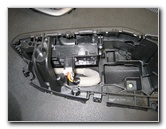 Window/Locks Power |
 Press Down Connector Clip |
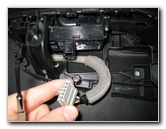 Remove Power Connector |
| Release the electrical connector for the power window and/or door locks by pressing on the plastic tab with your finger or a small screwdriver and pull it away from the armrest mount. | ||
|
|
||
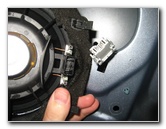
 Push In Door Handle |
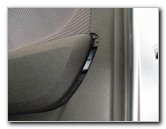
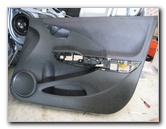 Pull Panel Away & Lift Up |
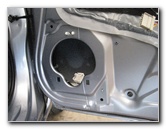
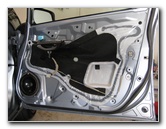 Door Panel Removed |
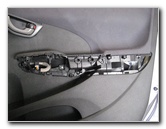
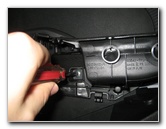
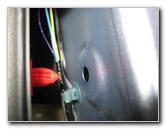
| The last step
before you can pull the panel off the door is to rotate the door handle
housing and push it partially behind the door panel. Use a flathead screwdriver or an automotive trim panel removal tool to carefully pop out the various red vinyl plastic fasteners on the rear of the panel that secure it to the metal door. When all of the door panel fasteners have been popped out, gently swing the bottom of the door panel towards you and lift it up off the top edge where it meets with the window. |
||
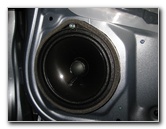 Stock OEM Speaker |
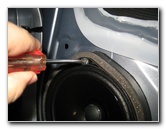 Remove Phillips Screw |
 Speaker Screw Removed |
| The original
factory speaker is only held in place by one long Phillips head screw.
To remove the speaker from the door take out the screw and then gently pull on the speaker until the sticky foam on the back side gives way. |
||
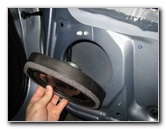 Pull Off Speaker |
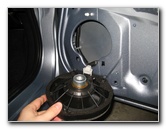 Stock Speaker Removed |
 Press 2 Side Clips |
| The power connector on the back of the speaker can be released by squeezing together the two clips and pulling the connector straight off the speaker. | ||
 Speaker Power Released |
 Install New Speaker |
 Lower Panel On To Door |
| If you purchased
your new speakers from Crutchfield, they most likely came with special
brackets and power connector adaptors to the make installation a very easy
process.
I recommend applying some Dynamat Sound Deadener to the metal door frame to help reduce road noise and make your new speakers sound better. It will also stop vibrations and rattles when you crank up the volume. To replace the door panel, lower it down onto the upper edge of the door frame near the window opening and pull the door handle through the opening. |
||
 Replace Armrest Screw |
 Replace Door Handle Screw |
 Push In Panel Fasteners |
| Re-install the
silver armrest screw and the black door handle screw.
Then look between the door panel and the door frame to line up the red vinyl fasteners before pushing them into the appropriate holes. |
||
 Snap On Armrest Piece |
 |
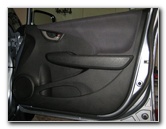 Front Door Panel Replaced |
| To finish the job,
line up the arm rest trim piece against the door panel and snap it back into
place.
Double check that the three clips on the armrest and all the door panel fasteners are securely in place. For more, please check out my
Honda
Fit Maintenance & Repair Guides page. |
||
| If you found this guide to be helpful,
please consider making a small donation by clicking on the PayPal.com
"Donate" button located to the right of this paragraph. Thank you!
(Note: I am not a registered charity. Donations are not tax deductible.) |