
GMC Terrain
Tail Light Bulbs Replacement Guide
How to change a burnt out brake, rear
turn signal or reverse light bulb in a 1st generation 2010-2016 GMC Terrain.

By Paul B. Michaels Author & Photographer Auto Mechanic Since 1989 |
||
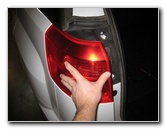
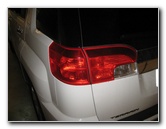 2016 Terrain Tail Lights |
 Open Tailgate Door |
 Two Plastic Screw Covers |
| This
automotive maintenance tutorial was specifically written to assist
owners of the first generation (2010, 2011, 2012, 2013, 2014, 2015 &
2016) GMC Terrain in changing a burnt out combination brake / rear
turn signal, reverse bulb and parking (inner tail light) in the tail
light housings. Owners of other General Motors vehicles such as the Buick Verano, Regal, LaCrosse, Cascada, Encore, Enclave, Envision, GMC Canyon, Sierra 1500, Acadia, Yukon, Denali, Savana, Spark, Sonic, Cruze, Malibu, Impala, Volt, Camaro, Corvette, SS, Trax, Equinox, Traverse, Tahoe, Suburban, Colorado, Silverado and Express may also find these DIY instructions to be helpful. The replacement light bulb part numbers are as follows: Brake # 3057, Reverse Light # 921 and Parking Light (Auxiliary Inner Lamp) # 161. The tools needed to access and replace the bulbs include a small flathead screwdriver, a 10mm socket with a 1/4" drive ratcheting wrench (or a Philips head screwdriver) and a plastic automotive panel pry bar tool. |
||
|
|
||
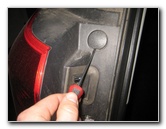
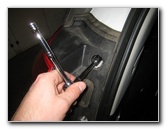
 Pry Out Screw Cover |
 Plastic Cap Removed |
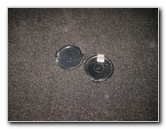 Two Covers Removed |
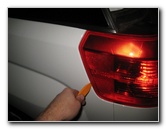
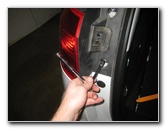
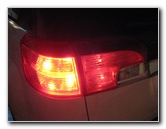
| The
first two steps are to open the tailgate door and then move to the side of
the SUV with the burnt out tail light bulb. Pry out the round black plastic screw covers on the inner edge of the tail light housing with a small flathead screwdriver. Set the two screw caps aside in a safe place. |
||
 Two Screws Exposed |
 Loosen Counterclockwise |
 Remove 10mm Screws |
| Loosen
the two screws along the inner edge of the tail light housing with a 10mm
socket and a 1/4" drive ratcheting wrench. You can also use a Philips head screwdriver. |
||
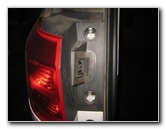
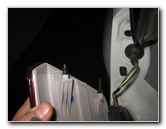
 Two 10mm Screws Removed |
 Pry At Edge of Housing |
 Pull Off Tail Light Assembly |
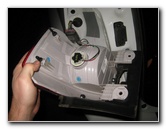
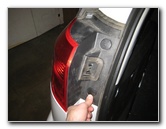
| Set the
two 10mm screws aside with the plastic covers. Pull the tail light housing straight off the rear corner of the SUV. If you have trouble removing the tail light assembly, pry along the outer edge with a plastic panel removal tool. Turn over the tail light housing to access the single bulb socket for the combination brake and rear turn signal light. |
||
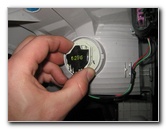
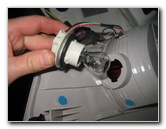 1/4 Turn Counterclockwise |
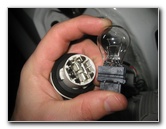 Pull Out Old Light Bulb |
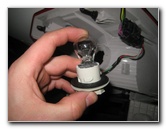 Push In New 3057K Bulb |
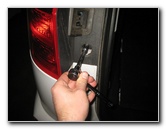
| Rotate
the base of the bulb socket 1/4 turn counterclockwise and pull it straight
out of the housing. Pull the old brake / rear turn signal bulb straight out of the socket and push in a new number 3057 or 3057K bulb. |
||
 1/4 Turn Clockwise - Lock |
 Line Up Pegs & Grommets |
 Push On Tail Light Housing |
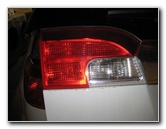
|
Re-insert the bulb socket in to the housing and rotate it 1/4 turn clockwise
to secure it in place. Line up the two metal pegs or "spikes" on the back side of the tail light housing with their corresponding plastic grommets on the rear corner of the SUV. Push the tail light housing back in to place. |
||
 Re-Insert 10mm Screws |
 Tighten Clockwise |
 Push In Plastic Caps |
|
Re-insert the two screws and tighten them in the clockwise direction with a
10mm socket and a 1/4" drive ratcheting wrench. You can also use a Phillips head screwdriver. Pop the two round black plastic covers back in to place over the screws. |
||
|
|
||
 Reverse & Parking Lights |
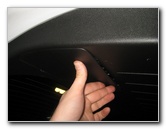
 Plastic Access Cover |
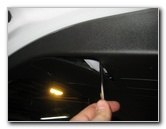 Pry At Bottom Edge |
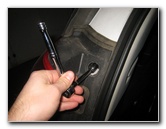
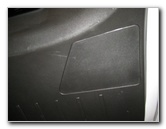
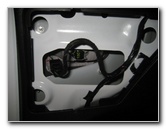
| The two
parking lights or "auxiliary lamps" and reverse light bulb are located in a
separate housing attached to the tailgate door. Locate the black plastic access cover on the underside of the tailgate door. Insert a flathead screwdriver or a plastic automotive panel removal pry bar tool in between the bottom edge of the access cover and the tailgate door interior panel. Gently pry out the access cover and set it aside in a safe place. |
||
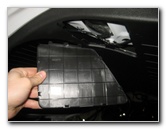 Access Panel Removed |
 Reverse Bulb Socket |
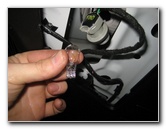
 1/4 Turn Counterclockwise |
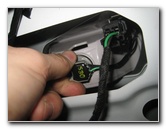
| The
reverse bulb socket is easily accessed once the plastic cover is removed. Rotate the base of the bulb socket 1/4 turn counterclockwise and pull it straight out of the housing. |
||
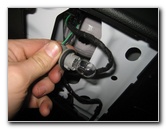 Bulb Socket Removed |
 Pull Out Old Light Bulb |
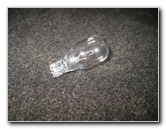 Old # 921 Light Bulb |
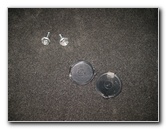
| Pull
the old bulb straight out of the socket and push in a new # 921
bulb. If you would like to have brighter reverse lights, choose a 921 LED bulb. |
||
 Push In New 921 Bulb |
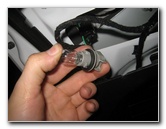
 Re-Insert Bulb Socket |
 1/4 Turn Clockwise - Lock |
| Re-insert the bulb socket in to the housing and rotate it 1/4 turn clockwise to secure it in place. | ||
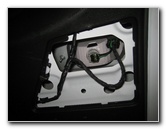
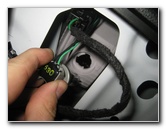
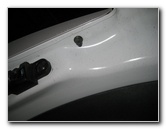 8mm Nut - Outer Edge |
 8mm Nuts - 2 Parking Lights |
 Re-Insert Plastic Tabs |
| If you
need to replace the two inner parking lights (also known as the "auxiliary
lamps" in the owner's manual), you will need to detach the housing from the
tailgate door. It is held in place by five 8mm nuts. One nut is located on the outer edge of the tailgate door. The other four nuts can be accessed near the reverse bulb socket. You will need an extension bar and possibly also a deep well 8mm socket to remove the nuts. |
||
 Pop In Plastic Access Panel |
 Access Cover Replaced |
 Test New Tail Light Bulbs |
|
Re-insert the plastic tabs on the top edge of the access panel and gently
pop in the bottom edge. Test the new tail light bulbs by having someone step on the brake pedal, activate the hazard signals and place the transmission in reverse. For more,
check out my other
2010-2016 GMC Terrain DIY Repair & Maintenance Guides. |
||
| If you found this guide to be helpful,
please consider making a small donation by clicking on the PayPal.com
"Donate" button located to the right of this paragraph. Thank you!
(Note: I am not a registered charity. Donations are not tax deductible.) |