
GM Pontiac
Grand Prix Engine Coolant / Antifreeze Change Guide
How to change the coolant (antifreeze) in
the radiator of a GM 3800 Series II engine equipped Pontiac Grand Prix.

By Paul B. Michaels Author & Photographer Auto Mechanic Since 1989 |
||
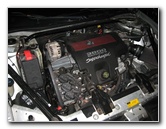 GM 3800 Series II V6 |
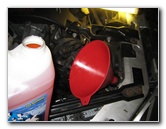
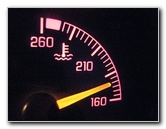
 Allow Engine To Cool! |
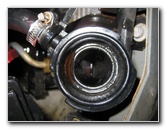
 Remove Radiator Cap |
| This automotive "how-to" guide was
specifically written to assist owners of the 6th generation (1997,
1998, 1999, 2000, 2001, 2002 & 2003) Pontiac
Grand Prix in draining the engine coolant (antifreeze) from the
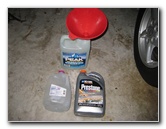
radiator and re-filling it with fresh fluid. Owners of other General Motors vehicles equipped with the 3800 Series II L67 or L36 engines such as the Pontiac Bonneville, Firebird, Buick Regal, Park Avenue, Riviera, Le Sabre, Chevrolet Camaro, Impala, Lumina, Monte Carlo, Oldsmobile Eighty-Eight, Regency, Intrigue, LSS and Holden Commodore may also find this guide to be useful. The tools needed to complete this coolant change procedure include a floor jack, two jack stands, a 10mm socket with a 1/4" drive ratchet, an automotive funnel and a pair of pliers. Other items needed are a gallon bottle of DEX-COOL approved antifreeze/coolant and a gallon of distilled water. Optional parts include a new radiator cap, a new thermostat, and new radiator hoses if these things have never been replaced. |
||
|
|
||
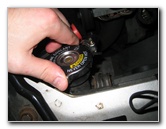
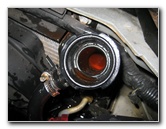
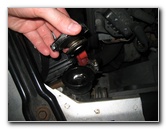 Push Down & Rotate Cap |
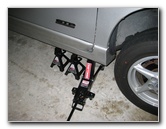 Jack Up Passenger Side |
 Lower Engine Cover |
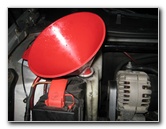
| The first two steps
are
to open the hood allow the engine to cool almost completely.
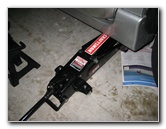
(Do not remove the radiator cap when the motor is hot to avoid being sprayed by hot coolant and injuring yourself.) When the engine is cool, remove the radiator cap. Rotate the cap about 1/2 turn counter clockwise. Then push down firmly with the palm of your hand and turn the cap another 1/2 turn counter clockwise to fully release it. Next raise the passenger side of the car with a floor jack and securely support it with one or more jack stands. Gather together a 10mm socket with ratcheting wrench, a pair of pliers (hose clamp pliers are best), and an old coolant catch container such as a bucket. You may also need a small flathead screwdriver to release a wire loom fastener for extra working room below the vehicle. |
||
 Lower Radiator Hose |
 Remove Three 10mm Screws |
 |
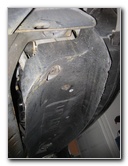
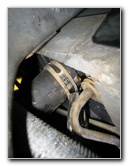
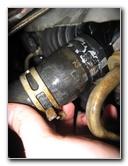
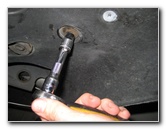
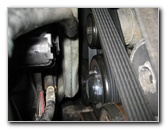
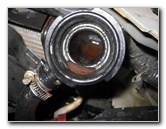
| Draining out the
old coolant from the radiator is best done by removing the lower radiator
hose located on the passenger side near the front of the car and just above
the black plastic engine bay cover.
The radiator is equipped with a plastic drain bolt, but it is prone to leaking especially if it hasn't been removed in years. A coolant leak is far less likely to occur after removing and replacing the lower radiator hose that is held in place by a very strong metal spring hose clamp. If any of your radiator hoses look dry, brittle, cracked or deformed, stop now and go buy new hoses to avoid wasting all of your fresh coolant when an old hose bursts or splits. Some of you may be able to just pull down the lower black plastic engine cover and access the lower radiator hose. I found it easier to access the hose and clamp after removing the three 10mm screws that hold it to the underside of the car. |
||
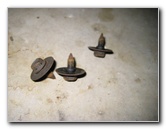 3 Engine Cover Screws |
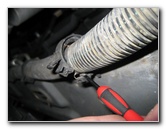 Release Cable Loom |
 Radiator Hose Clamp |
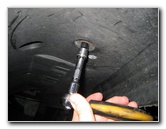
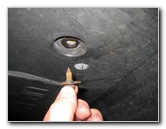
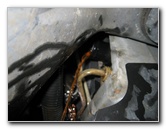
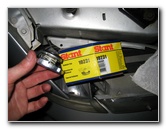
| If you still don't have enough working room, use a small flathead screwdriver to release the snap fastener holding the large wire loom in place along the sub frame. | ||
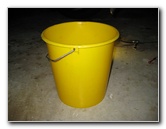 Bucket Catch Container |
 |
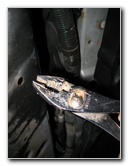
 Compress Clamp With Pliers |
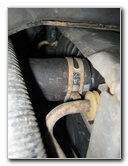
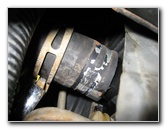
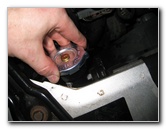
| Next grab the
pliers and your old coolant catch container. Carefully compress the metal
hose clamp on the lower radiator hose with the pliers and slowly wiggle the
clamp backwards.
Be sure to have your catch container directly below the hose and spread around some newspapers or rags to soak up any old coolant that may spill on to the ground. |
||
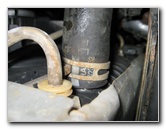
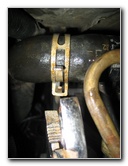
 Slide Back Clamp |
 Pull Off Lower Radiator Hose |
 Distilled Water For Flushing |
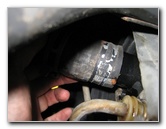
| Once the hose clamp
has been slid back at least 2-3 inches away from the radiator, you can
carefully pull the end of the hose off the black plastic spout on the bottom
passenger area of the radiator.
Point the end of the hose into the bucket. |
||
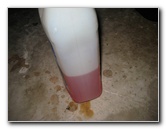
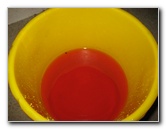 Old Coolant & Flush Water |
 Lower Car From Floor Jack |
 Replace Radiator Hose |
| When the old
coolant draining out slows to a trickle, remove the catch container and add
extra newspaper or rags below the car.
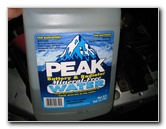
Lower the car from the floor jack and jack stands to allow a little more old coolant to flow out from the engine and radiator. If you are going to "flush" out the radiator, read below. If not, just continue to the pictures below these next few paragraphs. (If your old coolant looks as clean and brightly colored as mine does in the bucket above, you can skip flushing.) Some people recommend flushing out the radiator with a garden hose to flush out any contaminants. The water in my area is very "hard" and filled with minerals that may be harmful to the cooling system. So I chose to instead flush out the radiator with some distilled water from an old bottle of Peak Battery & Radiator Water that I wanted to throw away. Flushing out the radiator is not even absolutely necessary as long as you plan on draining and filling the radiator with fresh fluid every few years. Draining the radiator removes about 4-6 quarts of old coolant and the entire cooling system holds almost 12 quarts of fluid. Since the DEX-COOL antifreeze has an approximate life span of 5 years or 150,000 miles, renewing the system with 1/3 to 1/2 of the capacity with fresh coolant every few years is more than enough preventative maintenance. |
||
|
|
||
 |
 Pliers |
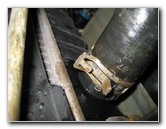
 Compress Hose Clamp |
| After the old coolant stops
leaking out and any flushing procedure is complete, raise the passenger side
of the car back up on the floor jack and jack stands.
Push the lower radiator hose back over the black plastic spout on the radiator. Use the pliers to compress the metal hose clamp and slide it forwards until it rests in the original position. Give the lower radiator hose a few tugs to make sure it is securely in place and won't pop off when the system is pressurized. For easier coolant changes in the future, consider ditching the spring type hose clamp and instead using a standard hex head "worm" gear hose clamp. Those hose clamps are much easier to loosen or tighten with a socket or wrench. |
||
 Slide Clamp Forward |
 Replace Shroud Screws |
 Tighten 10mm Screws |
| If you removed the three 10mm screws that help to hold the lower engine cover in place, replace and tighten them to just past hand tight. | ||
 Lower Car & Mix Fluids |
 Prestone Dex-Cool & Water |
 2 Quarts Coolant |
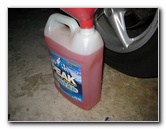
| The standard
recommendation is to fill the cooling system with a 50/50 mix of coolant and
distilled water.
For most climates, this ratio is the best compromise of cooling efficiency from the water and the anti-freezing / anti-corrosion / water pump lubrication properties of the DEX-COOL coolant fluid. |
||
 Mixing In Distilled Water |
 50/50 Coolant & Water |
 Insert Funnel & Fill Radiator |
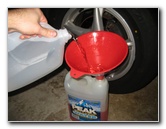
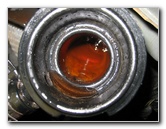
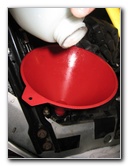
| To get a perfect
50% water and 50% coolant mixture, I used an empty radiator water bottle
with marks on the side that indicate the level of each quart in a gallon.
Then I used an automotive funnel to pour in 2 quarts of DEX-COOL coolant and 2 quarts of distilled water. Next place the automotive funnel into the radiator fill hole and slowly pour in the 50/50 mixture until it reaches the very top of the radiator. It took me about 2.5 quarts to fill up the radiator. |
||
 Radiator Filled To Top |
 ~ 2 Quarts Left |
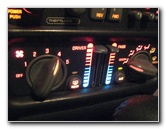 Turn On Engine & A/C Heater |
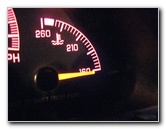
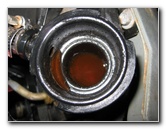
| In order to
completely fill the cooling system, you'll need to warm up the engine and
turn on the HVAC system's heater.
Leave the radiator cap off and watch as the coolant level visible in the filler hole gradually drops. When you can no longer see the coolant, replace the funnel and very slowly pour in more of the 50/50 mixture. |
||
 Allow Engine To Warm Up |
 Slowly Add Coolant |
 Top Off Radiator |
| As the engine continues to run, check back inside the vehicle to monitor the temperature gauge and see if the A/C vents are blowing warm air yet. | ||
 Coolant Level Dropping |
 Add More Coolant |
 Fill Overflow Bottle to "HOT" |
| Continue adding a
tiny bit of 50/50 coolant/water mixture every time the coolant level in the
radiator begins to drop out of view.
If the car begins to approach normal operating temperature and you can feel warm air blowing from the HVAC vents, turn off the engine. |
||
 "COLD" & "HOT" Level |
 New Stant Radiator Cap |
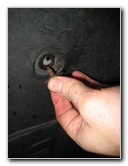
 Twist On New Cap Clockwise |
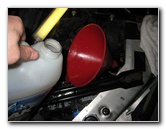
| Next, check inside
the white plastic overflow coolant bottle with a flash light.
If it looks clean, pour in a 50/50 mixture of coolant/water into the bottle until it reaches the "HOT" level mark stamped on the exposed side facing the alternator. If the inside of your overflow coolant bottle looks muddy, dirty, or full of sludge, disconnect the bottle and thoroughly clean it out before continuing on. |
||
 New Radiator Cap Installed |
 Engine Warming Up |
 Turn Off Engine - Allow Cool |
| If you purchased a
new radiator cap, install it by aligning it on the radiator filler neck and
twisting it 1/2 turn clockwise.
Then press down firmly with your palm to compress the spring and turn it another 1/2 turn clockwise. |
||
 Remove Cap & Add Fluid |
 Radiator Filled To Opening |
 Replace Cap |
| To complete the
job, take the car for a short drive to bring it up to full operating
temperature while operating the HVAC on high heat to circulate the new
coolant into the heater core.
Then allow the engine to cool, remove the radiator cap, and top off the radiator with the 50/50 mixture. I'd recommend constantly monitoring the engine's temperature gauge while driving during the next few days and checking to see if the radiator and/or coolant overflow bottle need to be topped off. Please remember to never remove the radiator cap when the engine is hot. Always allow the engine to cool before twisting off the radiator cap. Be sure to record the coolant change in your vehicle's service records. For more,
check out my
GM Pontiac Grand Prix Repair & Maintenance Guides page which has
links to every "how-to" procedure I've created while working on this car in
the past 10 years. |
||
| If you found this guide to be helpful,
please consider making a small donation by clicking on the PayPal.com
"Donate" button located to the right of this paragraph. Thank you!
(Note: I am not a registered charity. Donations are not tax deductible.) |