
Chevrolet
Tahoe License Plate Light Bulbs Replacement Guide
How to change a burnt out license plate
light bulb in the tail gate of a 3rd generation 2007-2014 GM Chevy Tahoe.

By Paul B. Michaels Author & Photographer Auto Mechanic Since 1989 |
||
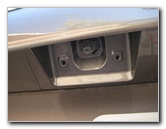
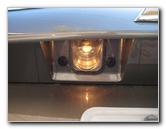
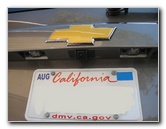 2014 Tahoe License Plate |
 Left License Plate Light |
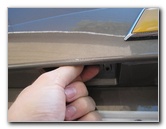
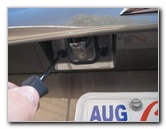 Remove 1st Phillips Screw |
| This
automotive maintenance tutorial was specifically written to assist
owners of the third generation (2007, 2008, 2009, 2010, 2011, 2012,
2013 & 2014) Chevrolet Tahoe in changing a burnt out license
plate light bulb in the cargo tail gate. Owners of related General Motors full size SUV vehicles with similar light housings such as the Suburban, GMC Yukon, Yukon XL, Yukon Denali, Cadillac Escalade and Hummer H2 may also find these DIY instructions to be helpful. A replacement bulb is part number 2825 from manufacturers such as Sylvania, Wagner, ACDelco, PIAA, and Eiko. You may also use any other compatible miniature wedge base bulbs such as the # W5W, 168, 175, 194 or an LED. The only tool needed to change the bulbs is a standard Phillips head screwdriver. |
||
|
|
||
 Remove Counter Clockwise |
 2 Phillips Screws Removed |
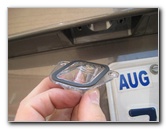 Pull Off Plastic Light Cover |
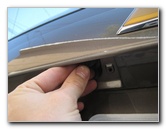
| The first step is
to remove the two screws holding the clear plastic lens cover in place by
turning them counter clockwise with the Phillips head screwdriver. Set the two screws and the plastic bulb cover aside in a safe place. |
||
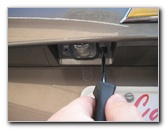
 Old Bulb Exposed |
 Pull Out Old Light Bulb |
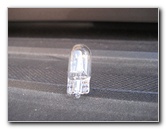 Old # W5W Bulb |
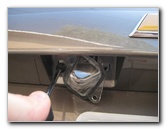
| Once the lens cover
has been removed, the old bulb will be exposed. Grasp the old bulb with your thumb and forefinger before pulling it straight out of the socket. |
||
|
|
||
 Empty Bulb Socket |
 Push In New W5W or 168 |
 Re-Attach Clear Lens Cover |
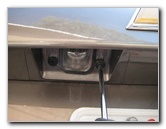
| Push a new #
2825 bulb straight in to the socket. You may also use any other compatible miniature wedge base bulbs such as the # 168, 175, 194, W5W or a brighter LED unit. Line up the clear plastic lens cover and re-insert the two screws. |
||
 Tighten Clockwise |
 Two Screws Replaced |
 Test New License Plate Bulbs |
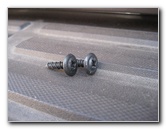
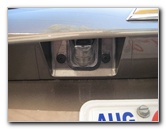
| Tighten the two
screws in the clockwise direction with the Phillips head screwdriver until
they are snug. Try to avoid over tightening the screws to prevent from cracking the plastic lens cover. Test the new license plate light bulbs by turning on the headlights. For more,
check out my other
Chevrolet Tahoe DIY Repair Guides. |
||
| If you found this guide to be helpful,
please consider making a small donation by clicking on the PayPal.com
"Donate" button located to the right of this paragraph. Thank you!
(Note: I am not a registered charity. Donations are not tax deductible.) |